Design Your Own Leggings – How to prepare legging pattern for fabric printing in Illustrator
Garment making and production can be daunting and a complicated process especially placement or engineered printing. A lot of time and effort goes into research and understanding where to start. We have put together tutorials on how to design, work with and prepare legging pattern for digital placement fabric printing. For this tutorial you need to be proficient in Illustrator or at least have basic knowlage. Our tutorial is based on industry standards. This technic can be applied to printing other products such as bikinis, t-shirts, singlets , dresses etc.
How to prepare legging pattern for digital fabric printing in Illustrator
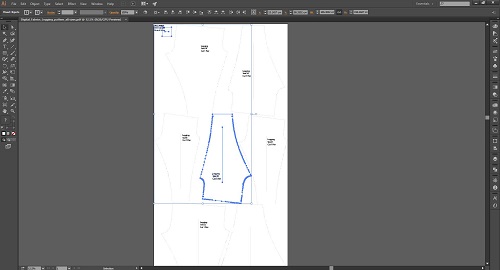
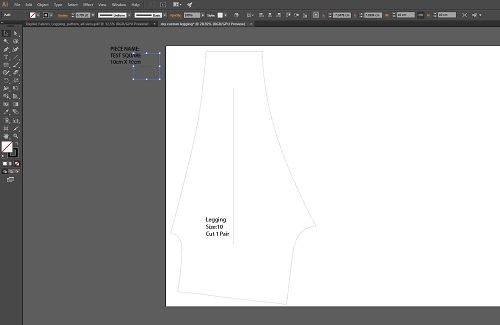
Open the PDF file in Illustrator. You can purchase our digital leggings pattern on our website or use your own.
The top left square will help you determine if the scaling of your patterns are correct, this square should always be 10x10cm.
Select the size you’d like to have printed (we have selected size 10) and while holding shift also select the scale square. Copy selection
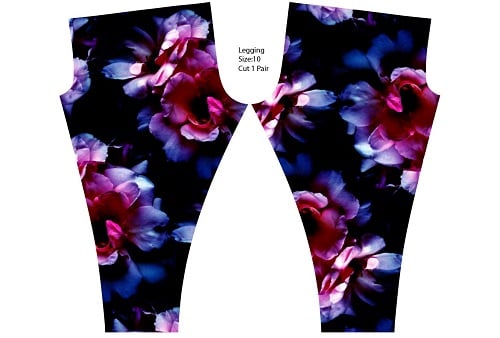
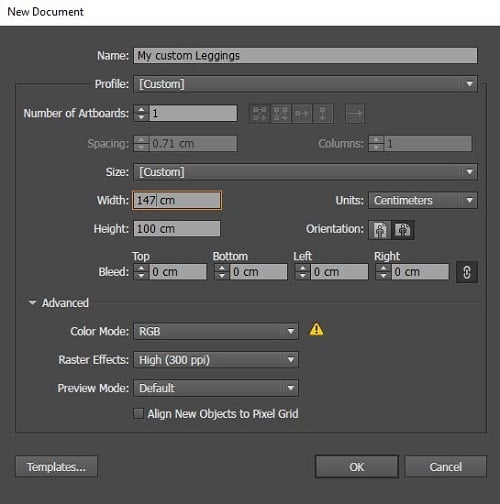
You’ll now have to create a new document. Make sure to set up to the width of the fabric (we’ve chosen to proceed with matte Lycra which as a printable width of 147cm) x the length of the print, this size legging will not exceed the 1 metre.
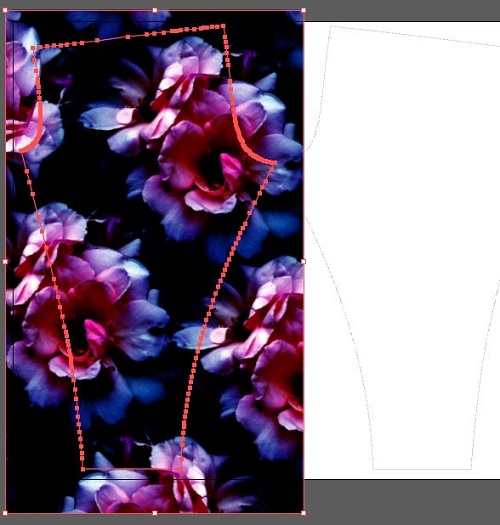
Paste the pattern piece and square scale into new artboard. The left and right hand side is where the selvage of your fabric will be, make sure you always keep the grain line (line within Patten) parallel to the selvage.
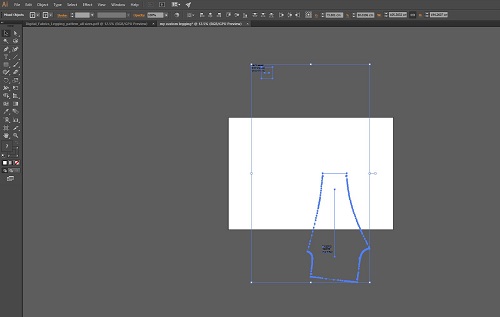
You can now double check the square scale which should remain 10x10cm and delete or move off the artboard and position the legging where you’d like.
Rotate your leggings so that they are the right way up, make sure that the centre line (grain line) is always parallel to the selvage (left and right sides of your artboard). Select the pattern including all notches details and grain line and rotate while holding down the shift key to ensure it rotated exactly how you need it.

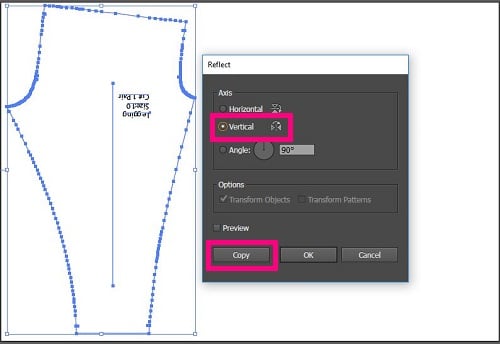
To make a pair, copy this leg pattern by selecting the shape of the pattern and once selected go to Object>transform>reflect and select vertical Axis and click copy.
You now have a pair.
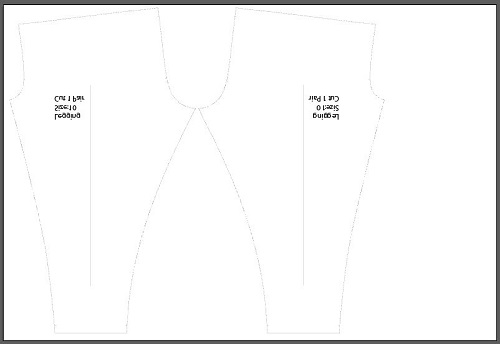
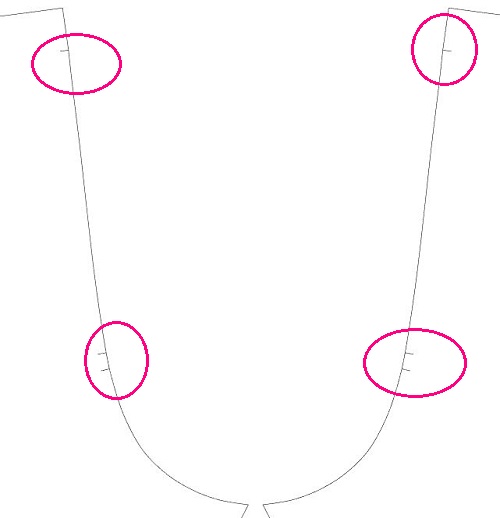
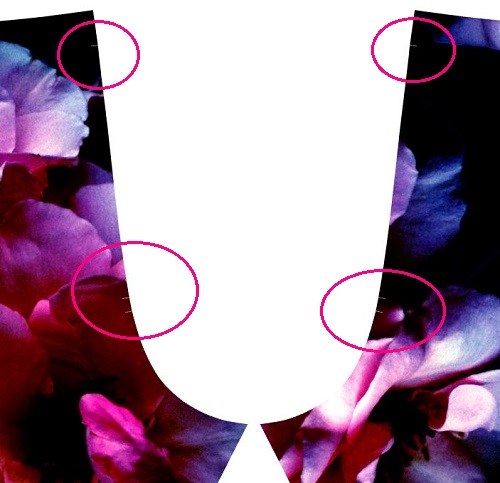
You can now delete the grain line and text, but keep all notches, you will need them for making. For this tutorial we’ve left the text from one of the legs to print, if you are thinking about printing several sizes it will very helpful to have this information next to each size to avoid confusion. Notches are the little nicks which are around the patterns which will help when constructing the leggings.
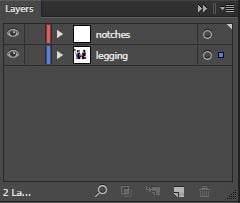
Copy all notches and paste into new layer for later use. Make sure you select all notches and if for any reason you are moving the legging pattern make sure you select the notches layer so that they move together.
Open up the design you would like to use, make sure the design has been setup slightly larger than the legging pattern size roughly 110cm long x 65cm wide and copy and paste into the artboard.
Select design >object>arrange>send to back.
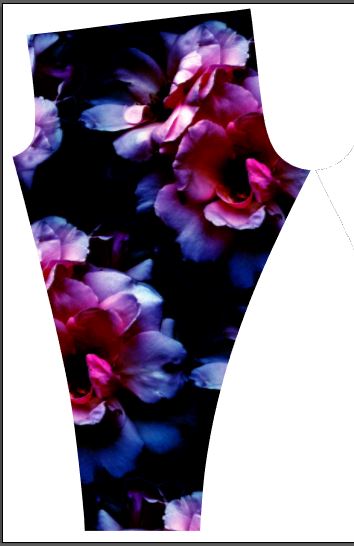
With both the artwork/design and legging pattern selected Object>clipping mask>make. Now you can only see your design in a shape of a leg pattern.
Repeat for other leg.
Select all notches in other layer and change the colour so they become visible.
Group all layers including leggings and notches and centre, your file is now ready to submit to have printed.