 This blog will explain how you can design your own seamless patterned tile that will actually repeat seamlessly across the width of your fabric. No tiny white gaps, no misaligned edges and no weird visual breaks.
In this post, we’re not using fancy or expensive graphic design software to create your file. We’re using Canva. So, read on to learn how to create a seamless repeating pattern tile using Canva. No graphic design qualifications required.
Whether you’re designing your own custom fabric for a passion project or looking to create custom fabric products you can sell online, this tutorial covers the essential need-to-know. Once you’ve nailed this tutorial, you’ve got all the skills you need to upload your own custom design file and start printing custom fabric online.
Prefer to watch and follow along?
We’ve recorded a full step-by-step video tutorial for you.
Click here to watch the 6 min tutorial on YouTube.
Why use Canva for custom pattern design?
Look, we love Adobe here at Digital Fabrics, but there’s no denying that it’s expensive, complex and arguably overkill for a lot of smaller design tasks. If you’re already using Canva for your marketing, mood boards or design mockups, it makes sense to keep everything in one place.
What is a seamless repeating pattern?
Before we get stuck into the tutorial, it’s important to understand what we mean when we talk about a seamless repeating pattern.
When you’re designing a pattern to print onto fabric you usually design for the fabric using a smaller tile that is then multiplied across the width and length of your fabric.
A seamless repeating pattern means your design joins together without any obvious edges or breaks. The motifs or design elements flow from tile to tile like magic. No awkward gaps, no visible joins and no surprises when your design becomes a physical reality.
If you are ordering custom fabric online and you want to ensure your design looks professional, learning how to master creating a seamless repeat is a must-have skill.
Tutorial time: how to create a seamless pattern tile in Canva
Read on to get a step-by-step walkthrough of the process to create a seamless pattern tile in Canva and get expert tips on how to ensure your design is flawless.
Step one: create your Canva design
Set up a new design using custom dimensions in centimeters. It’s important to use CM as you will be printing a physical product. We recommend starting with a 45cm x 45cm square design as this tiles neatly in our standard 140cm wide fabric, but you are free to create canvas at any size! Make it smaller if your designing for a smaller product such as a zip pouch or larger if you are after a bold effect.
Step two: create your design
You can upload your own elements into the design (think illustrations, graphics or hand-drawn motifs) or use Canva’s elements — just be sure to check copyright if you’re planning to sell your design.
Step three: start creating your repeating elements
Canva’s Position toolbar is your best friend. You’ll use this to manually place duplicated design elements at precise X and Y coordinates to create that seamless flow.
For example:
- Place a motif onto your design at -10cm. That’s negative 10 for the X coordinate value which will move a motif slightly off the left edge of the canvas.
- Duplicate this motif and using the Position tool and the X coordinate, move it 35cm in from the right. You need to also make sure the Y coordinate is the same and matching for both motifs. This means it’ll repeat perfectly when tiled. Remember your tile is 45cm wide, so you’re working from that to position the elements relatively.
- Now, add a different motif -5 cm from the top. To do this, use the Y coordinate which will move a motif slightly off the top edge of the canvas.
- Duplicate the motif and place a copy 40 cm down the file using the Y coordinate. This time make sure the X coordinate is the same and matching in both objects. Again, work using relative positions against that 45cm design size.
This is where the maths comes in (don’t worry, the video walks you through it!).
Step four: test your repeat
Export your tile, re-upload it into Canva, and tile it across a new design to make sure the edges line up. This gives you a quick visual check before you upload it into our custom fabric uploader to print your own fabric.
Step five: export your tile for printing
Our pro tip is to always export your seamless repeat pattern tile from Canva at the highest quality and highest file size JPG you can manage. This will help ensure you meet our recommended 300DPI to ensure print quality. Avoid PNGs and PDFs, JPGs work best with our printing software.
Common mistakes to avoid
- Using pixels instead of centimetres
You’re designing for print, not screen — always switch your units to centimetres when setting up your design in Canva.
- Working too small
A 20cm x 20cm tile might look fine on screen, but it can become blurry or repetitive when repeated across metres of fabric. When in doubt: design big.
- Forgetting to test your repeat
Just because it looks seamless on your artboard doesn’t mean it’ll print perfectly. Always test your tile before uploading. Make sure you stretch any background colours beyond the edge of your design for the same reason.
- Relying on Canva’s AI pattern tools
Canva’s pattern generator is fun, but not reliable for actual fabric printing — the results often don’t tile correctly. We definitely recommend creating your own seamless repeating pattern in Canva by following this tutoria.
Ready to print your pattern onto fabric?
It’s incredibly easy to print your own fabric online using our Fabric Uploader. Simply take your exported pattern file, upload the file into our online tool and you can order fabric immediately. Just watch this handy tutorial if you’d like to learn more about using our online uploader to start printing your own fabric.
Designing abstract textural prints may seem like a challenge, but by selecting the Mirror Repeat Feature when using our Online Uploader, your designs can be taken to the next level with minimal fuss when it comes to repeating your design. Here’s an easy to follow tutorial put together by one of our fabulous interns from 2018 – Emily!
Firstly, start out by creating your own designs and then scan them into your computer. We recommend to scan your artwork at 300dpi and in RGB colour mode.
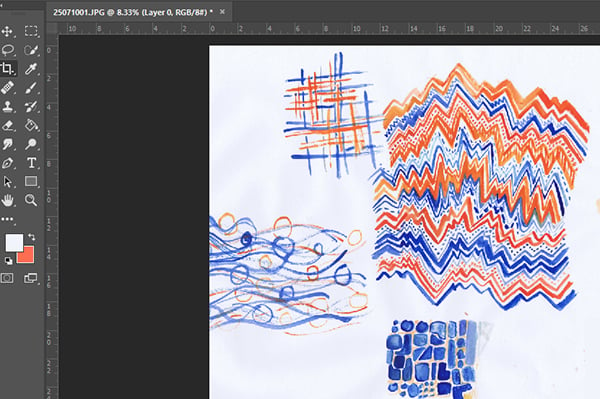
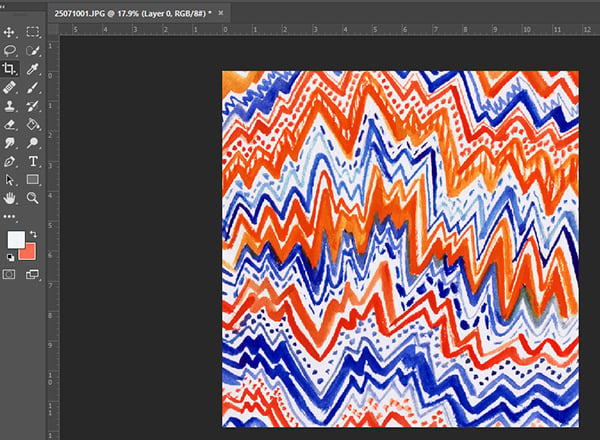
For our artwork we decided to play around with line-work and contrasting colours to create a high energy zig-zag effect.

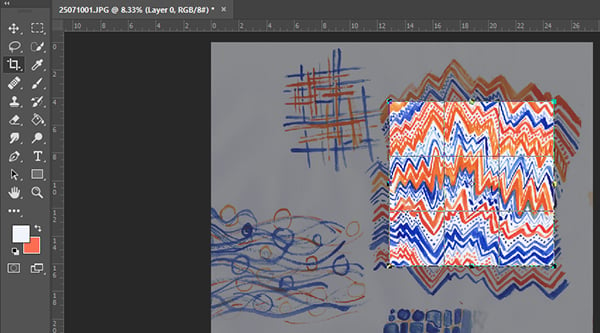
Open the design in Adobe Photoshop. It’s at this stage that you can edit your artwork if it requires any tweaks, such as changing the colours or removing / cleaning up elements. Once you are happy with your artwork use the crop tool to crop your design into a rectangular tile.
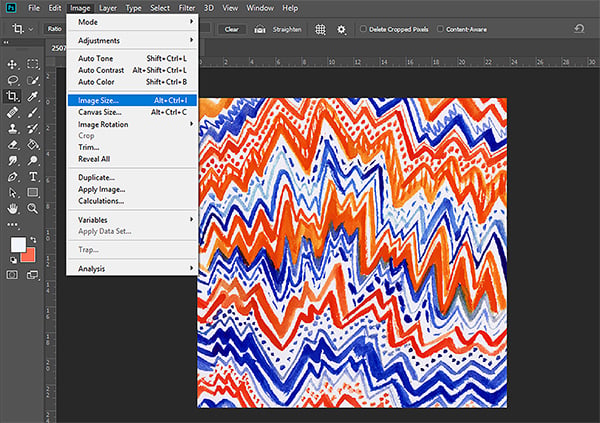
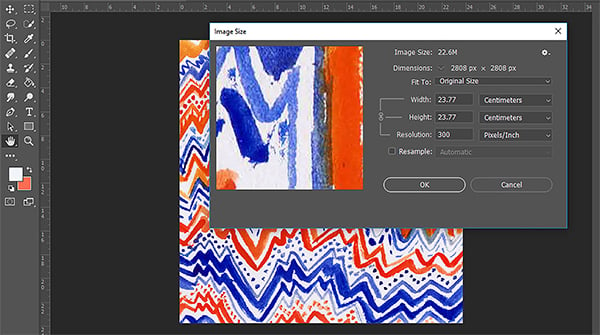
Check the size of your image by selecting ‘Image’ > ‘Image Size’ from the menu bar in the top-left of your screen. If the dpi of your image is larger than 300, please reduce it to 300dpi. If the dpi of your image is less than 300 you can keep it at this size. Please note we recommend artwork for digital printing to have a dpi of at least 150 for best results when printing onto fabric.
Save the tile as a JPEG so that it is compatible with the Online Uploader.
Next head to our website! The Online Uploader is available either clicking here or by copying & pasting this link: www.digitalfabrics.com.au/custom-fabric into your browser. Use the Online Uploader to upload your design. After the file has loaded you should see it in the fabric preview window.
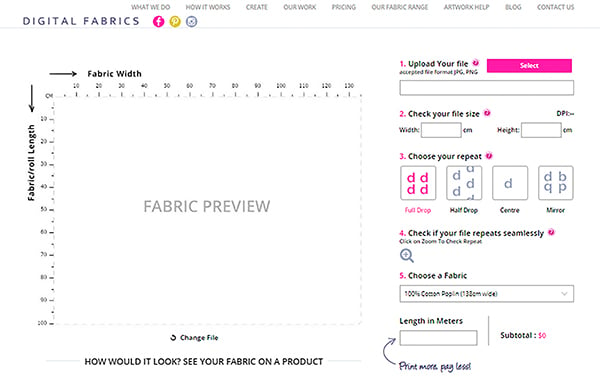
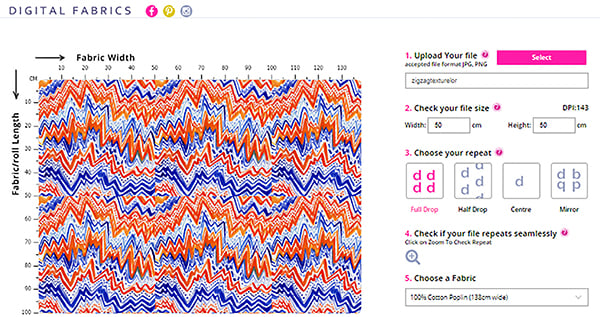
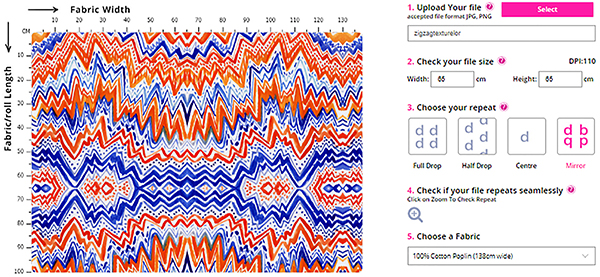
To the right of the fabric preview window you will see a list of options, including any changes that need to be made to your artwork size as well as the type of ‘repeat’ required for your design. When first uploaded your artwork will always be shown using a ‘full drop’ repeat. Select the ‘mirror repeat’ option. This will reflect your design tile’s edges when placed next to each other, resulting in a seamless repeat pattern of your textured artwork.
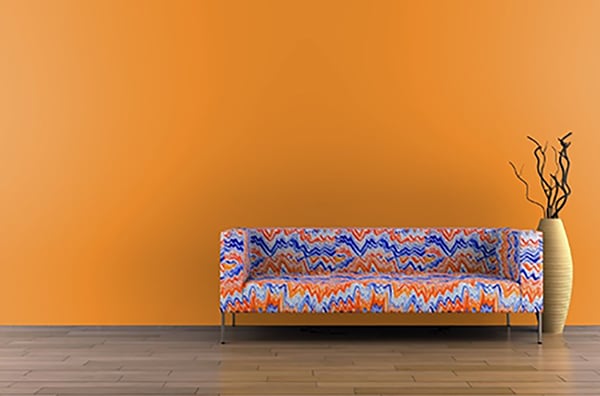
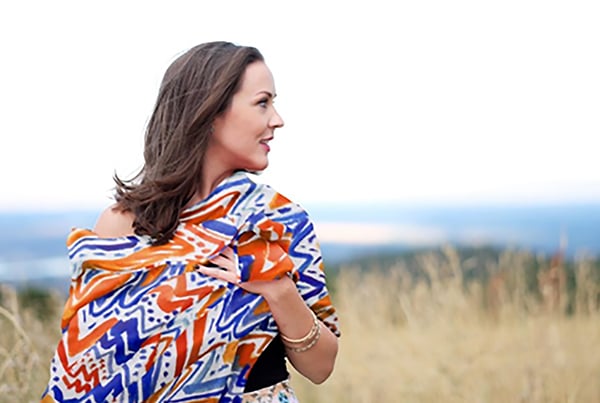
Congratulations! You now have a repeat design all set to be printed on the fabric of your choice and applied to any project you can imagine!
Snippets’. Chats with Creatives. We are back with series two! Here at Digital Fabrics we love everything print, pattern and colour and we love to know what makes designers tick. This second series is all about asking some fun and different questions and learning about the inspirations and ideas behind the artist and their work. We hope to inspire others by sharing snippets of these creative stories. We gave the artists and designers featured a varied and different set from series one list of questions to choose from so we will learn something new from everyone involved, should be fun!
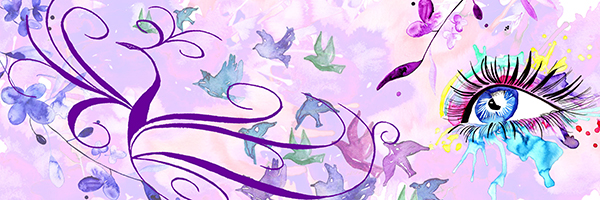
Today on snippets we are talking to Stacey from Kalaii Creations who is an artist and designer who loves working with watercolour, creating textile art, and helping creative brands with their surface pattern and design needs as well as teaching workshops! She has a flair for colour and a style that is elegant, playful and enchanting.
 Tell us a bit about yourself, your brand/label name what your creative practice is, how and when you began:
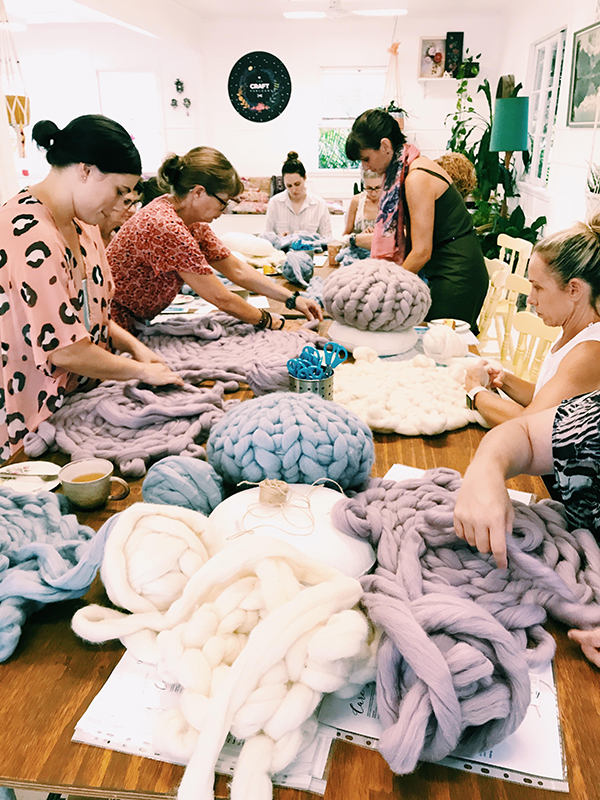
My name is Stacey and I established Kalaii Creations in 2016 when I was on maternity leave with my second baby. I needed a little bit of me time, and participated in a creative workshop and from there I was hooked! My creative streak was reignited. I was always very interested in drawing in my school years, and did art through high school, but lost track of it all during my later years. I am so glad to have found it again! I started by making an Instagram page, and sharing some of my artwork, and soon had orders coming in for custom pieces and I just decided to explore it all, and it has opened up a lot of doors for me. Now I host creative workshops with Workshop Brisbane, The Craft Parlour on the Gold Coast, in shopping centres, and I am soon to help teach a textile design workshop, with you here at Digital Fabrics which I am very excited about! Currently I focus on watercolour art, graphic design, textile design and creative workshops ranging from knitting, watercolour art and textiles. I can’t wait to see what’s in store for the future.
 Where do you call home?
I have been based in South Brisbane, Queensland, for most of my life (I moved from NSW when I was just a baby).
What 3 words best describe your creative style.
Feminine, Boho inspired, Vibrant
Which part of the creative process is your favourite and why?
I love the initial stages of creating, when a client comes to you with their vision, and their inspiration, and you get a rush of exciting ideas and ways in which you can help them. I love being able to see what I will paint in my mind, and then how I can manipulate that in Adobe Photoshop or Illustrator and then still always be pleasantly surprised at the finished result.
 What does a typical creative day look like for you? How do you stay on plan and organised?
A typical day for me is a little bit of a hot mess actually! I have two kiddies under 5, and I also work at a Brisbane based university for 3 days a week and thus arrange my creative design work at varying stages around this. Mostly I work at night, once the kiddies are asleep and I host my creative workshops on the weekends. I stay on top of my workload by completing little bits every day, and stay organized by using a Passion Planner. I write down all my clients needs and deadlines, and I also write down all the personal designs, and tasks I want to achieve within my business, which keeps me focused!
What would your dream creative project look like? Who or what is your dream project, client or job? Tell us about why you would love to collaborate with them and what you find inspiring about their work.
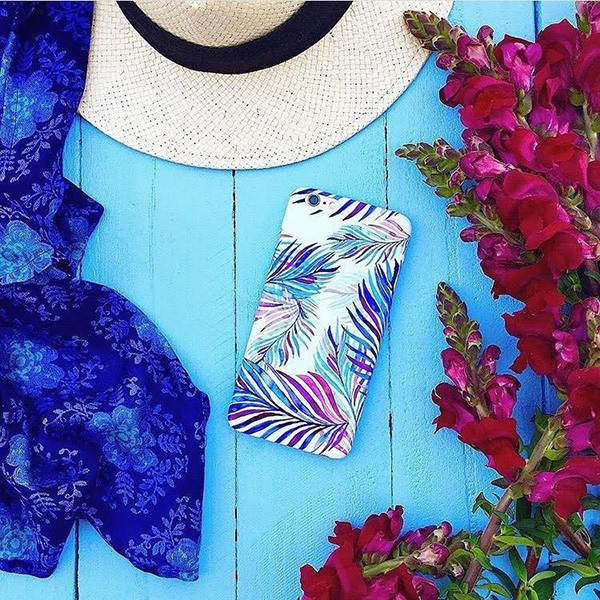
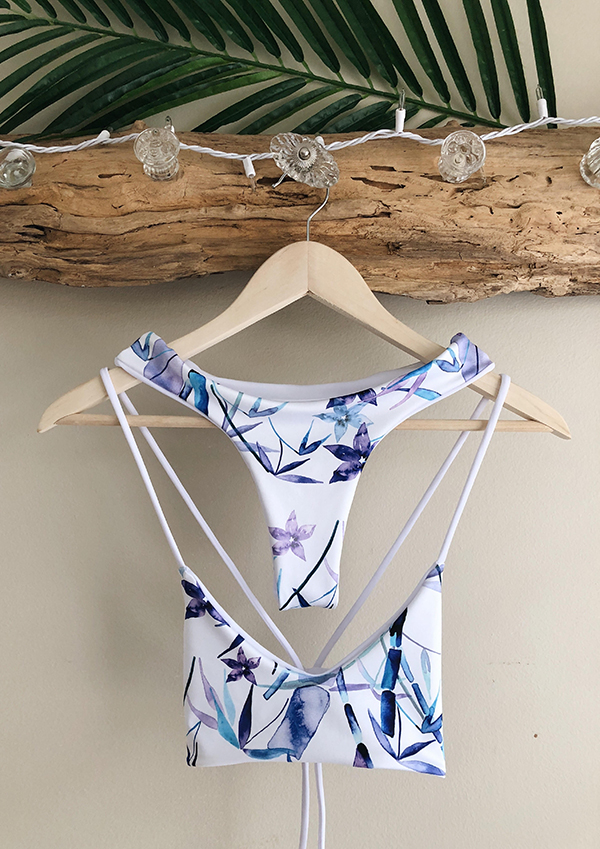
I would love to further explore the possibilities of having my designs feature more on active wear and swimwear out in the market place. I would love to be custom creating designs for people left right and centre! I find it so exhilarating when you see your artwork making a product pop! I am so thankful to have been given the opportunity to work with Sarah from @saltysparrowbikini on her new line release coming later in the year. I would also love to work with @midoribikinis. I love their designs and aesthetics and feel my designs would fit well with this brand.
 Which other artists/ designers/ makers, artists or creative people are you enjoying at the moment?
I am currently in love with @jessswan_art I love the colours she uses, the shapes, tones everything! It is mesmerizing watching her work!
Tell us about your creative space, what are your tips for keeping a creative studio space organised?
It is my dream to soon create a creative space. Currently I work from my dining table (I know there are many of you out there just like me) and I also have a very small old fashioned house which does not leave a lot of room for arts and crafts and product storage. I use a combination of storage draws and desk space to stay on top of my organisation at home. I am hoping soon to extend our house for multiple reasons, and I may just sneak in a little studio while I am at it!
What has been your proudest creative business achievement to date?
My proudest creative business achievement to date and a dream come true is an upcoming swimwear design project I have been able to assist with. Sarah from Salty Sparrow Bikini (@saltysparrowbikini), has chosen my designs to feature on her first swimwear line which I am over the moon about! I am also super excited to be working with Jemma from Newymummyblogger on the designs for an upcoming project she will be releasing soon. But I will keep that hush hush for now 🙂 Another major achievement for me is being able to work so closerly with Digital Fabrics to help teach textile design classes. I keep pinching myself about this amazing opportunity!
Tell us about how you get your creative juices flowing, what is your process?
I love speaking with new clients about their design ideas and inspirations, as often their ideas require me to push my artistic and creative boundaries each time. They make me think outside the box and think of ideas/combinations that I would not have ventured into, if it was not for their influence! This is my favourite part! Then I usually research their inspiration and competitors to get a vibe for the type of project I am working on and then I get to creating. I usually see the end product first, and then work towards creating the elements to bring this to reality.
 What projects or collaborations from last year stuck out, good or bad and what is coming up this year that you would like to plug!
I have loved working with Workshop Brisbane, The Craft Parlour, Sarah and Jemma, and also Lauren from @cocokini_ (another bikini designer who has also featured my designs)
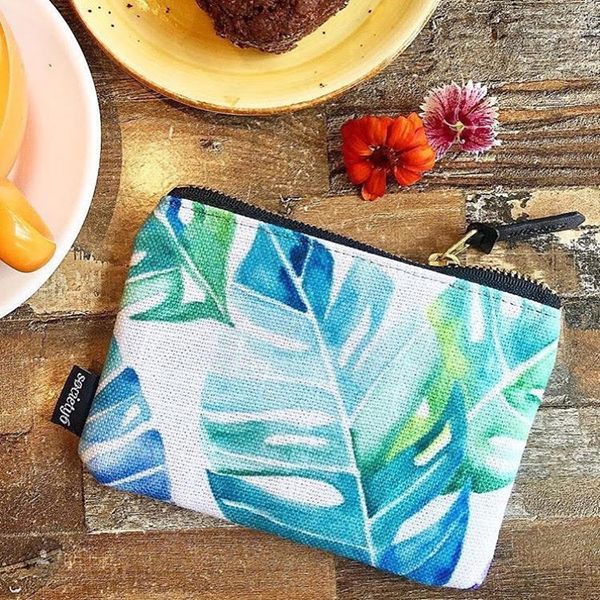
 I am super excited to further develop my relationship with Digital Fabrics and help by teaching textile design class for beginners, and I look forward to printing some more fabrics for some special pieces I have in mind. Watch this space! My next venture is the release of a cute little day clutch, great for the beach, where I have collaborated with Kate from @blue_eyed_girl_creations who has helped to sew the clutches for me. I can’t wait to see what people think of them.
 You can follow what Stacey is upto: Website, Instagram, Facebook
Snippets’. Chats with Creatives. We are back with series two! Here at Digital Fabrics we love everything print, pattern and colour and we love to know what makes designers tick. This second series is all about asking some fun and different questions and learning about the inspirations and ideas behind the artist and their work. We hope to inspire others by sharing snippets of these creative stories. We gave the artists and designers featured a varied and different set from series one list of questions to choose from so we will learn something new from everyone involved, should be fun!
Today on snippets we are talking to Stacey from Kalaii Creations who is an artist and designer who loves working with watercolour, creating textile art, and helping creative brands with their surface pattern and design needs as well as teaching workshops! She has a flair for colour and a style that is elegant, playful and enchanting.
Tell us a bit about yourself, your brand/label name what your creative practice is, how and when you began:
My name is Stacey and I established Kalaii Creations in 2016 when I was on maternity leave with my second baby. I needed a little bit of me time, and participated in a creative workshop and from there I was hooked! My creative streak was reignited. I was always very interested in drawing in my school years, and did art through high school, but lost track of it all during my later years. I am so glad to have found it again! I started by making an Instagram page, and sharing some of my artwork, and soon had orders coming in for custom pieces and I just decided to explore it all, and it has opened up a lot of doors for me. Now I host creative workshops with Workshop Brisbane, The Craft Parlour on the Gold Coast, in shopping centres, and I am soon to help teach a textile design workshop, with you here at Digital Fabrics which I am very excited about! Currently I focus on watercolour art, graphic design, textile design and creative workshops ranging from knitting, watercolour art and textiles. I can’t wait to see what’s in store for the future.
Where do you call home?
I have been based in South Brisbane, Queensland, for most of my life (I moved from NSW when I was just a baby).
What 3 words best describe your creative style.
Feminine, Boho inspired, Vibrant
Which part of the creative process is your favourite and why?
I love the initial stages of creating, when a client comes to you with their vision, and their inspiration, and you get a rush of exciting ideas and ways in which you can help them. I love being able to see what I will paint in my mind, and then how I can manipulate that in Adobe Photoshop or Illustrator and then still always be pleasantly surprised at the finished result.
What does a typical creative day look like for you? How do you stay on plan and organised?
A typical day for me is a little bit of a hot mess actually! I have two kiddies under 5, and I also work at a Brisbane based university for 3 days a week and thus arrange my creative design work at varying stages around this. Mostly I work at night, once the kiddies are asleep and I host my creative workshops on the weekends. I stay on top of my workload by completing little bits every day, and stay organized by using a Passion Planner. I write down all my clients needs and deadlines, and I also write down all the personal designs, and tasks I want to achieve within my business, which keeps me focused!
What would your dream creative project look like? Who or what is your dream project, client or job? Tell us about why you would love to collaborate with them and what you find inspiring about their work.
I would love to further explore the possibilities of having my designs feature more on active wear and swimwear out in the market place. I would love to be custom creating designs for people left right and centre! I find it so exhilarating when you see your artwork making a product pop! I am so thankful to have been given the opportunity to work with Sarah from @saltysparrowbikini on her new line release coming later in the year. I would also love to work with @midoribikinis. I love their designs and aesthetics and feel my designs would fit well with this brand.
Which other artists/ designers/ makers, artists or creative people are you enjoying at the moment?
I am currently in love with @jessswan_art I love the colours she uses, the shapes, tones everything! It is mesmerizing watching her work!
Tell us about your creative space, what are your tips for keeping a creative studio space organised?
It is my dream to soon create a creative space. Currently I work from my dining table (I know there are many of you out there just like me) and I also have a very small old fashioned house which does not leave a lot of room for arts and crafts and product storage. I use a combination of storage draws and desk space to stay on top of my organisation at home. I am hoping soon to extend our house for multiple reasons, and I may just sneak in a little studio while I am at it!
What has been your proudest creative business achievement to date?
My proudest creative business achievement to date and a dream come true is an upcoming swimwear design project I have been able to assist with. Sarah from Salty Sparrow Bikini (@saltysparrowbikini), has chosen my designs to feature on her first swimwear line which I am over the moon about! I am also super excited to be working with Jemma from Newymummyblogger on the designs for an upcoming project she will be releasing soon. But I will keep that hush hush for now 🙂 Another major achievement for me is being able to work so closerly with Digital Fabrics to help teach textile design classes. I keep pinching myself about this amazing opportunity!
Tell us about how you get your creative juices flowing, what is your process?
I love speaking with new clients about their design ideas and inspirations, as often their ideas require me to push my artistic and creative boundaries each time. They make me think outside the box and think of ideas/combinations that I would not have ventured into, if it was not for their influence! This is my favourite part! Then I usually research their inspiration and competitors to get a vibe for the type of project I am working on and then I get to creating. I usually see the end product first, and then work towards creating the elements to bring this to reality.
What projects or collaborations from last year stuck out, good or bad and what is coming up this year that you would like to plug!
I have loved working with Workshop Brisbane, The Craft Parlour, Sarah and Jemma, and also Lauren from @cocokini_ (another bikini designer who has also featured my designs)
I am super excited to further develop my relationship with Digital Fabrics and help by teaching textile design class for beginners, and I look forward to printing some more fabrics for some special pieces I have in mind. Watch this space! My next venture is the release of a cute little day clutch, great for the beach, where I have collaborated with Kate from @blue_eyed_girl_creations who has helped to sew the clutches for me. I can’t wait to see what people think of them.
You can follow what Stacey is upto: Website, Instagram, Facebook
It would be safe to say that most of us are creative, we might love to doodle, paint, and create collages. Whilst these are all wonderful and inventive practices, what if you wanted to start developing these crafts into textile designs but didn’t have the digital design software skills to get your file prepared for fabric printing. What we would say is “learn it’! Learn digital textile design in small bites. Start slowly, from converting your art into a digital format and getting to know basic Photoshop tools. Everything new can be overwhelming, but if you take one step at a time and slowly build your confidence, you will get the hang of it in no time. Below are some simple steps that will help you prepare your art for digital seamless repeat printing.
DIGITIZING – CONVERTING YOUR ART INTO A DIGITAL FORMAT
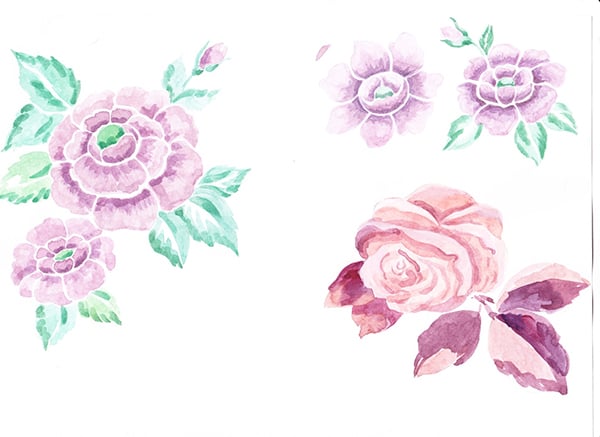
Start with an artwork painted onto a flat, one colour background that surrounds the artwork. For this tutorial we used a simple white plain background for the purpose of being easy, but any colour is fine.
To convert your artwork into a digital format you need to scan or photograph the artwork. Scanning at a resolution of 300 dpi is preferred. However, if you don’t have a scanner, photograph your artwork laid out flat, indoors with plenty of light (natural day light if best), holding the camera directly above the artwork, making sure there are no shadows of any kind interfering with the artwork.
CLEANING – DELETING UNWANTED ELEMENTS FROM AN ARTWORK
Open your artwork in Photoshop by selecting MAIN MENU > FILE > OPEN > CHOOSE YOUR ARTWORK FILE.
Using MARQUEE TOOL select the object or image that you want to repeat.
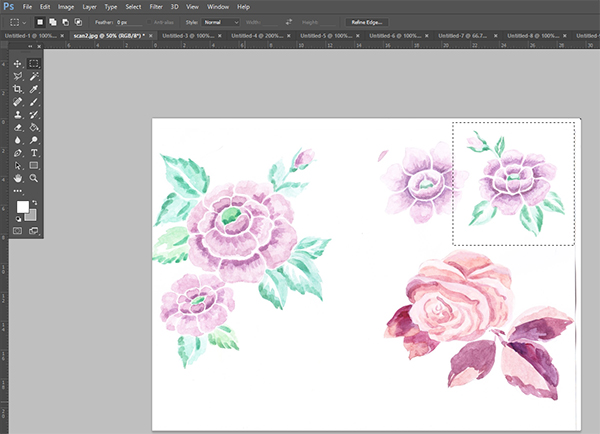
Now let’s bring the artwork or image that you want to repeat into a new document so you can start playing with it. While MARQUEE TOOL selection is active, (this will appear as ants running around the selected area) go to MAIN MENU > EDIT > COPY to copy selected area and FILE > NEW to open new document. NOTE: Photoshop is a very smart software. The area that you have selected will now determine the file size of the new document being opened. Click OK.
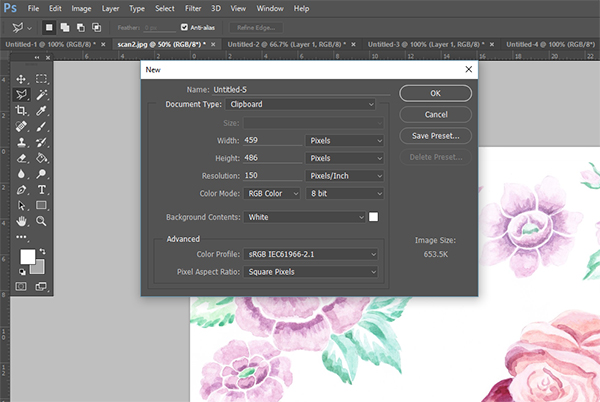
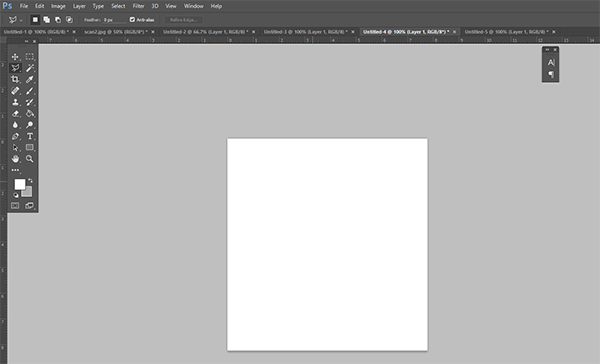
Whilst in the newly opened document select MAIN MENU > EDIT> PASTE to bring your selected artwork into the new document. It should paste by default in the middle of the new document fitting artwork well within the new document space. Nothing should be cropped out or hidden from view.
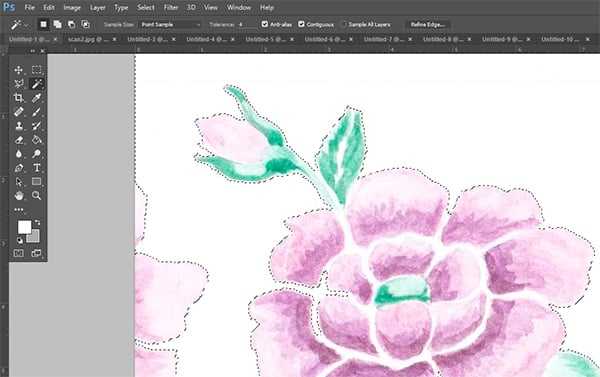
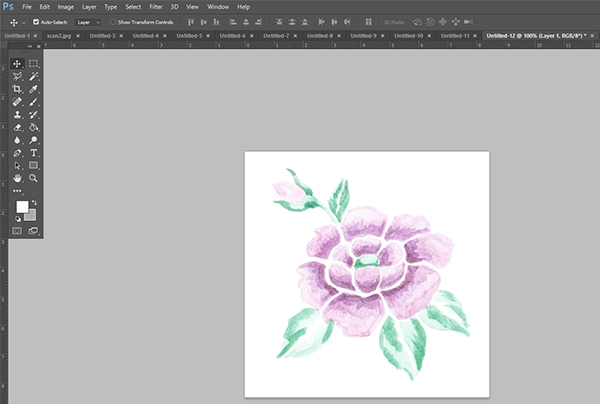
Now to clean your artwork. If your white background is slightly messy or the texture of the paper is visible, you will need to clean this up, since whatever you see on the screen will be printed onto fabric. To quickly ‘deep-etch’ or in other words ‘clean-up’, select the layer that you just brought in. Then select the MAGIC WAND TOOL. Change the tolerance to low (we selected a tolerance measure of ‘4’ but you might need to adjust this number as it is based on your artwork). Tolerance is the rate at which the same or similar colours are selected when using the MAGIC WAND TOOL. The higher the tolerance the more of that colour will be found and therefore selected within the artwork.
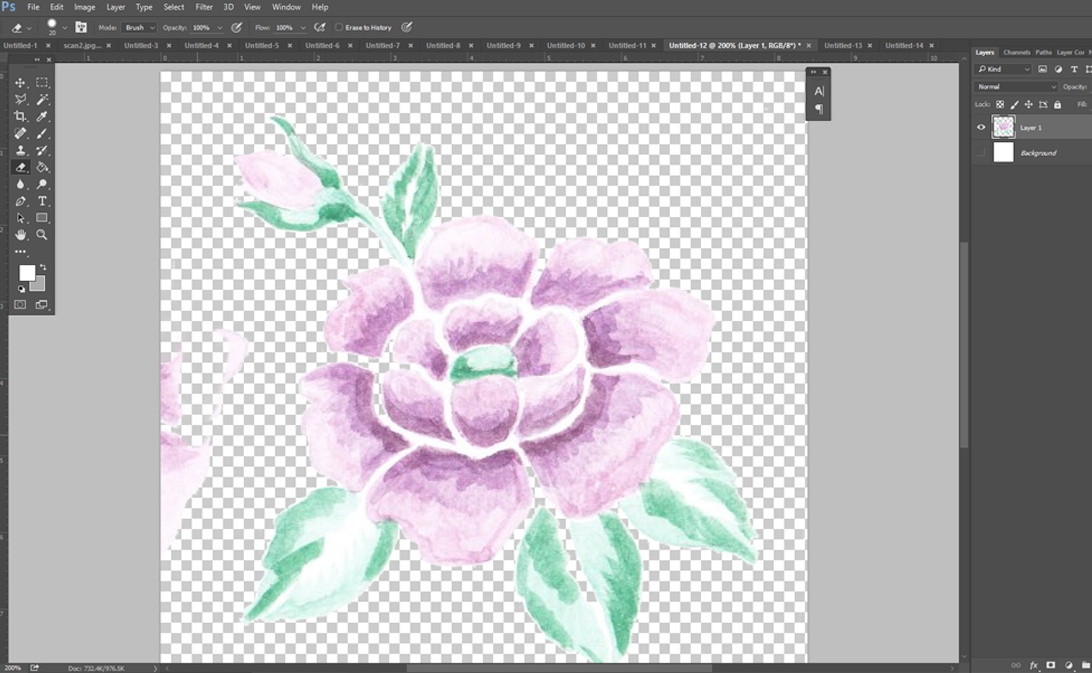
Make sure the CONTIGUOUS box is ticked, this will ensure that only space around your artwork is being selected, and not that which is inside or a part of the drawn objects. Now once everything is prepared for selection click on the white background to select it. You can see on the image below that only the white background area is selected. While it is selected hit the DELETE button on your keyboard. This will remove the white selected background.
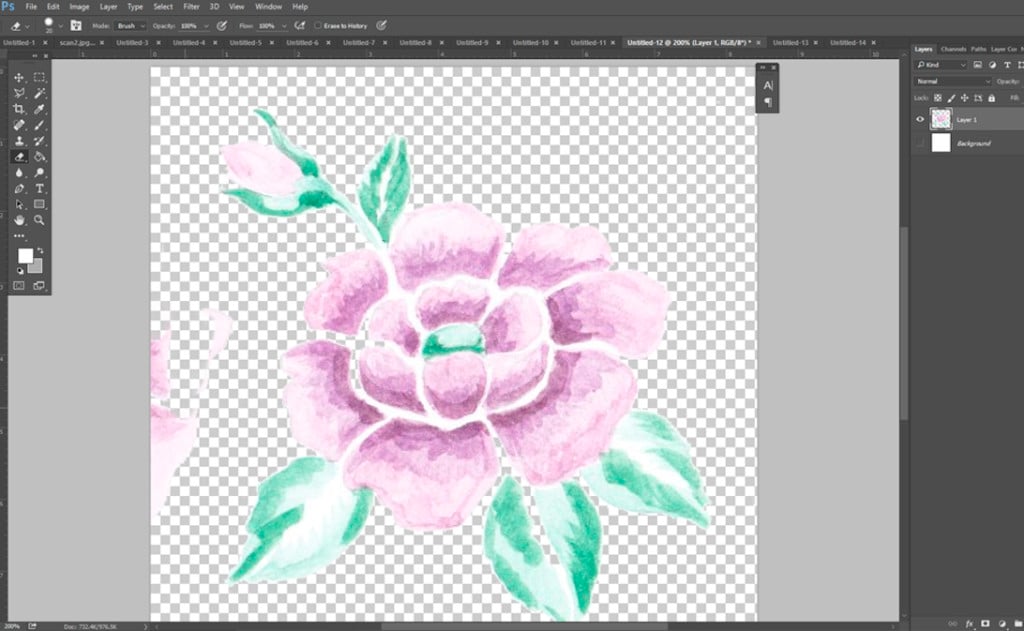
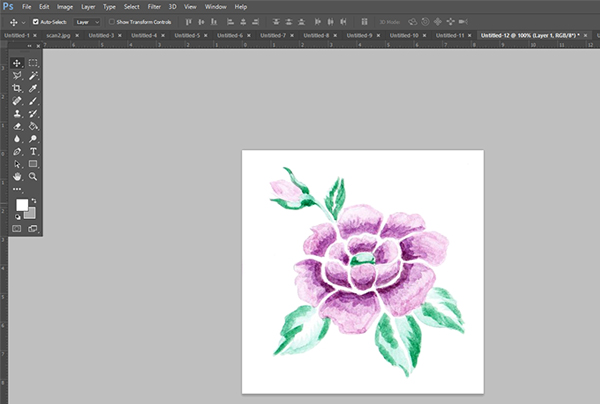
As you can see there is a little bit of another flower peaking through on the left side. Lets clean this up by using the simple ERASER TOOL. You can adjust the size of the eraser as needed at the top left of the screen. You can make the background layer invisible (this will then appear as little white and grey squares as seen below) to check that you have cleaned up all of the image. Simply zoom in to check the edges of your artwork and any potential unwanted marks left behind.
ADJUSTING COLOURS
The image is now clean, but colour wise the artwork is not strong enough. To brighten and intensify the colours of the image select MAIN MENU > IMAGE > AUTO CONTRAST.
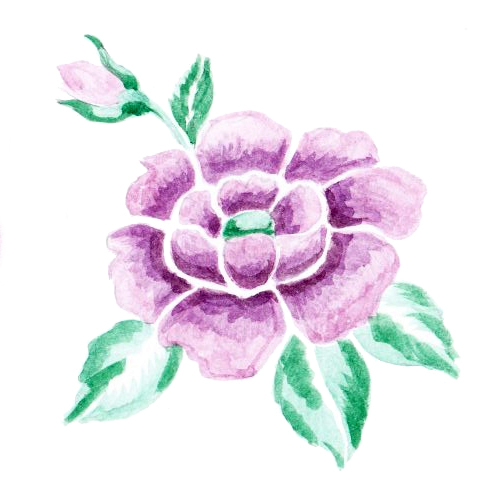
You are almost done! To flatten your image select MAIN MENU > LAYER > FLATTEN IMAGE. All layers have now merged into one. Save the image as a JPG high quality file MAIN MENU > FILE > SAVE AS > SAVE.
Now you are done and ready to upload your file to print on to a fabric of your choice!
REPEATING A PATTERN USING OUR FABRIC UPLOADER
Open the Fabric Uploader page.
Drag & Drop your image or click on the SELECT button to upload your ready to print artwork. Once your file is uploaded, you’ll be able to see it in the fabric preview window. You can scale your artwork up or down, simply by typing in and adjusting the artwork to the size you want. Keep an eye on the DPI! This is the resolution and quality of your file. If your artwork is low resolution and is scaled up, the print result can be blurry.
Next step is to choose your Repeat type. This is the fun part! Play around with the different options and see how the variations impact your artwork in the preview window. Compare how the different options distribute your artwork across the width and the length of the fabric. Pick the one that suits your design idea best!
FULL DROP REPEAT
MIRROR REPEAT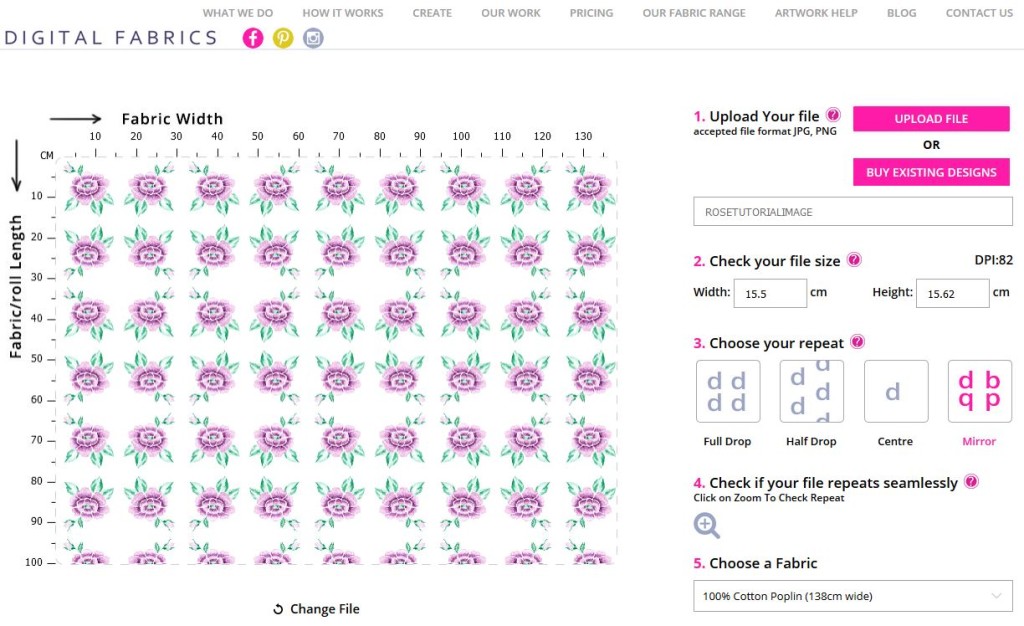
Choose how many meters you wish to print simply by typing it into the quantity box and then select the fabric you want to print on. Remember that each fabric stock has a different width so be sure to check that the fabric you choose meets your needs.
P.S. This tutorial is designed to be very basic. If you are still struggling to prepare your artwork files, we recommend you attend one of the workshops on offer at our Digital Textile Design School to help you nail those Photoshop basics!
It would be safe to say that most of us are creative, we might love to doodle, paint, and create collages. Whilst these are all wonderful and inventive practices, what if you wanted to start developing these crafts into textile designs but didn’t have the digital design software skills to get your file prepared for fabric printing. What we would say is “learn it’! Learn digital textile design in small bites. Start slowly, from converting your art into a digital format and getting to know basic Photoshop tools. Everything new can be overwhelming, but if you take one step at a time and slowly build your confidence, you will get the hang of it in no time. Below are some simple steps that will help you prepare your art for digital seamless repeat printing.
DIGITIZING – CONVERTING YOUR ART INTO A DIGITAL FORMAT
Start with an artwork painted onto a flat, one colour background that surrounds the artwork. For this tutorial we used a simple white plain background for the purpose of being easy, but any colour is fine.
To convert your artwork into a digital format you need to scan or photograph the artwork. Scanning at a resolution of 300 dpi is preferred. However, if you don’t have a scanner, photograph your artwork laid out flat, indoors with plenty of light (natural day light if best), holding the camera directly above the artwork, making sure there are no shadows of any kind interfering with the artwork.
CLEANING – DELETING UNWANTED ELEMENTS FROM AN ARTWORK
Open your artwork in Photoshop by selecting MAIN MENU > FILE > OPEN > CHOOSE YOUR ARTWORK FILE.
Using MARQUEE TOOL select the object or image that you want to repeat.
Now let’s bring the artwork or image that you want to repeat into a new document so you can start playing with it. While MARQUEE TOOL selection is active, (this will appear as ants running around the selected area) go to MAIN MENU > EDIT > COPY to copy selected area and FILE > NEW to open new document. NOTE: Photoshop is a very smart software. The area that you have selected will now determine the file size of the new document being opened. Click OK.
Whilst in the newly opened document select MAIN MENU > EDIT> PASTE to bring your selected artwork into the new document. It should paste by default in the middle of the new document fitting artwork well within the new document space. Nothing should be cropped out or hidden from view.
Now to clean your artwork. If your white background is slightly messy or the texture of the paper is visible, you will need to clean this up, since whatever you see on the screen will be printed onto fabric. To quickly ‘deep-etch’ or in other words ‘clean-up’, select the layer that you just brought in. Then select the MAGIC WAND TOOL. Change the tolerance to low (we selected a tolerance measure of ‘4’ but you might need to adjust this number as it is based on your artwork). Tolerance is the rate at which the same or similar colours are selected when using the MAGIC WAND TOOL. The higher the tolerance the more of that colour will be found and therefore selected within the artwork.
Make sure the CONTIGUOUS box is ticked, this will ensure that only space around your artwork is being selected, and not that which is inside or a part of the drawn objects. Now once everything is prepared for selection click on the white background to select it. You can see on the image below that only the white background area is selected. While it is selected hit the DELETE button on your keyboard. This will remove the white selected background.
As you can see there is a little bit of another flower peaking through on the left side. Lets clean this up by using the simple ERASER TOOL. You can adjust the size of the eraser as needed at the top left of the screen. You can make the background layer invisible (this will then appear as little white and grey squares as seen below) to check that you have cleaned up all of the image. Simply zoom in to check the edges of your artwork and any potential unwanted marks left behind.
ADJUSTING COLOURS
The image is now clean, but colour wise the artwork is not strong enough. To brighten and intensify the colours of the image select MAIN MENU > IMAGE > AUTO CONTRAST.
You are almost done! To flatten your image select MAIN MENU > LAYER > FLATTEN IMAGE. All layers have now merged into one. Save the image as a JPG high quality file MAIN MENU > FILE > SAVE AS > SAVE.
Now you are done and ready to upload your file to print on to a fabric of your choice!
REPEATING A PATTERN USING OUR FABRIC UPLOADER
Open the Fabric Uploader page.
Drag & Drop your image or click on the SELECT button to upload your ready to print artwork. Once your file is uploaded, you’ll be able to see it in the fabric preview window. You can scale your artwork up or down, simply by typing in and adjusting the artwork to the size you want. Keep an eye on the DPI! This is the resolution and quality of your file. If your artwork is low resolution and is scaled up, the print result can be blurry.
Next step is to choose your Repeat type. This is the fun part! Play around with the different options and see how the variations impact your artwork in the preview window. Compare how the different options distribute your artwork across the width and the length of the fabric. Pick the one that suits your design idea best!
FULL DROP REPEAT
MIRROR REPEAT
Choose how many meters you wish to print simply by typing it into the quantity box and then select the fabric you want to print on. Remember that each fabric stock has a different width so be sure to check that the fabric you choose meets your needs.
P.S. This tutorial is designed to be very basic. If you are still struggling to prepare your artwork files, we recommend you attend one of the workshops on offer at our Digital Textile Design School to help you nail those Photoshop basics!
- Open your file in Photoshop. Main menu > File > Open
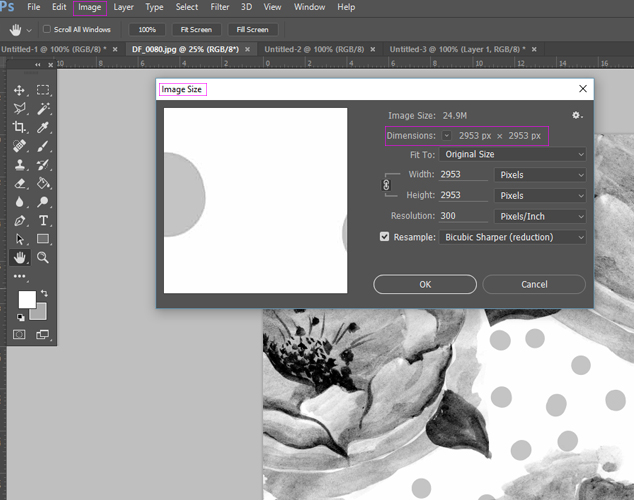
- Check size of your image. Main menu > Image > Image size. Take note of the pixel dimension (PX) at the full resolution size.
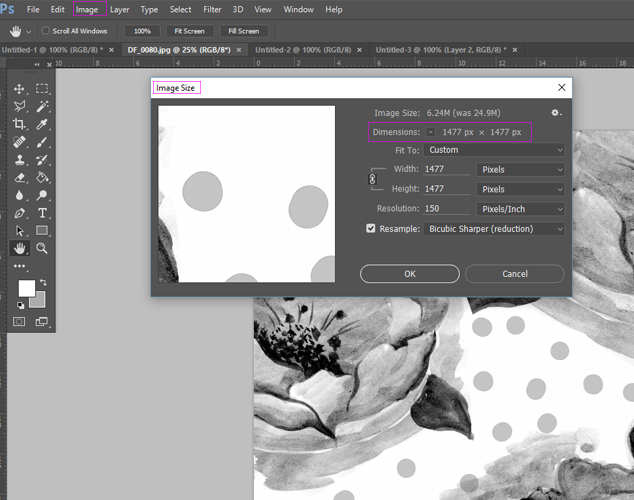
- Change the resolution to half of its value and take note of the changed pixel dimension. Keep these numbers handy as you will need them to offset your artwork. Don’t click OK at this stage, as you don’t want to change the resolution size, you only need the pixel information.
- Once you have pixel dimensions noted you can offset and check your file for seamless repeat. Go to Main menu > Filter > Other > Offset. In the open box enter that half pixel values that you have noted down. Select option Wrap Around and tick the Preview option, so you can preview what is happening to your artwork. The side edges of the artwork will now be visible in the middle and the middle will become the sides. In other words the artworks sides got folded into the middle.
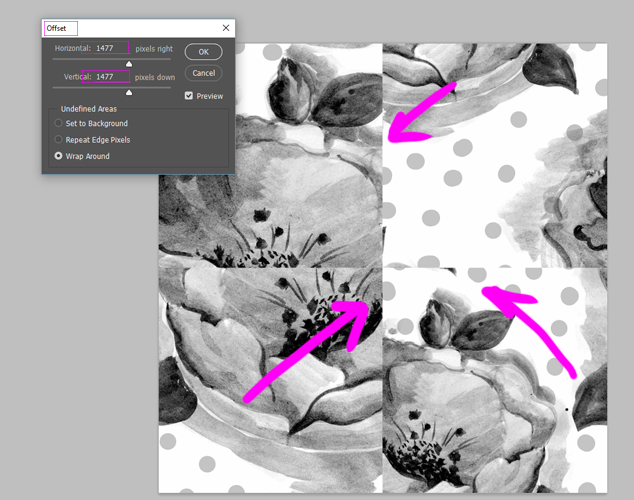
- If your artwork in not in seamless repeat, you will see it in the middle of your artwork, through vertically and horizontally missed joins and miss matched lines. In some artwork this will not be obvious and you will need to zoom right in to the joining pixels to spot the issue.
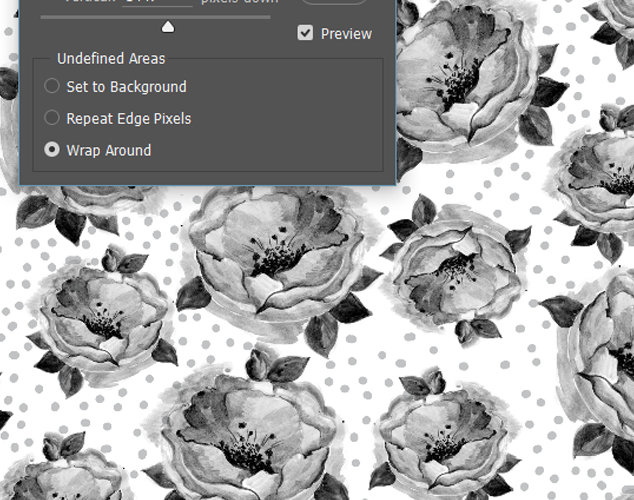
- When your artwork repeats seamlessly, there is no miss matched lines and elements of the artwork flows seamlessly.
________________________________________
If you are at the beginning of your textile and surface design journey you might want to consider our workshops and classes on offer or continue learning more online through our available tutorials.
- Open your file in Photoshop. Main menu > File > Open
- Check size of your image. Main menu > Image > Image size. Take note of the pixel dimension (PX) at the full resolution size.
- Change the resolution to half of its value and take note of the changed pixel dimension. Keep these numbers handy as you will need them to offset your artwork. Don’t click OK at this stage, as you don’t want to change the resolution size, you only need the pixel information.
- Once you have pixel dimensions noted you can offset and check your file for seamless repeat. Go to Main menu > Filter > Other > Offset. In the open box enter that half pixel values that you have noted down. Select option Wrap Around and tick the Preview option, so you can preview what is happening to your artwork. The side edges of the artwork will now be visible in the middle and the middle will become the sides. In other words the artworks sides got folded into the middle.
- If your artwork in not in seamless repeat, you will see it in the middle of your artwork, through vertically and horizontally missed joins and miss matched lines. In some artwork this will not be obvious and you will need to zoom right in to the joining pixels to spot the issue.
- When your artwork repeats seamlessly, there is no miss matched lines and elements of the artwork flows seamlessly.
________________________________________
If you are at the beginning of your textile and surface design journey you might want to consider our workshops and classes on offer or continue learning more online through our available tutorials.