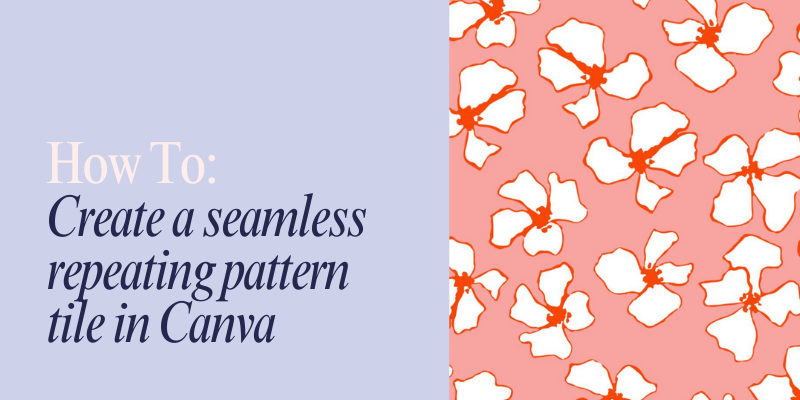
How to Create a Seamless Repeating Pattern Tile Using Canva
 This blog will explain how you can design your own seamless patterned tile that will actually repeat seamlessly across the width of your fabric. No tiny white gaps, no misaligned edges and no weird visual breaks.
In this post, we’re not using fancy or expensive graphic design software to create your file. We’re using Canva. So, read on to learn how to create a seamless repeating pattern tile using Canva. No graphic design qualifications required.
Whether you’re designing your own custom fabric for a passion project or looking to create custom fabric products you can sell online, this tutorial covers the essential need-to-know. Once you’ve nailed this tutorial, you’ve got all the skills you need to upload your own custom design file and start printing custom fabric online.
Prefer to watch and follow along?
We’ve recorded a full step-by-step video tutorial for you.
Click here to watch the 6 min tutorial on YouTube.
Why use Canva for custom pattern design?
Look, we love Adobe here at Digital Fabrics, but there’s no denying that it’s expensive, complex and arguably overkill for a lot of smaller design tasks. If you’re already using Canva for your marketing, mood boards or design mockups, it makes sense to keep everything in one place.
What is a seamless repeating pattern?
Before we get stuck into the tutorial, it’s important to understand what we mean when we talk about a seamless repeating pattern.
When you’re designing a pattern to print onto fabric you usually design for the fabric using a smaller tile that is then multiplied across the width and length of your fabric.
A seamless repeating pattern means your design joins together without any obvious edges or breaks. The motifs or design elements flow from tile to tile like magic. No awkward gaps, no visible joins and no surprises when your design becomes a physical reality.
If you are ordering custom fabric online and you want to ensure your design looks professional, learning how to master creating a seamless repeat is a must-have skill.
Tutorial time: how to create a seamless pattern tile in Canva
Read on to get a step-by-step walkthrough of the process to create a seamless pattern tile in Canva and get expert tips on how to ensure your design is flawless.
Step one: create your Canva design
Set up a new design using custom dimensions in centimeters. It’s important to use CM as you will be printing a physical product. We recommend starting with a 45cm x 45cm square design as this tiles neatly in our standard 140cm wide fabric, but you are free to create canvas at any size! Make it smaller if your designing for a smaller product such as a zip pouch or larger if you are after a bold effect.
Step two: create your design
You can upload your own elements into the design (think illustrations, graphics or hand-drawn motifs) or use Canva’s elements — just be sure to check copyright if you’re planning to sell your design.
Step three: start creating your repeating elements
Canva’s Position toolbar is your best friend. You’ll use this to manually place duplicated design elements at precise X and Y coordinates to create that seamless flow.
For example:
- Place a motif onto your design at -10cm. That’s negative 10 for the X coordinate value which will move a motif slightly off the left edge of the canvas.
- Duplicate this motif and using the Position tool and the X coordinate, move it 35cm in from the right. You need to also make sure the Y coordinate is the same and matching for both motifs. This means it’ll repeat perfectly when tiled. Remember your tile is 45cm wide, so you’re working from that to position the elements relatively.
- Now, add a different motif -5 cm from the top. To do this, use the Y coordinate which will move a motif slightly off the top edge of the canvas.
- Duplicate the motif and place a copy 40 cm down the file using the Y coordinate. This time make sure the X coordinate is the same and matching in both objects. Again, work using relative positions against that 45cm design size.
This is where the maths comes in (don’t worry, the video walks you through it!).
Step four: test your repeat
Export your tile, re-upload it into Canva, and tile it across a new design to make sure the edges line up. This gives you a quick visual check before you upload it into our custom fabric uploader to print your own fabric.
Step five: export your tile for printing
Our pro tip is to always export your seamless repeat pattern tile from Canva at the highest quality and highest file size JPG you can manage. This will help ensure you meet our recommended 300DPI to ensure print quality. Avoid PNGs and PDFs, JPGs work best with our printing software.
Common mistakes to avoid
- Using pixels instead of centimetres
You’re designing for print, not screen — always switch your units to centimetres when setting up your design in Canva. - Working too small
A 20cm x 20cm tile might look fine on screen, but it can become blurry or repetitive when repeated across metres of fabric. When in doubt: design big. - Forgetting to test your repeat
Just because it looks seamless on your artboard doesn’t mean it’ll print perfectly. Always test your tile before uploading. Make sure you stretch any background colours beyond the edge of your design for the same reason. - Relying on Canva’s AI pattern tools
Canva’s pattern generator is fun, but not reliable for actual fabric printing — the results often don’t tile correctly. We definitely recommend creating your own seamless repeating pattern in Canva by following this tutoria.
Ready to print your pattern onto fabric?
It’s incredibly easy to print your own fabric online using our Fabric Uploader. Simply take your exported pattern file, upload the file into our online tool and you can order fabric immediately. Just watch this handy tutorial if you’d like to learn more about using our online uploader to start printing your own fabric.