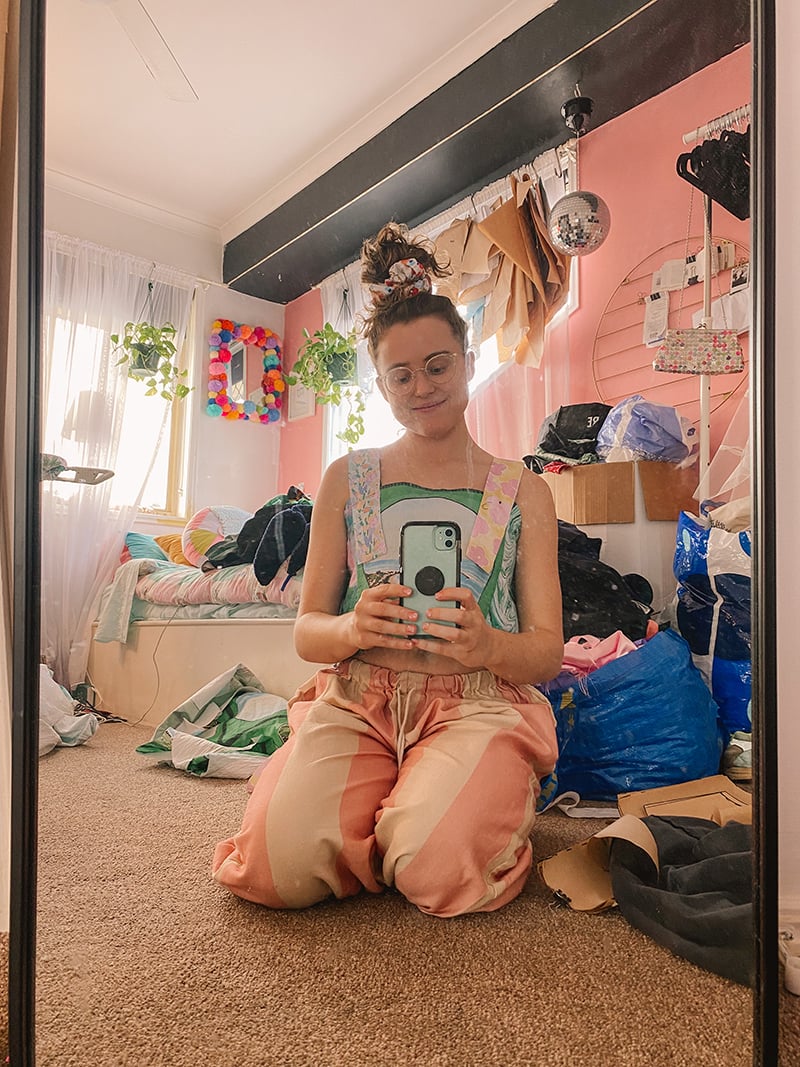
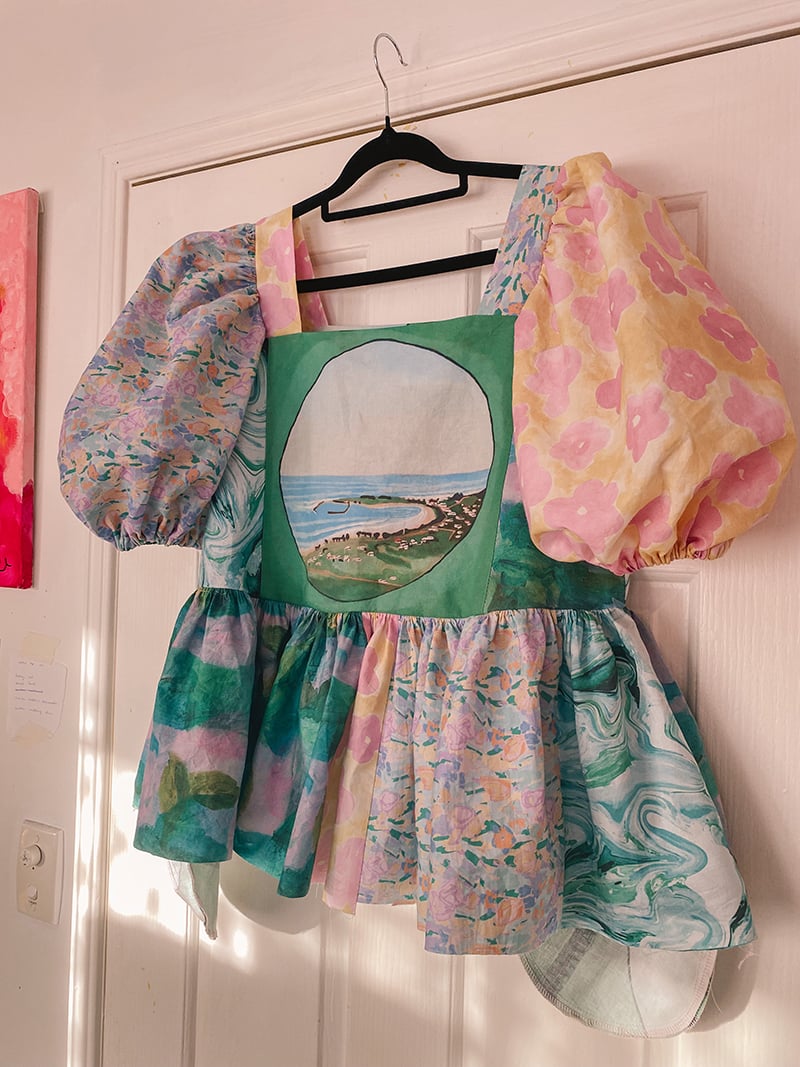
Party in patchwork style this festive season!
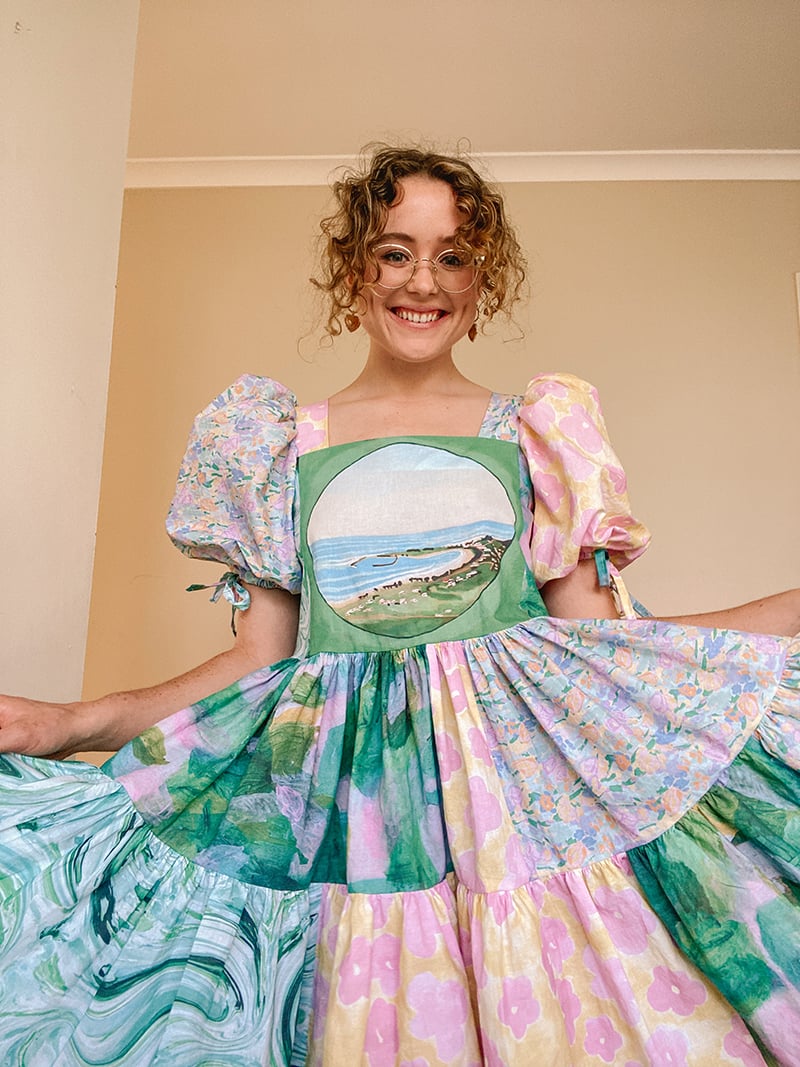
We’ve adored Carly B from the first time we landed on her Instagram, and to our delight she has made her signature patchwork dress entirely of Digital Fabrics Designer prints! With party season fast approaching, creating a staple summer piece has been on Carly’s mind, and she’s created this stunning pastel dress, perfect for twirling in. As if we could love her anymore, for bonus points, she took the leftover fabric scraps and made a pair of shorts too! Truly a kindred spirit of the DF way. Come along and sew your party dress with Carly, here is her amazing DIY dress tutorial!
With party season fast approaching, creating a staple summer piece has been on my mind! To my delight, Digital Fabrics reached out to help make my dream dress a reality & let me reassure you, the process from start to finish was simply divine.
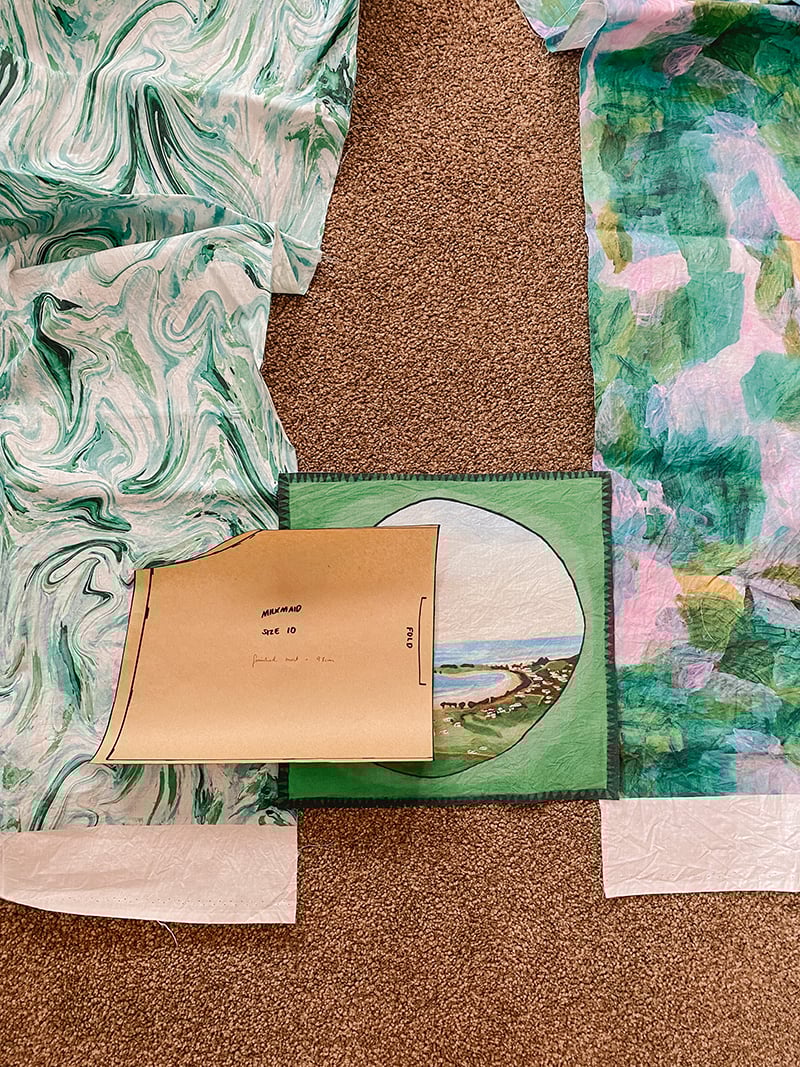
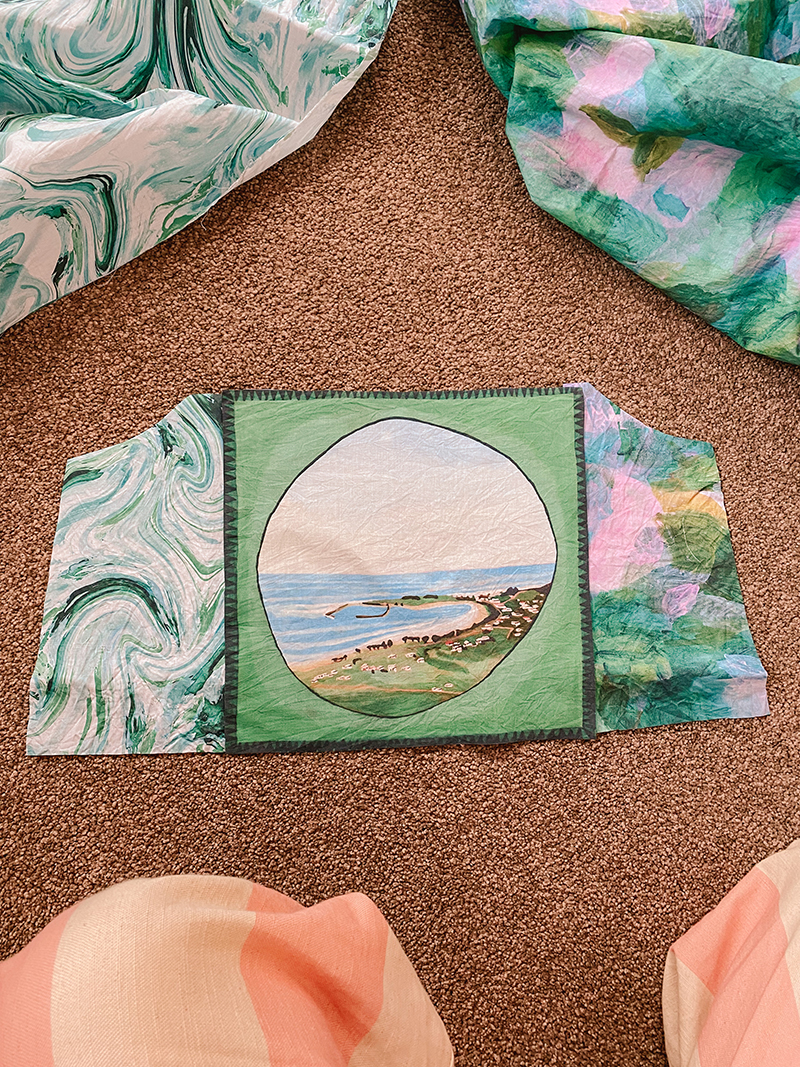
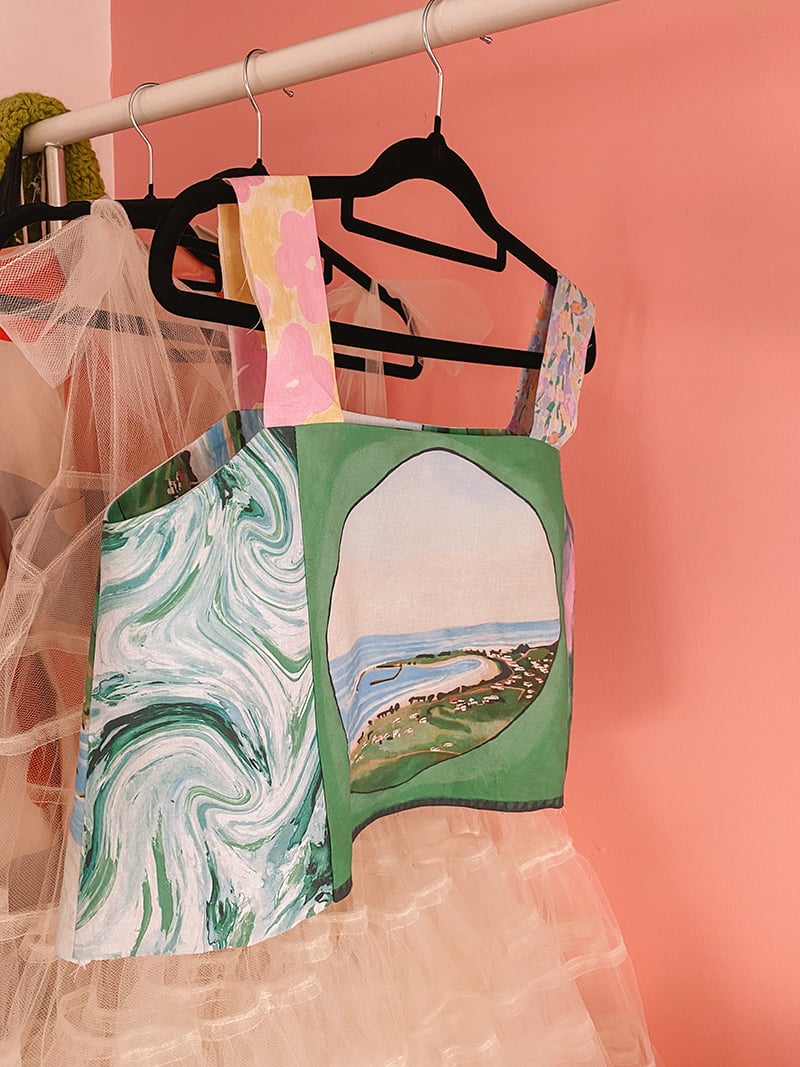
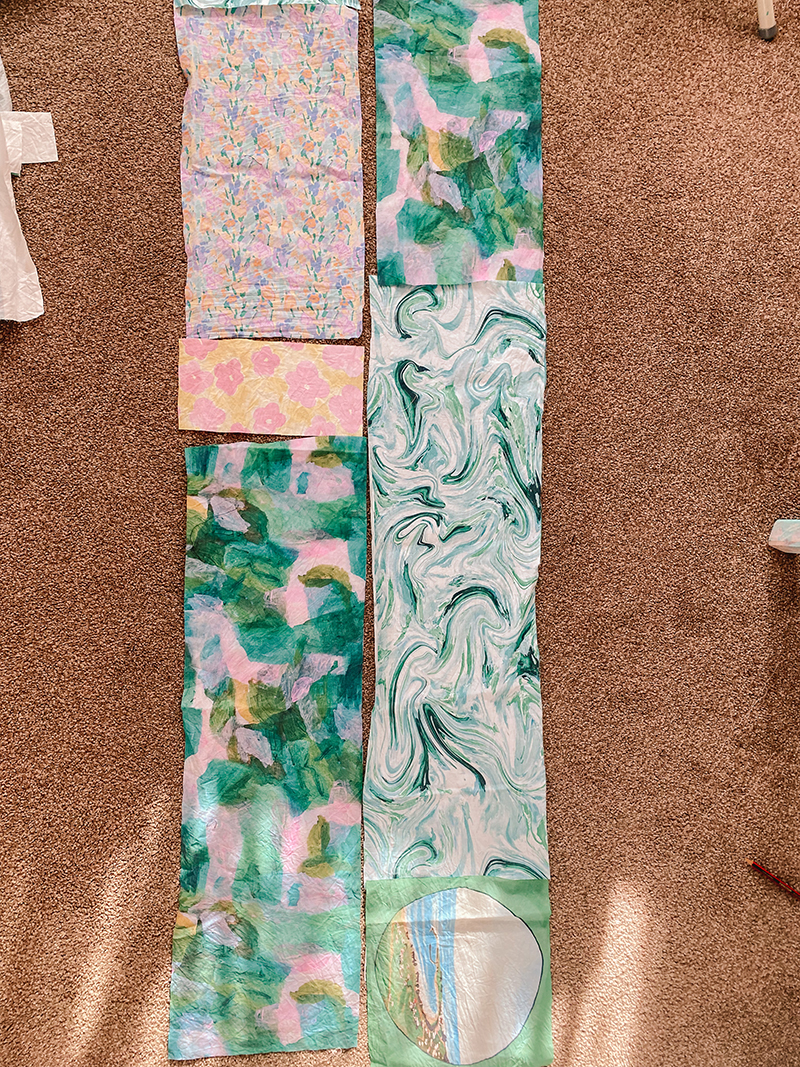
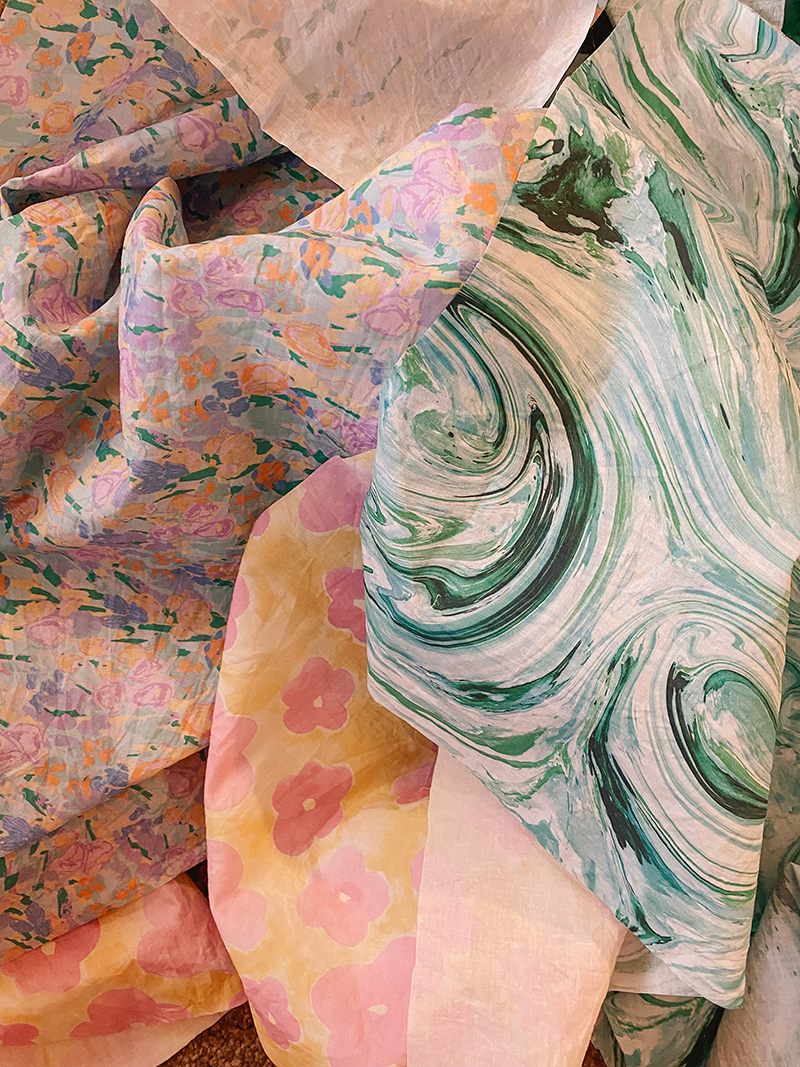
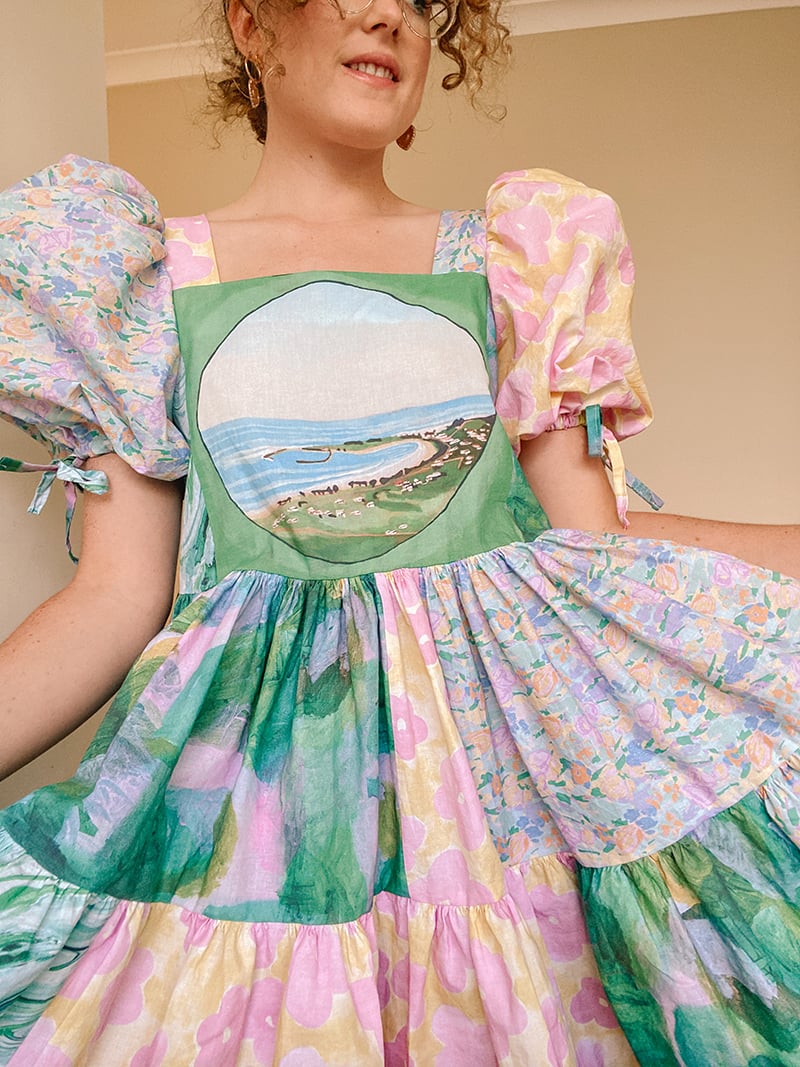
I started with the most difficult task. Choosing my fabrics! I decided to browse through the unique range of Australian designer/artist designed prints, looking for five (or so) prints that would tell a summer story (Click Fabric Shop, Designer Fabrics for this storefront). I immediately fell in love with a print by Sue Michael called ‘The Shack’. My family have visited a rundown, wholesome beach shack on the Gold Coast for most of my childhood, and this heartwarming art reminded me of my childhood filled with sandy days, pink zinc on my nose & sweet summer days spent in the ocean. Basing my design around this print, I then selected 4 other prints that felt complimentary and ordered!
I got 5m of Cotton Poplin in total, which was 1m of each print to make my patchwork style dress. Please know that you have the option of ordering samples of fabrics to see what the fabric is like before you place your order, if that’s something you like! You can also get your own designs printed on their fabric (in a huge variety of fabric kinds too), so if you’re artistically inclined & want to order your very own fabric – you can!
As everything is printed in Sydney, Australia they arrived at my doorstep in Brisbane/Meanjin quickly. The quality of the fabric was delightful to see (the Cotton Poplin is reminds me of the cleanest, crunchiest hotel sheets) and it was so cool to see all 5 of my designs printed on one single 5m length of fabric. Love seeing that low waste production! I hand washed each print separately, letting them dry on the line & giving them a good press.
What I used
– 5m of cotton poplin from Digital Fabrics
1M JOAN MEADOW ( designer MADELINE HAWKIN)
1M DILLY DAISY
1M BEACH SHACK GREEN FIELDS ( designer SUE MICHAEL)
1M MRAMOR ICE
– matching thread
– elastic for arms
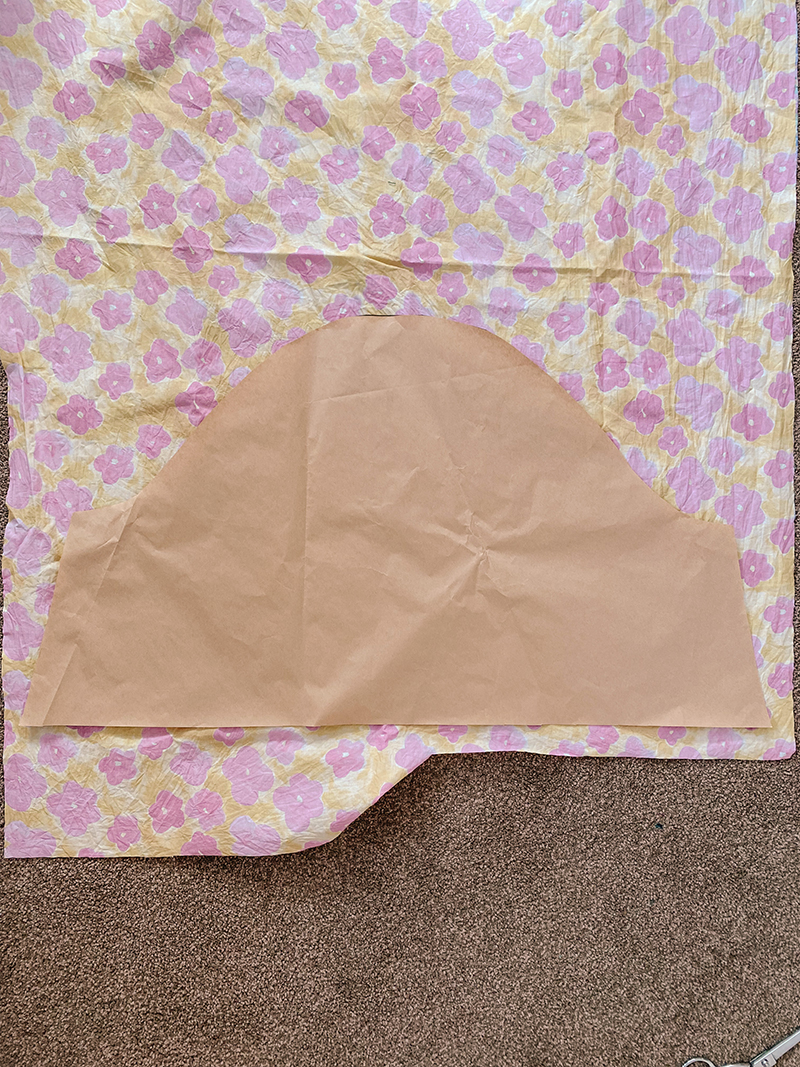
– self drafted pattern ( you can find similar patterns on Etsy 1. 2. 3. )
Make time: 5 hours (ish)
Level: Beginner
Let’s make it!
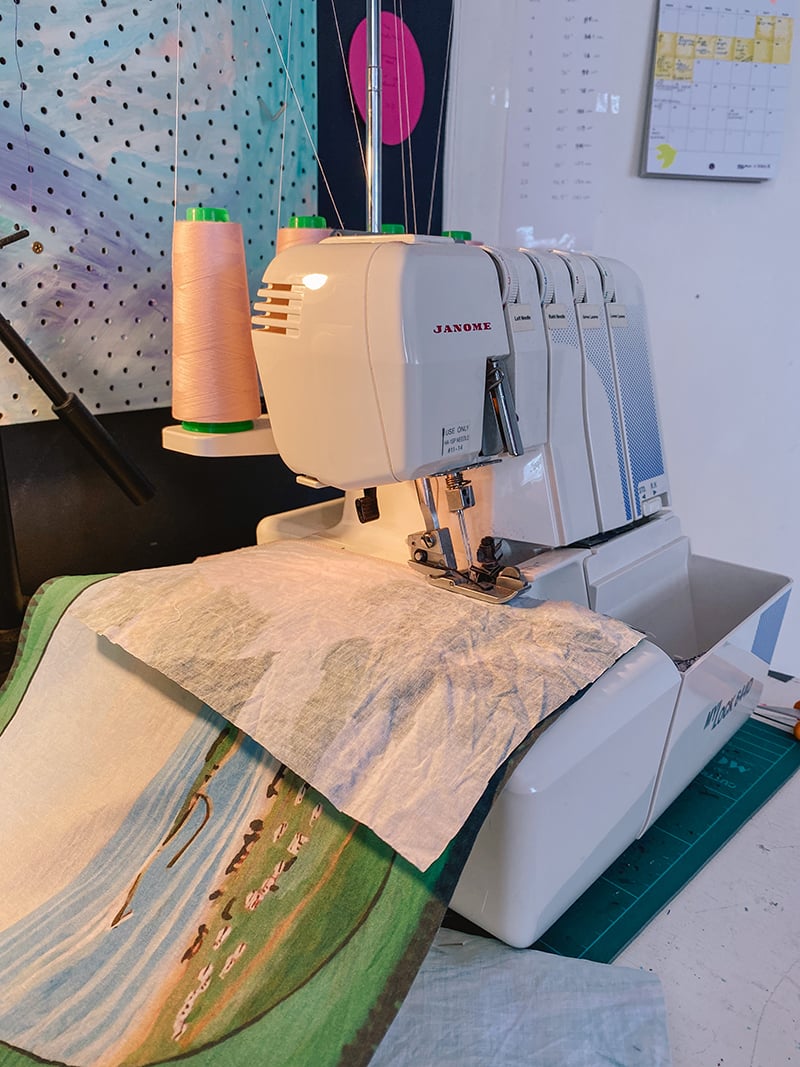
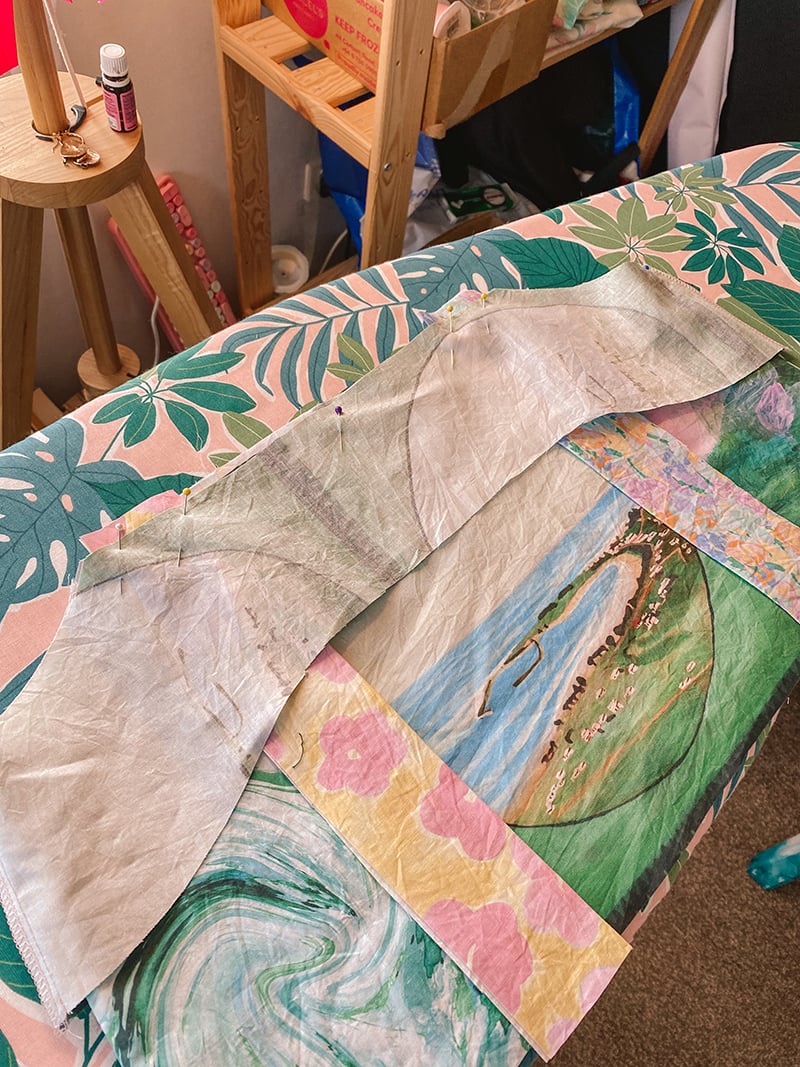
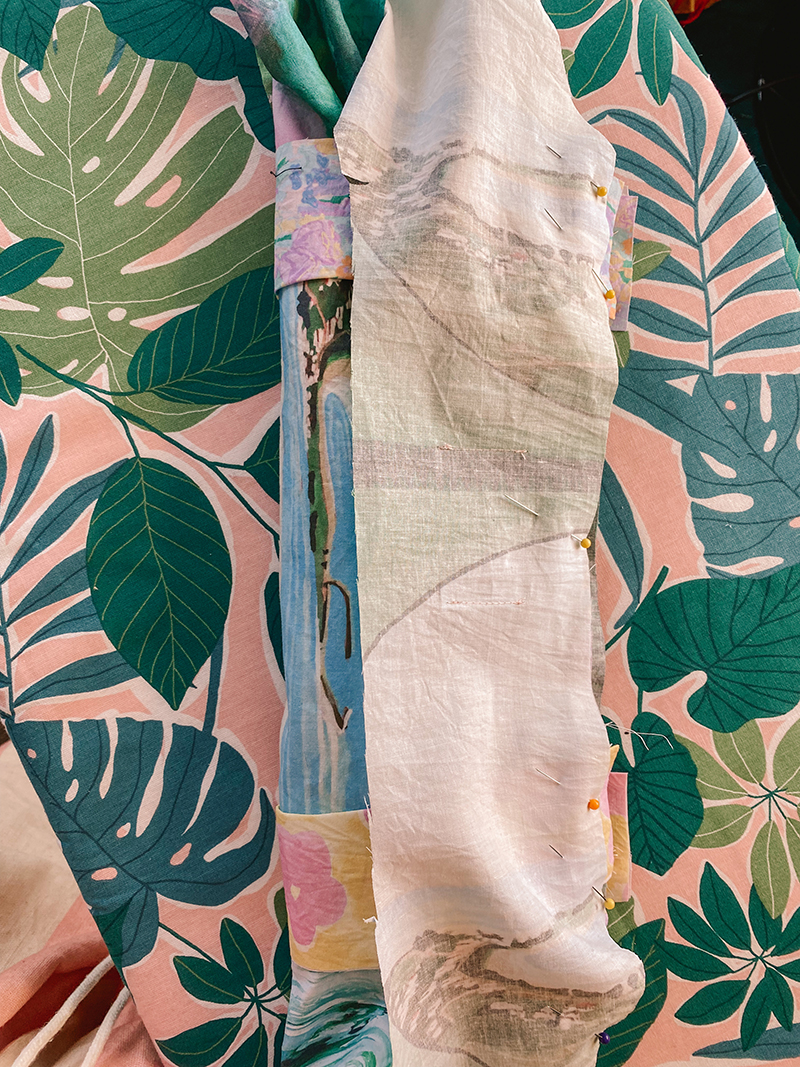
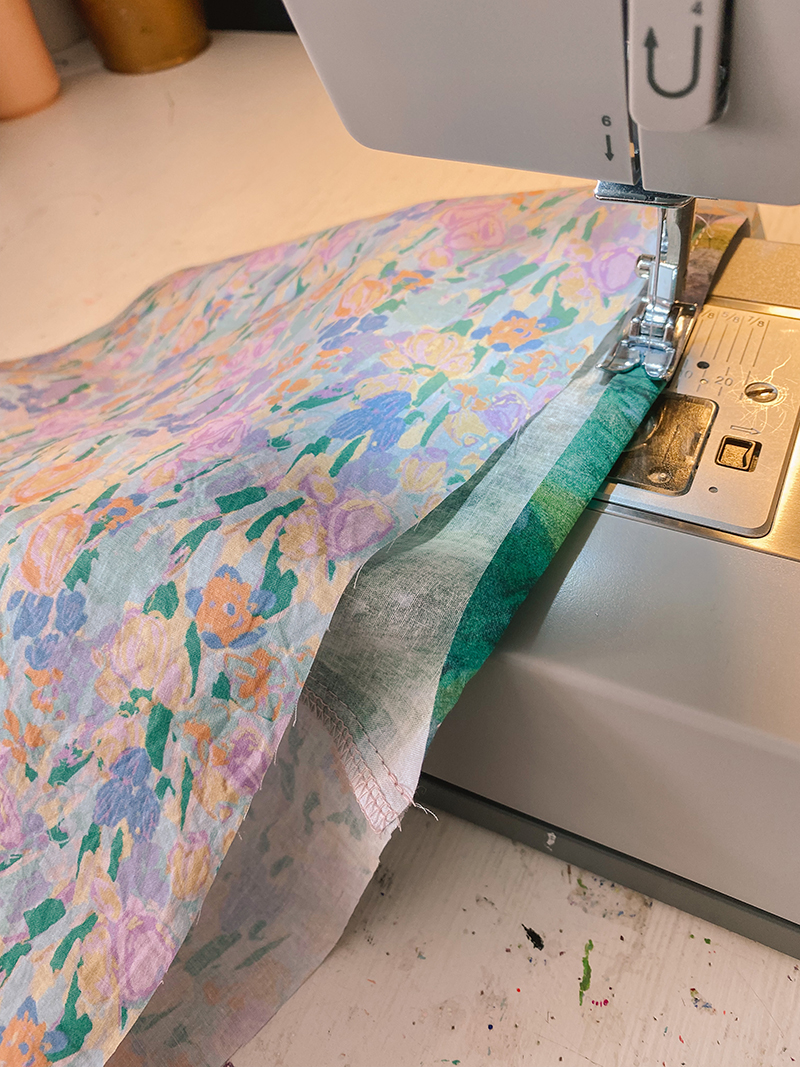
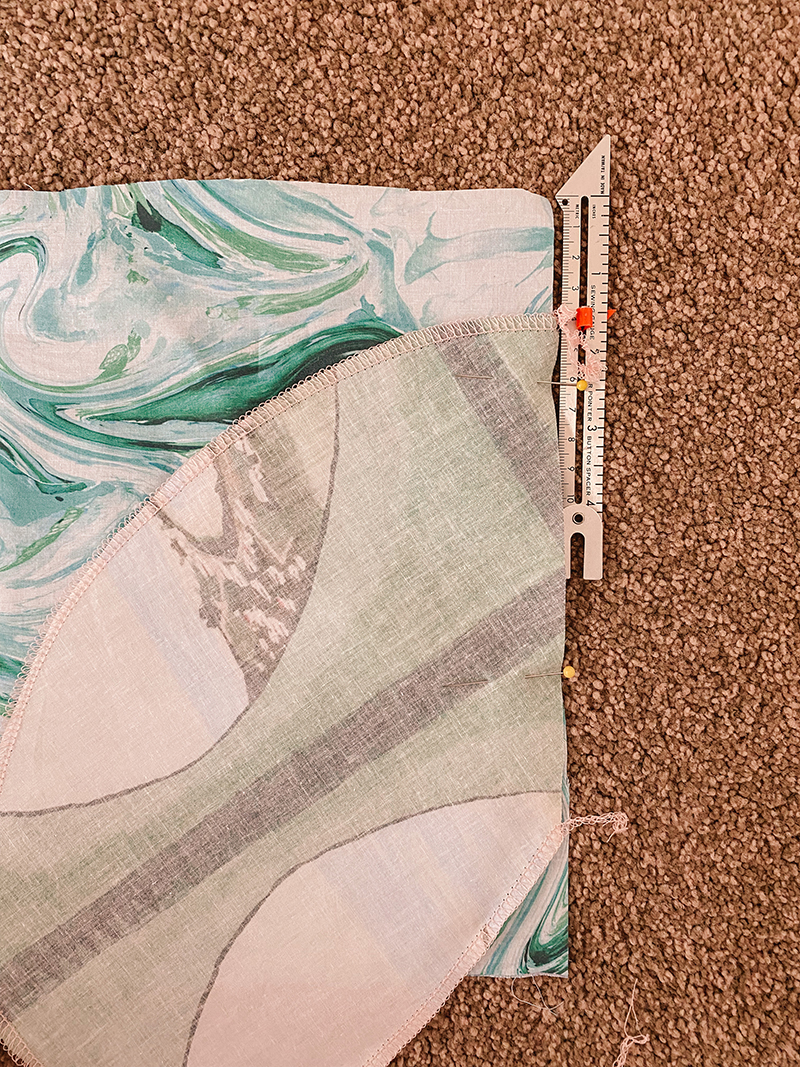
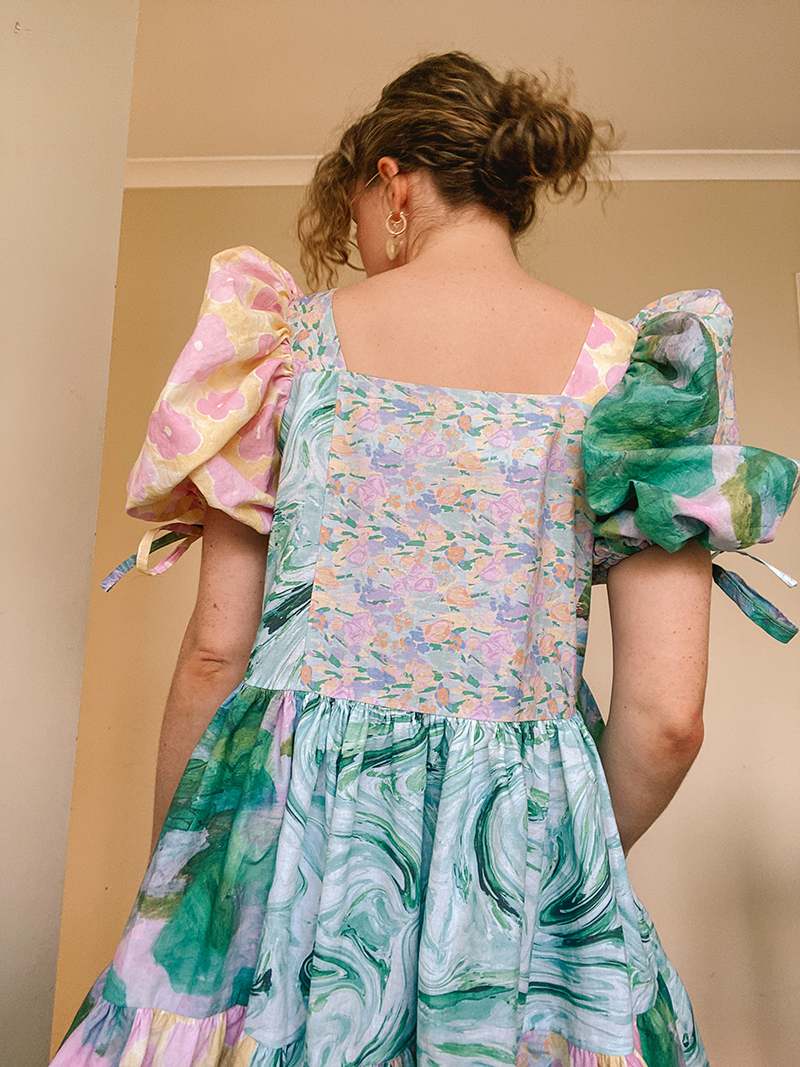
To begin I played with fabric placement until I was happy & then cut out a front and back bodice piece as well as front and back facings. At patchwork seams I overlocked them together & then sewed a straight stitch beside it to secure. (If you don’t have an overlocker you can use a zig zag stitch to finish edges, no problems.) You could topstitch this seam down too if you’re feeling fancy!
I then cut out two straps, testing them on myself to see what length they needed to be. You could definitely do bow straps if you’re wanting a sleeveless dress.
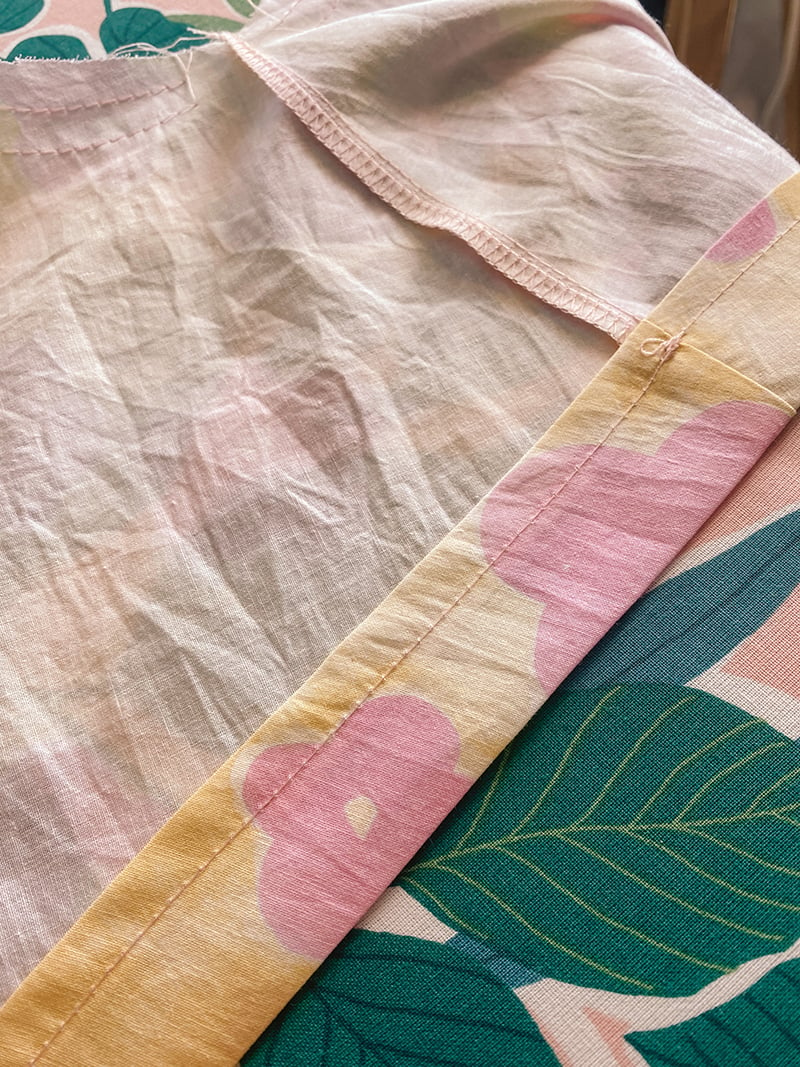
To attach the straps, I sandwiched them between the facing & bodice pieces. This part is a little tricky as you need to sandwich the straps at the front and back of the bodice – it will create a burrito like shape. Then I sewed all along the top of the bodice, securing everything. Turn right side out & give it a good press. Optional topstitch along the neckline if desired.
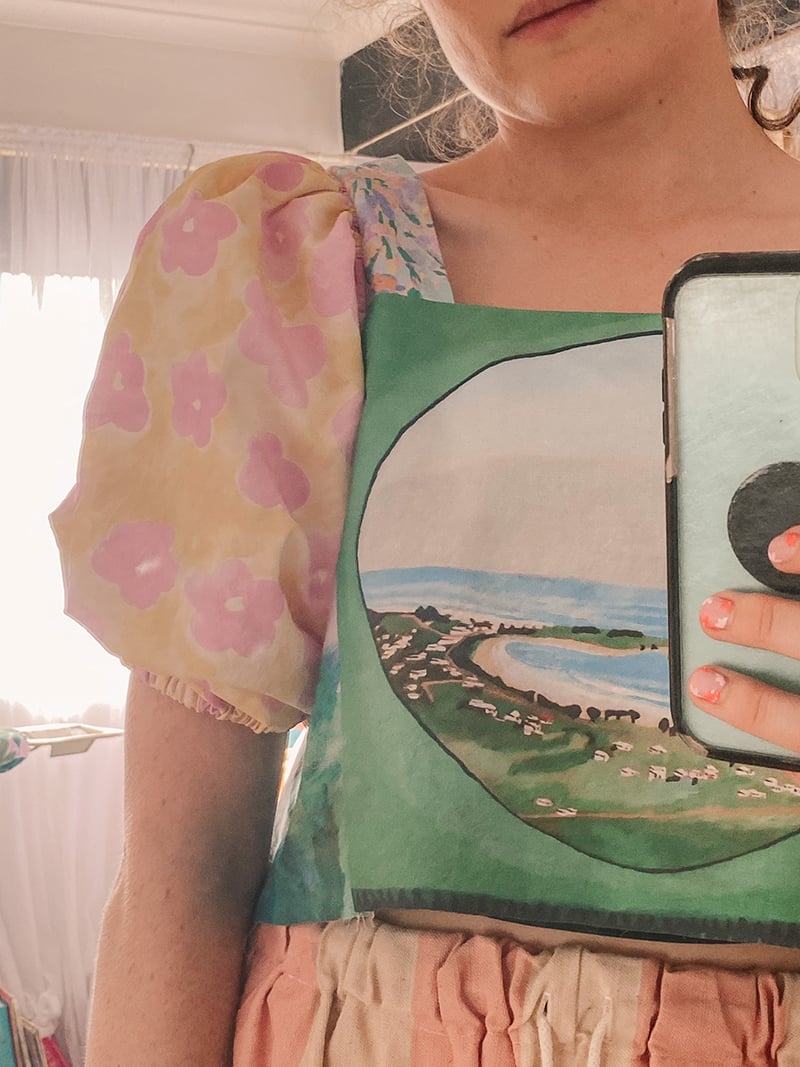
Next, I added puff sleeves! I made each sleeve different, with one sleeve featuring two different fabrics spliced together for that patchwork effect.
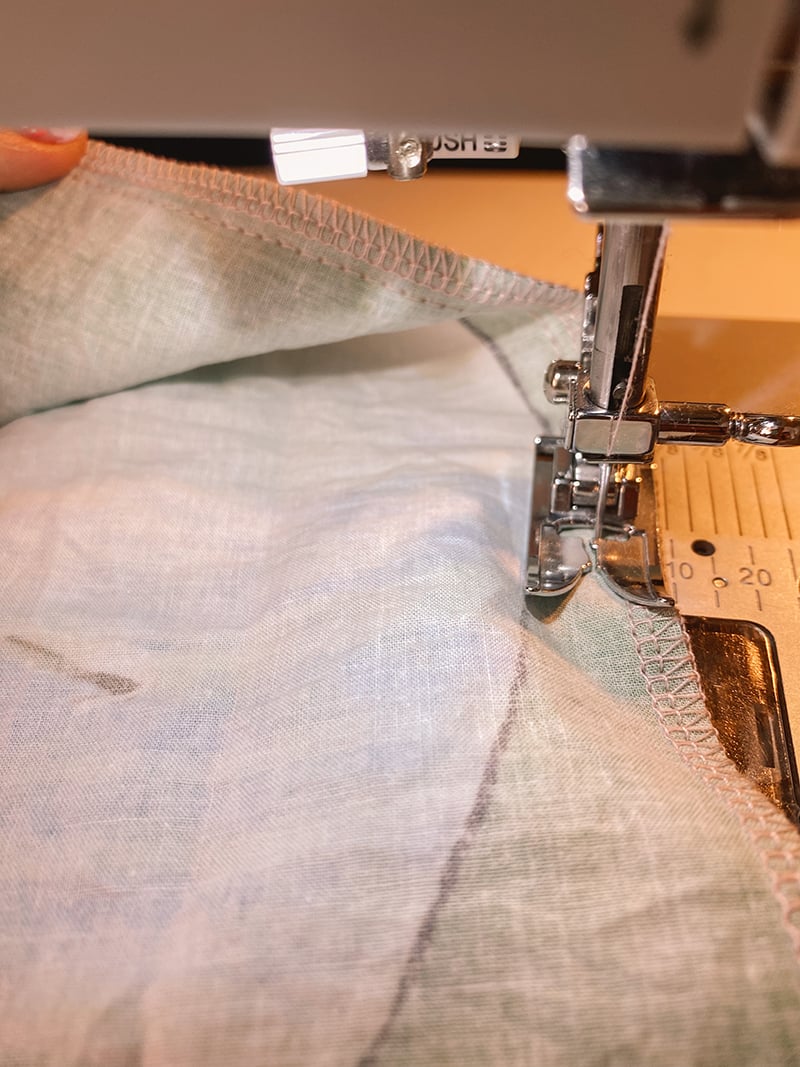
I cut two sleeves and sewed the side seam with fabric right sides together.
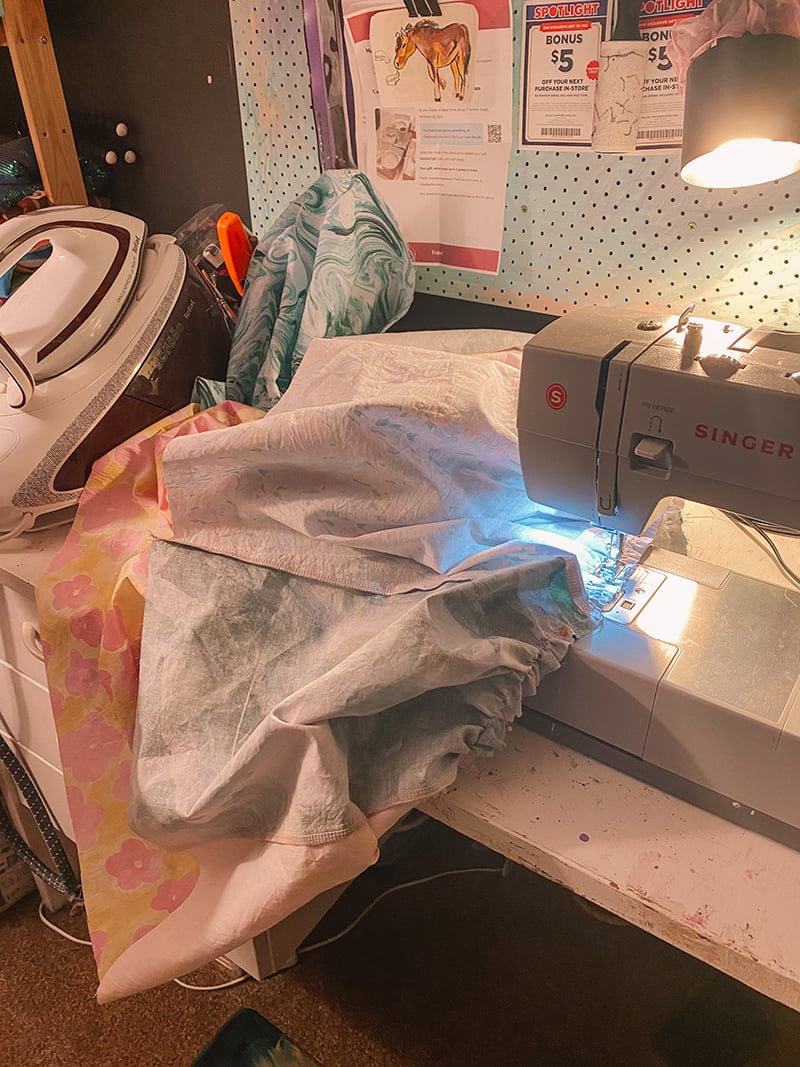
After pressing that seam, I turned up the bottom edge 1.5cm and sewed, and then turned it up again but this time leaving space for elastic to go through. (Leave a gap for that elastic to be threaded through as well! We’ll close it up later.)
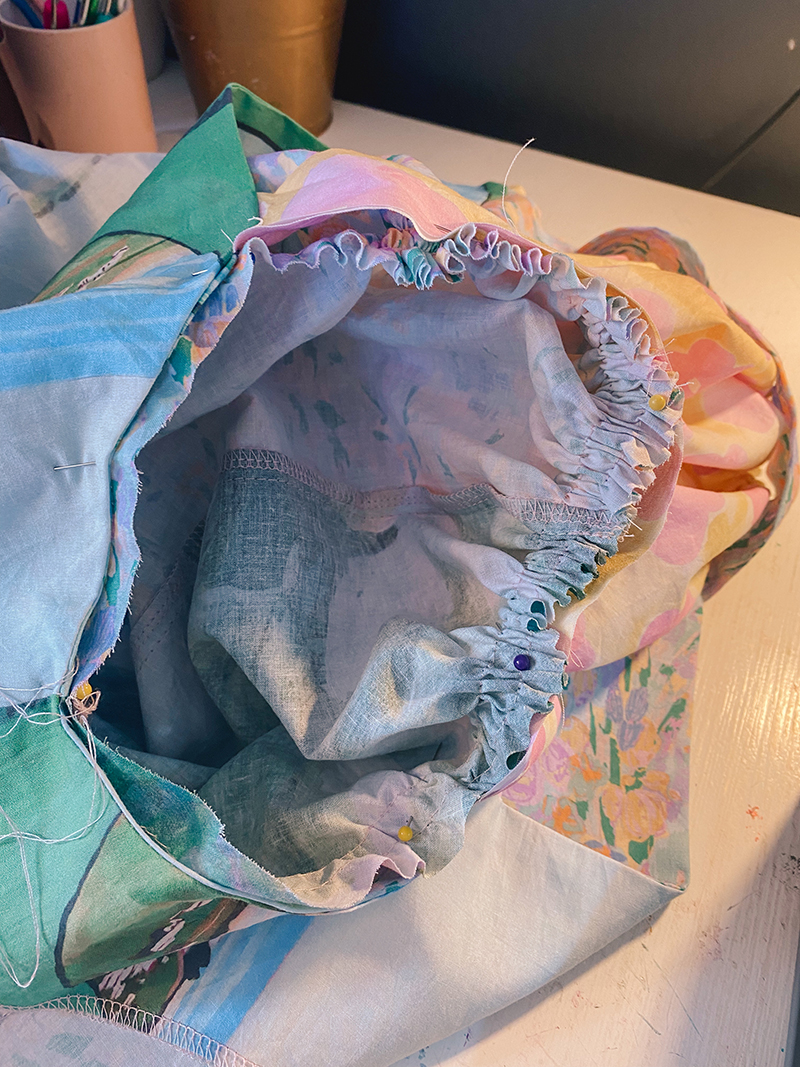
I then sewed two parallel lines in my longest stitch along the top of the sleeve & gathered it so it fit perfectly in my garment. I pinned the sleeve right sides together and stitched between the two stitches but this time in my regular stitch length. I overlocked this edge, removed my basting (or gathering) stitches and voila!
This is when I like to add the elastic which I just using a safety pin & threading it through. After the little opening is closed up the sleeve is DONE! YIPEE!! Revel in your sweet puff sleeves friend!
Side note: I later decided I wanted little ties threaded through the elastic channel of each sleeve. I cut thin strips of scrap fabric, folded in edges & then folded in half (like bias tape) and sewed them closed. I snipped tiny openings on the right side of the sleeve & threaded them through. There’s probably a better way to do this but that’s just how I did it.
Skirt time!! I am a sucker for a very gathered skirt, so I went a little overboard with the gathers in this one. I wanted a two-tier skirt with pockets and lots of volume, and boy is that what I got.
Basically, the process for the first tier and second tier were exactly the same, except the first tier has pockets, & the second tier has a hem & needs more fabric than the first.
For the first tier I cut strips of fabric from all of the different prints out to create two 170cm long panels that were 26cm wide. I also cut out 4 pockets.
I sewed and overlocked all of the patchwork pieces together so I had these
long strips. Then, I attached my pocket pieces (with edges overlocked) right sides together on my panels about 1.5 inches down. I overlocked the pockets on and pressed the seams towards the pockets and also did a lovely little topstitch to keep that looking flush and tidy. Then I attached the two skirt pieces together with right sides facing to make one big loops with pockets.
Woohoo!
To gather the skirt I sewed two parallel lines in the longest stitch length (sound familiar? hehe!) along the top edge of the skirt & pulled those stitches very gently until the skirt became the length of the bodice. I then pinned the skirt to the bodice, sewed it on, overlocked and removed the visible basting stitch.

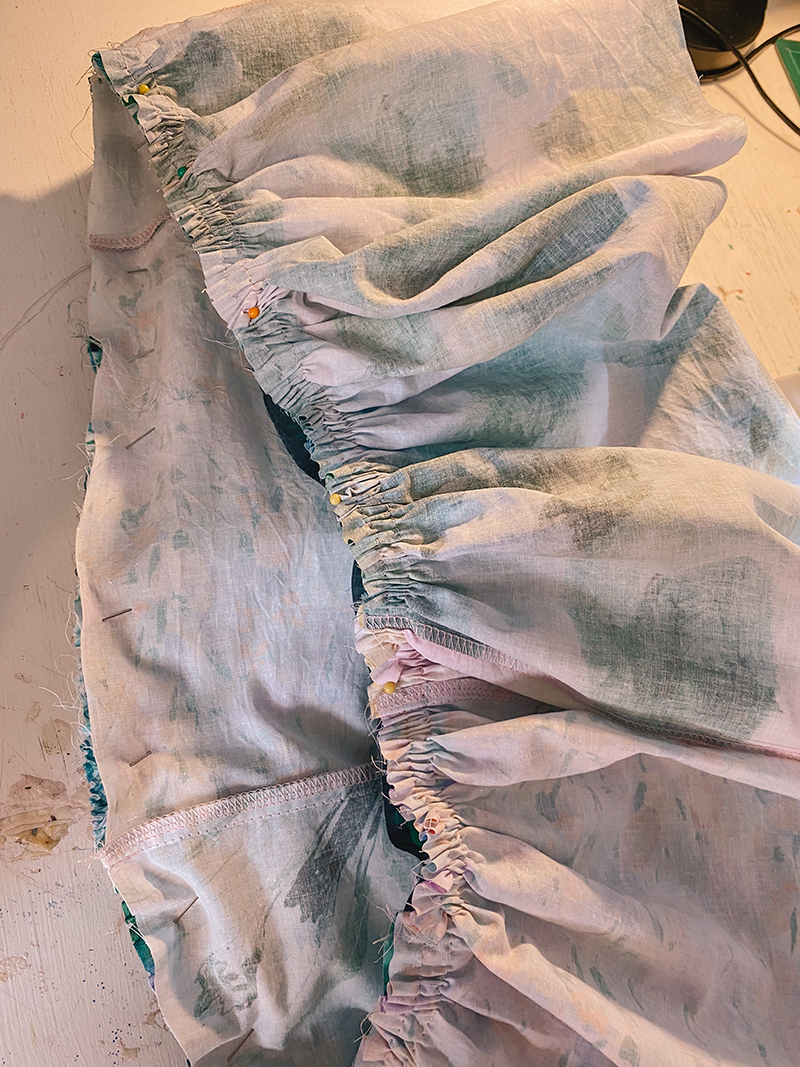
The 2nd tier is almost an identical process except it just requires a lot more fabric. I proceeded to cut out many more strips of fabric (this time at a longer width of about 32cm) and attach them all together to make a long strip. I didn’t measure this tier but it should be the top tier length x 1.5 at the very least. I estimate mine was about double the length. I sewed the gathering stitches again, gathered it up with upmost patience, pinned it to the 1st tier and sewed it on! I had to do the pinning a few times to ensure the pattern placement was as ideal as possible, as sometimes the fabrics would all end up matching & I really wanted there to be a difference between each section of the dress.
After a little playing I finally got the right balance however. The final step them was hemming it which I wizzed through & gave it a good press for a sweet crisp edge. And then she was done in all of her twirly, full skirt glory!!
From an array of divine fabrics to a sweet patchwork summertime party dress.
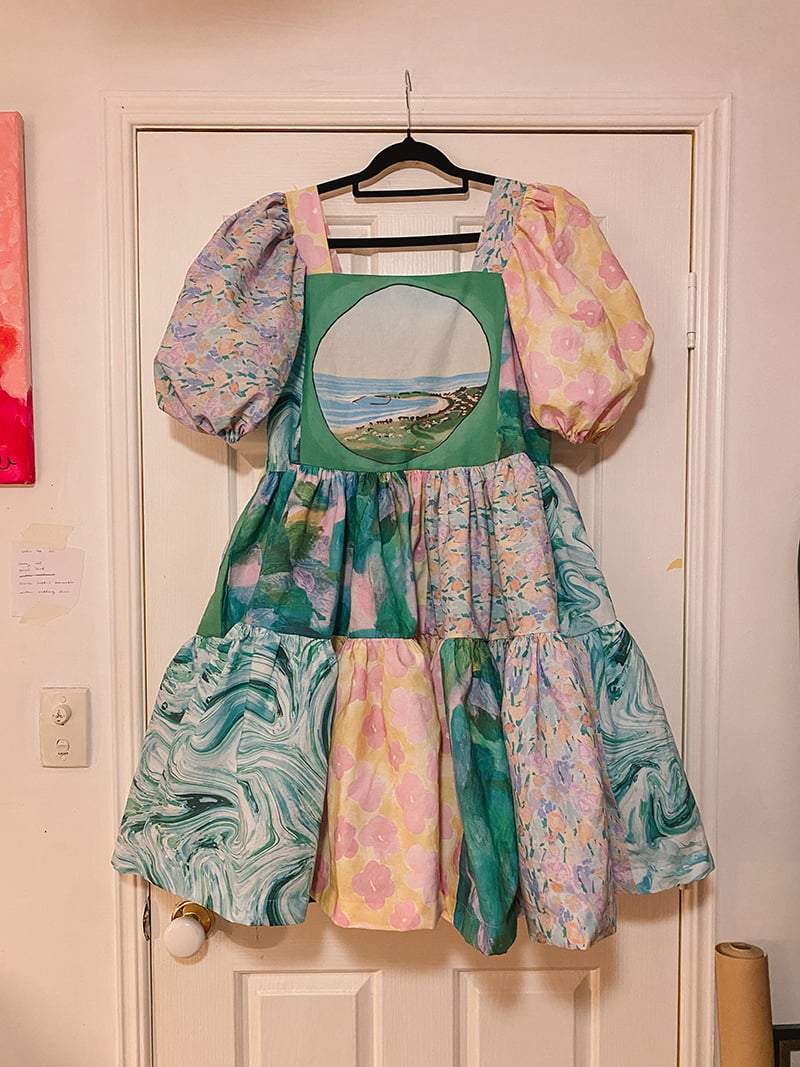
All in all, I adored bringing this piece to life. It was so inspiring to work with prints designed by such excellent artists & it felt like an honour to piece them together. The quality of the fabric and printing kept astounding me & I know I will be treasuring this piece for summers to come. From the swirls of the ocean, to the happy flowers that remind me of the sun & pink zinc & of course the centre piece of the dress which was The Shack print, I truly feel transported back to my favourite holiday destination – the beach.
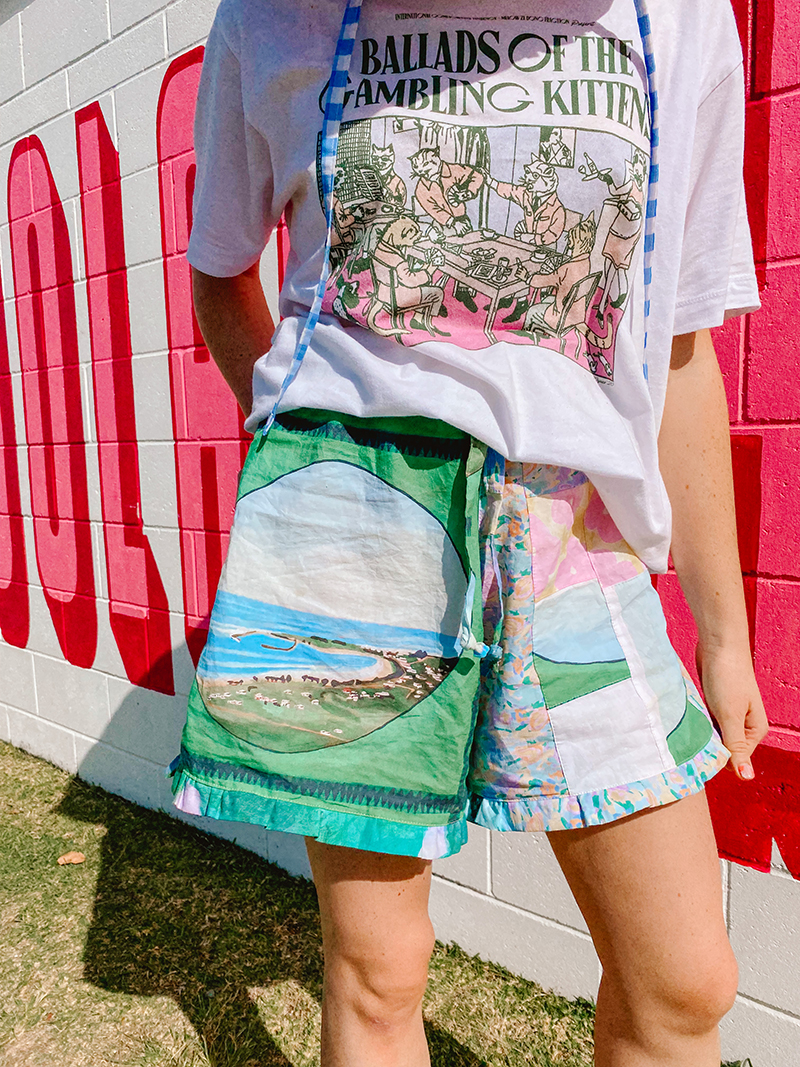
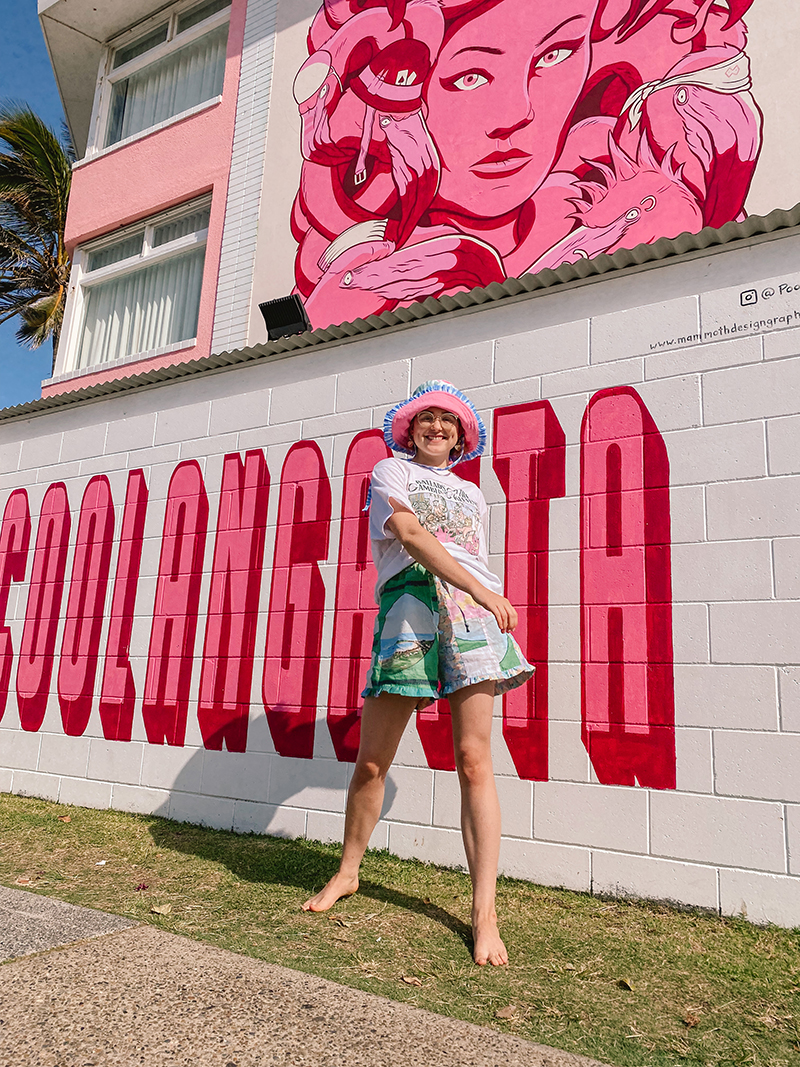
Bonus Scrap Busting Shorts!
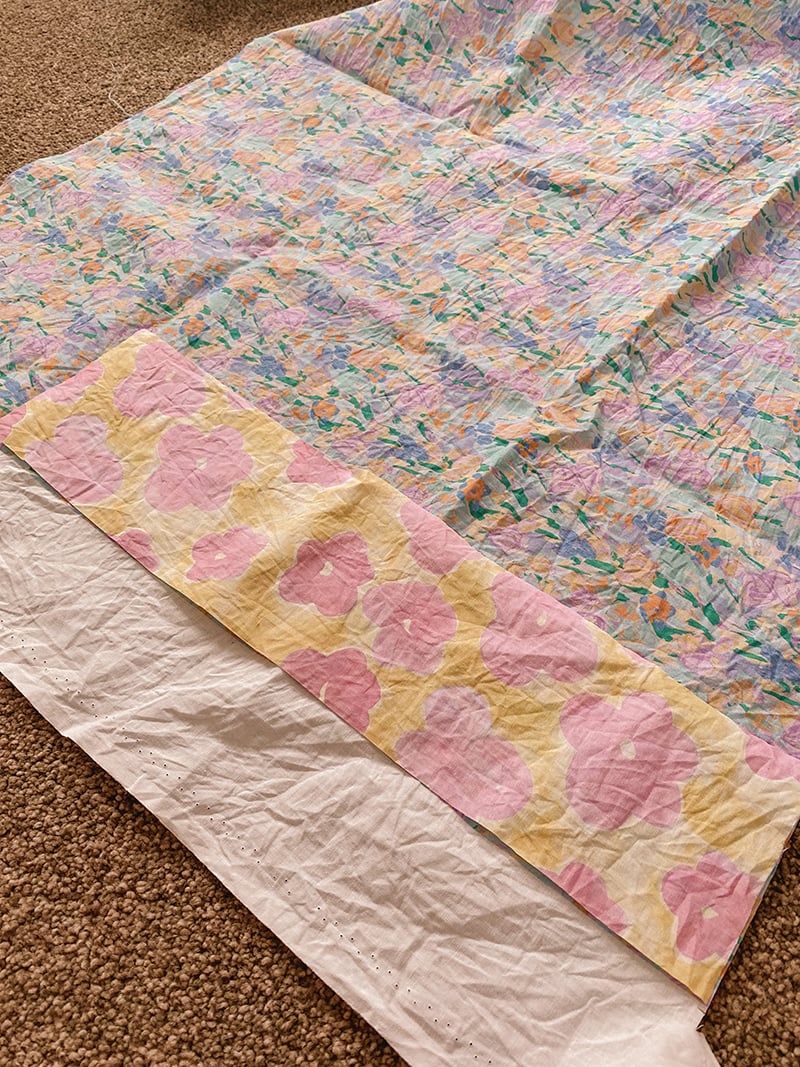
At the end of this project, I was blessed with a small treasure trove of delightful scraps & I knew I had to push myself to make them into something! I had to, not only because I love working with scraps, but because Digital Fabrics are no wastage and employ sustainable production methods themselves! Had to match that energy.
Digital Fabrics are print-to-order which means that every fabric that they print is used. They print ethically using non-toxic water-based inks & they boast of efficiency, quality & consistency with their product – which I have seen with my own eyes!
So, feeling inspired, I had to get to work on reducing my fabric waste with a scrappy pair of high waisted play shorts!
A great point of inspiration and reference for these shorts can be found at HalfSoyBean’s youtube channel! which I will link below!
I was able to make enough patchwork fabric from my Digital Fabrics scraps & was able to reduce my own fabric waste to a small pile of white selvage & some very small pieces. A huge success!
Thank you so much to Digital Fabrics for supplying this gorgeous, Australian designed & printed fabric. If you sewed along, please feel free to tag us @digitfalfabrics & @fromcarlyb & share your creations with us!