Snippets’. Chats with Creatives. Here at Digital Fabrics we love everything print, pattern and colour and we love to know what makes designers tick. This series is all about asking some fun and different questions and learning about the inspirations and ideas behind the artist and their work. We hope to inspire others by sharing snippets of these creative stories. We gave the artists and designers featured a varied list of questions to choose from so we will learn something new from everyone involved, should be fun!
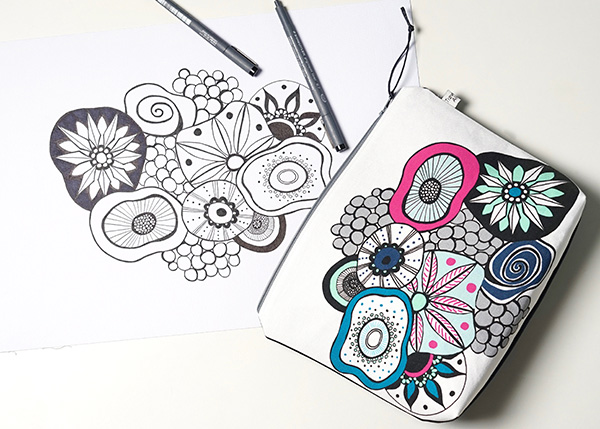
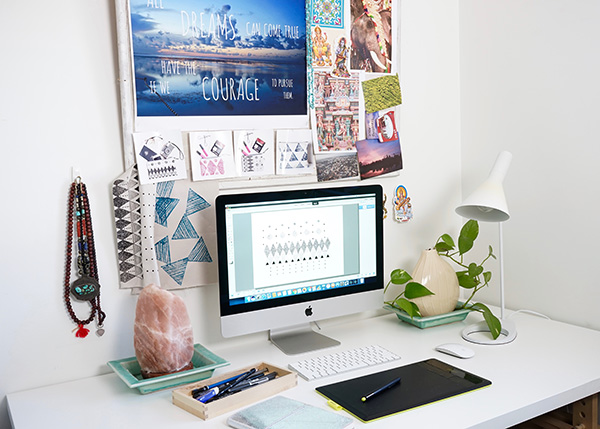
Today on Snippet’s we are talking to Sara Johnson, the artist behind ‘Travelling Alice’ a printmaker based in Sydney who designs and prints her own fabric before making it into unique accessories.
The Snippety Snips:
Tell us a bit about yourself and what your creative practice is, how and when you began:
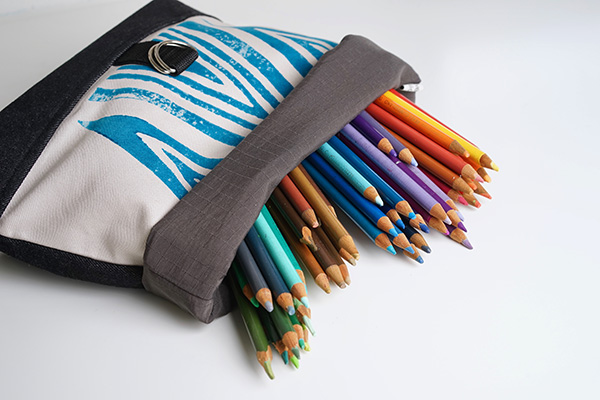
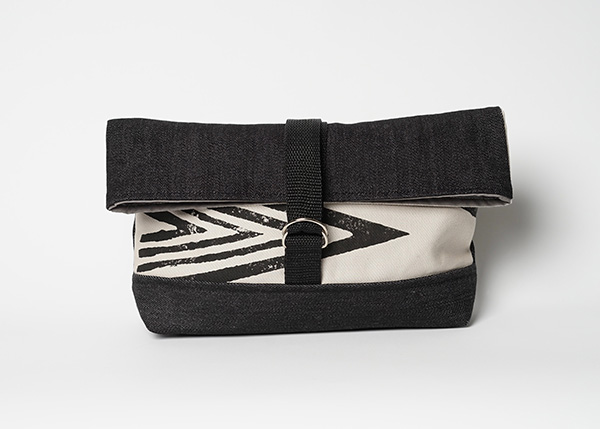
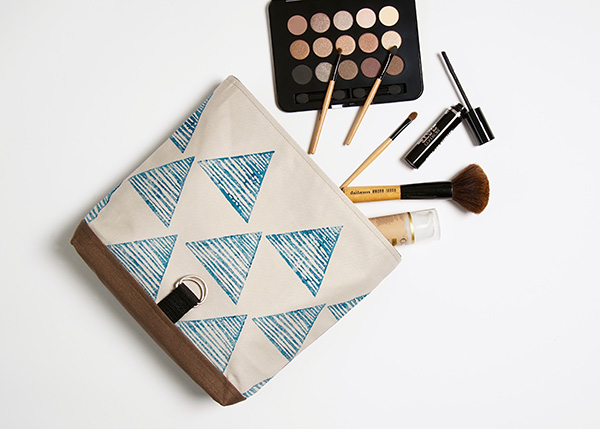
Travelling Alice is a range of hand printed travel accessories, made in my Sydney Studio.
I studied Fine Arts just out of High School as I just wanted to Draw, while there I learnt Printing (wow ) I could turn my drawings into prints.
At nineteen I got the opportunity to volunteer in India for three months, and this is where my love of fabrics and Crafts came from and of course my travelling obsession began, seeing all these amazing artist, crafts people. Traveling Alice Started from a need to make light weight and colourful travel accessories for myself and friends. I am such an organised traveller I like to pack things so they are easy to find but of course they have to look good as well.
 Which part of the creative process is your favourite and why?
Drawing drawing and drawing. My Mum is a sign writer so I have always been around pencils, pens and brushes my whole life so it feels as natural as eating. By the way I have the worst hand writing, so I did not get this talent.
How would you describe your work, and what influences your style?
I design fabric that I can sew into accessories. Travel definitely influences my style and my life. I became obsessed with it when I first travelled to India when I was 19. This was also where my love of Fabrics and pattern came from, you get exposed to colour and patterns, it’s a feast for the eyes.

 If you could have your portrait painted by any artist dead or alive, who would you choose?
Louise Bourgeois, that would be amazing and fun, she was known for her Sculptures but I love her printmaking. Louise Bourgeois was also known for her dry humour so we could have a laugh at the same time.
Love your Locals:
City/Town/Village where you currently reside:
Sydney South
Favourite spot for a bite:
I am a Coffee lover so food is a second thought so my favourite place to get coffee is White Horse Coffee in Sutherland
Secret Inspirational spot:
To be honest I find inspiration anywhere and anytime of the day or night. I have numerous note books so I can quickly write the inspiration down.
 You can follow what Sara is upto: Website, Instagram, Facebook
Snippets’. Chats with Creatives. Here at Digital Fabrics we love everything print, pattern and colour and we love to know what makes designers tick. This series is all about asking some fun and different questions and learning about the inspirations and ideas behind the artist and their work. We hope to inspire others by sharing snippets of these creative stories. We gave the artists and designers featured a varied list of questions to choose from so we will learn something new from everyone involved, should be fun!
Today on Snippet’s we are talking to Sara Johnson, the artist behind ‘Travelling Alice’ a printmaker based in Sydney who designs and prints her own fabric before making it into unique accessories.
The Snippety Snips:
Tell us a bit about yourself and what your creative practice is, how and when you began:
Travelling Alice is a range of hand printed travel accessories, made in my Sydney Studio.
I studied Fine Arts just out of High School as I just wanted to Draw, while there I learnt Printing (wow ) I could turn my drawings into prints.
At nineteen I got the opportunity to volunteer in India for three months, and this is where my love of fabrics and Crafts came from and of course my travelling obsession began, seeing all these amazing artist, crafts people. Traveling Alice Started from a need to make light weight and colourful travel accessories for myself and friends. I am such an organised traveller I like to pack things so they are easy to find but of course they have to look good as well.
Which part of the creative process is your favourite and why?
Drawing drawing and drawing. My Mum is a sign writer so I have always been around pencils, pens and brushes my whole life so it feels as natural as eating. By the way I have the worst hand writing, so I did not get this talent.
How would you describe your work, and what influences your style?
I design fabric that I can sew into accessories. Travel definitely influences my style and my life. I became obsessed with it when I first travelled to India when I was 19. This was also where my love of Fabrics and pattern came from, you get exposed to colour and patterns, it’s a feast for the eyes.
If you could have your portrait painted by any artist dead or alive, who would you choose?
Louise Bourgeois, that would be amazing and fun, she was known for her Sculptures but I love her printmaking. Louise Bourgeois was also known for her dry humour so we could have a laugh at the same time.
Love your Locals:
City/Town/Village where you currently reside:
Sydney South
Favourite spot for a bite:
I am a Coffee lover so food is a second thought so my favourite place to get coffee is White Horse Coffee in Sutherland
Secret Inspirational spot:
To be honest I find inspiration anywhere and anytime of the day or night. I have numerous note books so I can quickly write the inspiration down.
You can follow what Sara is upto: Website, Instagram, Facebook
Snippets’. Chats with Creatives. Here at Digital Fabrics we love everything print, pattern and colour and we love to know what makes designers tick. This series is all about asking some fun and different questions and learning about the inspirations and ideas behind the artist and their work. We hope to inspire others by sharing snippets of these creative stories. We gave the artists and designers featured a varied list of questions to choose from so we will learn something new from everyone involved, should be fun!
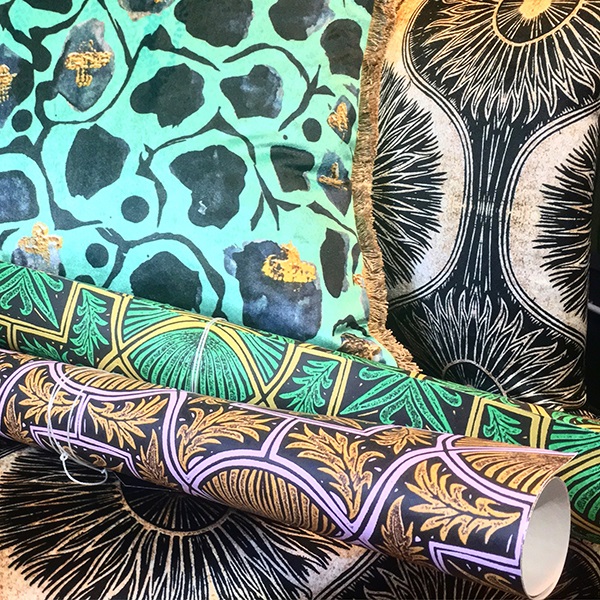
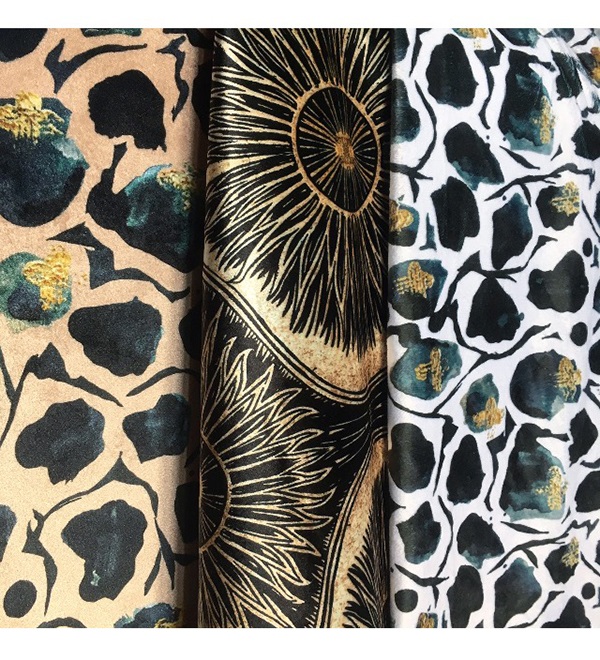
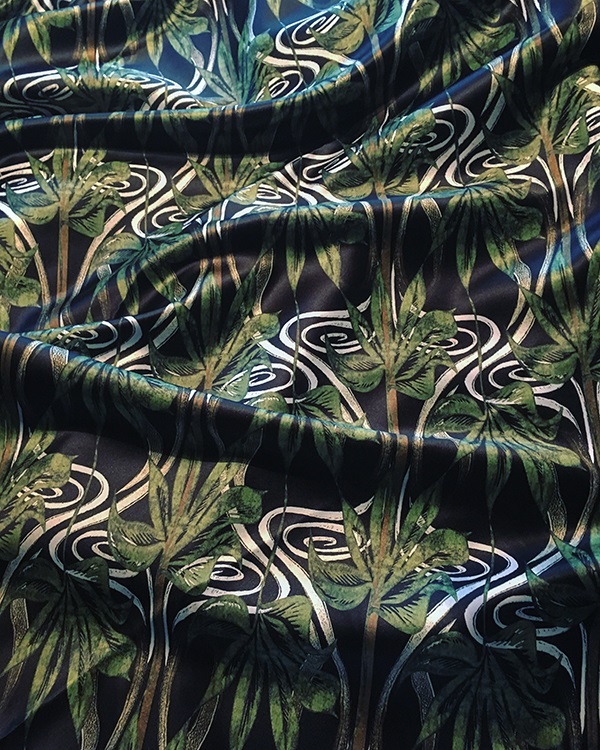
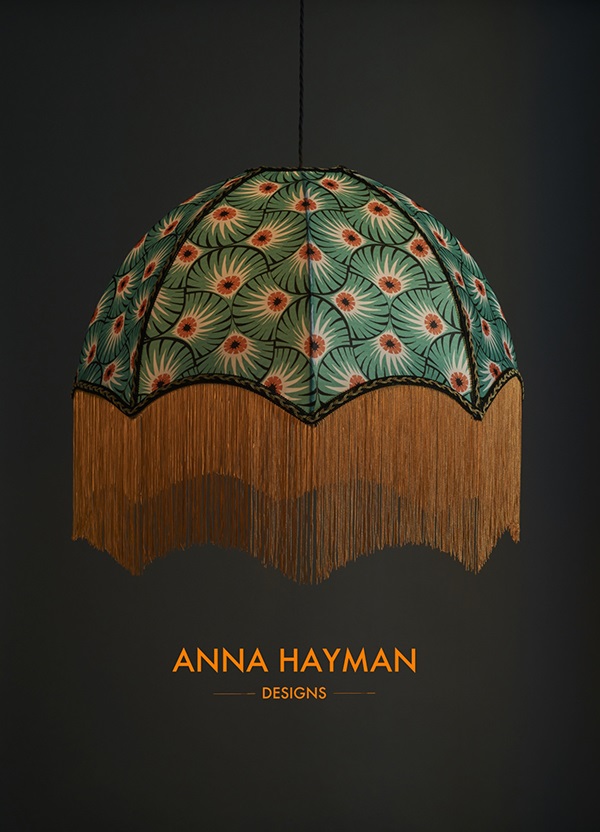
Today on Snippet’s we are talking to Anna Hayman, a UK based print designer who creates fabrics, wallpaper and other homewares from original lino printing and ink drawings. Her work is influenced by the art and craft era as well as the sixties and seventies which is clear in her current work.
 The Snippety Snips:
Tell us a bit about yourself and what your creative practice is, how and when you began:
I am a British print designer specialising in printed lampshades, wallpapers, fabrics and cushions. I create my designs from linoprints and ink paintings. I began trading in February 2016
Which part of the creative process is your favourite and why?
My favourite part is transforming artwork – in my case a Lino print or an ink painting – into a pattern. Pattern is my utter obsession so creating repeat designs from artwork is a really exciting point for me, often there are literally endless possibilities of how it can be repeated, mirrored or formed, and seeing that take shape is completely thrilling. That comes just before the worst part, getting the pattern to repeat, which can take forever and is truly boring! Luckily I’m a bit of a geek 🙂
How would you describe your work, and what influences your style? I would describe my work as half hippy, half traditionalist, intricate, relaxed and colourful. I’m influenced by old English styles, I visit a lot of old places, and 1920’s places, but also love Bohemian 70’s style. Creatives I’m influenced by are Celia Birtwell, Biba, The Bloomsbury Group, Olaf Hajek, Aubrey Beardsley and many more.
 In another life what natural talent would you wish for?
Writing! I have been reading a lot about the lives of writers recently and I must say it does seem an appealing occupation. I’ve always told myself I am terrible at writing, especially copy, but really I just haven’t had the space to explore it. I would love to take a summer learning how to construct a book, for instance.
Which other Australian designers, artists or creative people are you enjoying at the moment?
Estelle Briedis, for her exacting palettes of colour, Nine Lives Bazaar for their beautiful brand building skills and photography, and Instagram legend @labohemehouseofthewishingtrees for her inspiring and abundant use of brights with white, and layering of textures.
If you could only use one colour in your work what would it be?
Hard question! But I’m crushing hard on jade at the moment, a sort of greenish turquoise, a colour which can be hot and cool, and quenching somehow. I’d find it hard to live without orange though, deep vibrant orange, warm and fresh at the same time.
 If you could have your portrait painted by any artist dead or alive, who would you choose?
Lucian Freud, not just because I love his work (I love flat looking paintings with a lot of detail) but because I feel I have the right sort of face for his portraiture.
Which five words best describe you?
English, rebellious, clever, arty, fun.
Love your Locals:
City/Town/Village where you currently reside:
Ringmer in Sussex, England.
Favourite spot for a bite:
Any good seafood restaurant, or sushi place.
Secret Inspirational spot:
Charleston farmhouse, the Bloomsbury group country house hotspot of the 1920’s, which is 15 minutes from where I live.
You can follow what Anna is upto: Website, Instagram, Facebook
We are right in the middle of a gorgeous Sydney Summer, and for most of us have gone back to work after a (hopefully) relaxing festive break. What better way to feel like we’re still on holidays than with the launch of a new range of summery prints- our Tropicana range. Time to take a very grown up trip to the tropics!
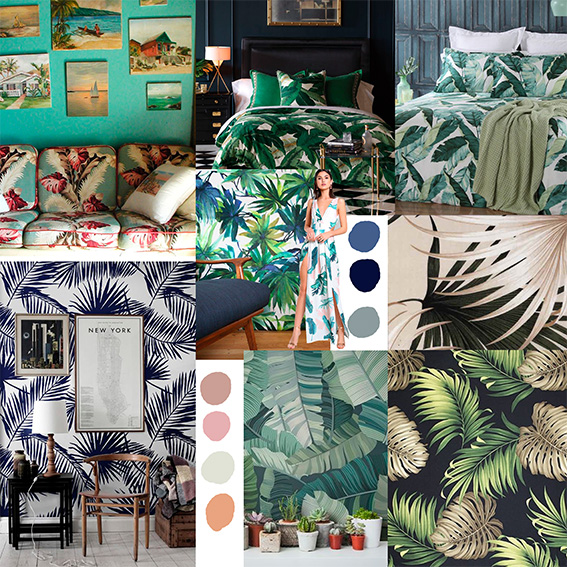
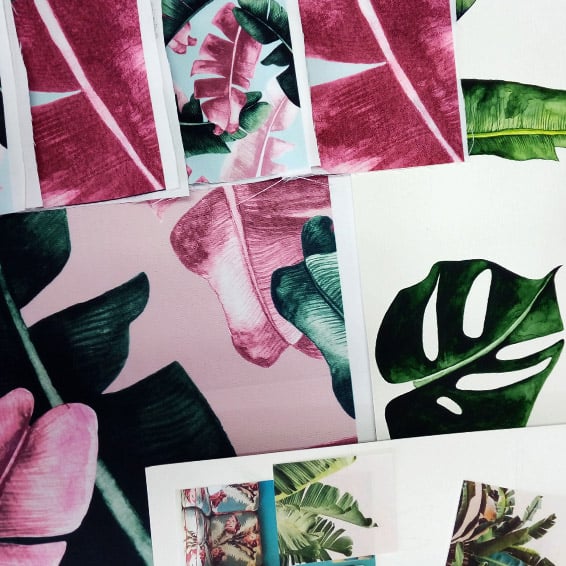
All of the designs began by taking inspiration from tropical flora and carefully hand painting a series of detailed Banana Palms and Monstera leaves. At Digital Fabrics we love all things textural, and by using one of our favourite mediums, watercolours, we were able to create really luscious leaf motifs to start creating textile designs from.
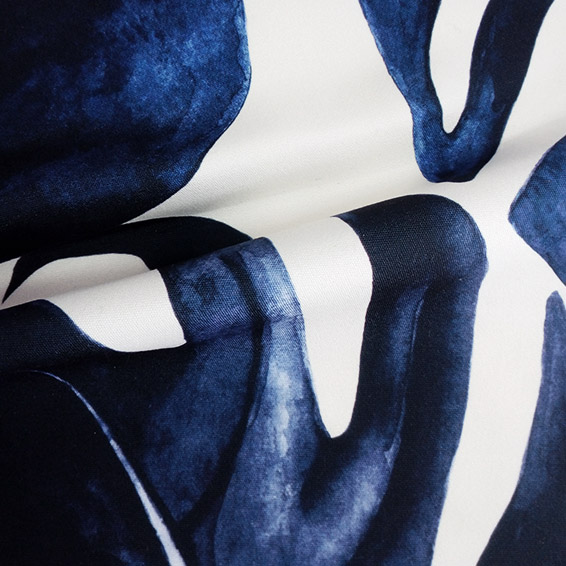
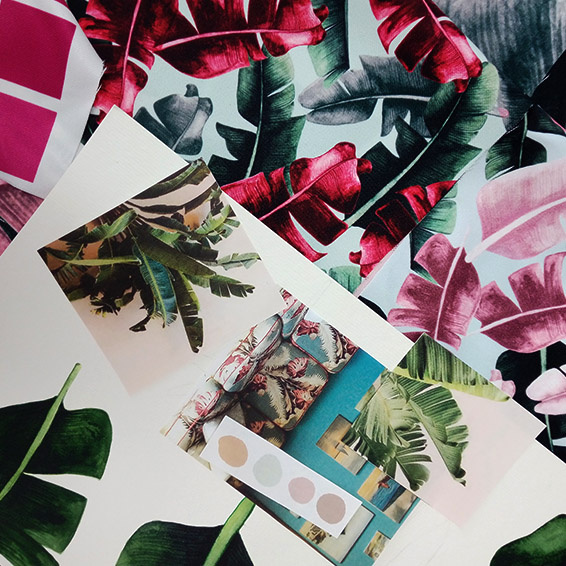
We wanted to rework classic tropical designs to create elegant and accessible prints. To achieve this we determined each design as a large scale print to celebrate the gorgeous watercolour aesthetic. We then primarily used a colour palette of contrasting neutrals with muted colours such as blush pink and sage to ensure the designs as timeless.
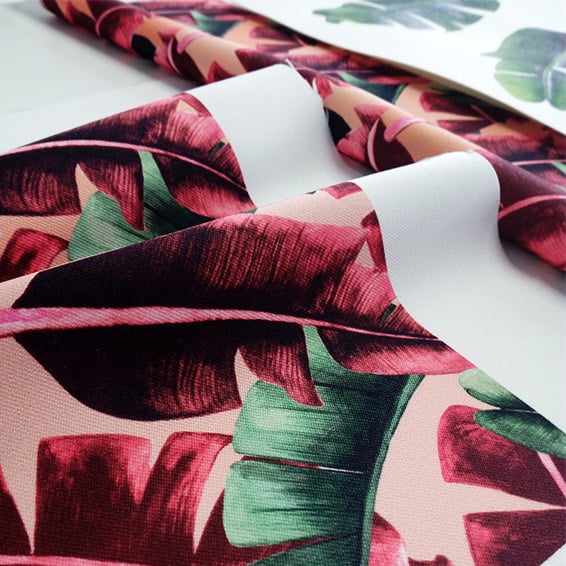
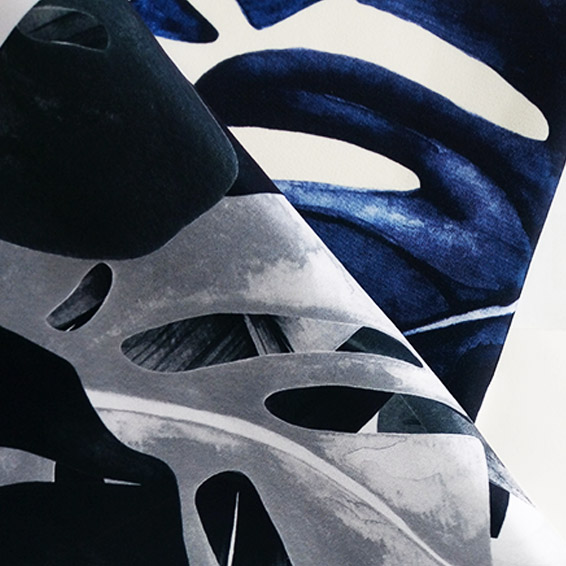
We see these designs being suitable for both interiors and fashion and just looking at these new prints has us dreaming about fabulous statement curtains or retro swimsuit designs. We’d love to hear about the kind of project you envision these designs for!
The Tropicana Collection is available for purchase in our Design Library!
Snippets’. Chats with Creatives. Here at Digital Fabrics we love everything print, pattern and colour and we love to know what makes designers tick. This series is all about asking some fun and different questions and learning about the inspirations and ideas behind the artist and their work. We hope to inspire others by sharing snippets of these creative stories. We gave the artists and designers featured a varied list of questions to choose from so we will learn something new from everyone involved, should be fun!
Today on Snippet’s we are talking to Anna Hayman, a UK based print designer who creates fabrics, wallpaper and other homewares from original lino printing and ink drawings. Her work is influenced by the art and craft era as well as the sixties and seventies which is clear in her current work.
The Snippety Snips:
Tell us a bit about yourself and what your creative practice is, how and when you began:
I am a British print designer specialising in printed lampshades, wallpapers, fabrics and cushions. I create my designs from linoprints and ink paintings. I began trading in February 2016
Which part of the creative process is your favourite and why?
My favourite part is transforming artwork – in my case a Lino print or an ink painting – into a pattern. Pattern is my utter obsession so creating repeat designs from artwork is a really exciting point for me, often there are literally endless possibilities of how it can be repeated, mirrored or formed, and seeing that take shape is completely thrilling. That comes just before the worst part, getting the pattern to repeat, which can take forever and is truly boring! Luckily I’m a bit of a geek 🙂
How would you describe your work, and what influences your style? I would describe my work as half hippy, half traditionalist, intricate, relaxed and colourful. I’m influenced by old English styles, I visit a lot of old places, and 1920’s places, but also love Bohemian 70’s style. Creatives I’m influenced by are Celia Birtwell, Biba, The Bloomsbury Group, Olaf Hajek, Aubrey Beardsley and many more.
In another life what natural talent would you wish for?
Writing! I have been reading a lot about the lives of writers recently and I must say it does seem an appealing occupation. I’ve always told myself I am terrible at writing, especially copy, but really I just haven’t had the space to explore it. I would love to take a summer learning how to construct a book, for instance.
Which other Australian designers, artists or creative people are you enjoying at the moment?
Estelle Briedis, for her exacting palettes of colour, Nine Lives Bazaar for their beautiful brand building skills and photography, and Instagram legend @labohemehouseofthewishingtrees for her inspiring and abundant use of brights with white, and layering of textures.
If you could only use one colour in your work what would it be?
Hard question! But I’m crushing hard on jade at the moment, a sort of greenish turquoise, a colour which can be hot and cool, and quenching somehow. I’d find it hard to live without orange though, deep vibrant orange, warm and fresh at the same time.
If you could have your portrait painted by any artist dead or alive, who would you choose?
Lucian Freud, not just because I love his work (I love flat looking paintings with a lot of detail) but because I feel I have the right sort of face for his portraiture.
Which five words best describe you?
English, rebellious, clever, arty, fun.
Love your Locals:
City/Town/Village where you currently reside:
Ringmer in Sussex, England.
Favourite spot for a bite:
Any good seafood restaurant, or sushi place.
Secret Inspirational spot:
Charleston farmhouse, the Bloomsbury group country house hotspot of the 1920’s, which is 15 minutes from where I live.
You can follow what Anna is upto: Website, Instagram, Facebook
Snippets’. Chats with Creatives. Here at Digital Fabrics we love everything print, pattern and colour and we love to know what makes designers tick. This series is all about asking some fun and different questions and learning about the inspirations and ideas behind the artist and their work. We hope to inspire others by sharing snippets of these creative stories. We gave the artists and designers featured a varied list of questions to choose from so we will learn something new from everyone involved, should be fun!
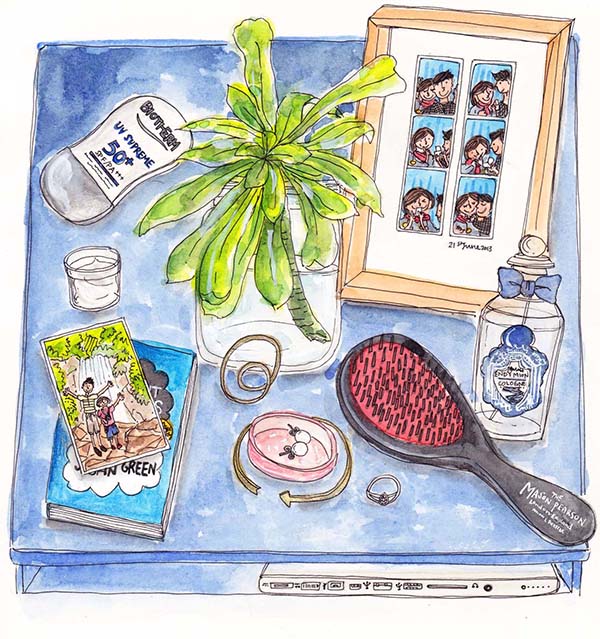
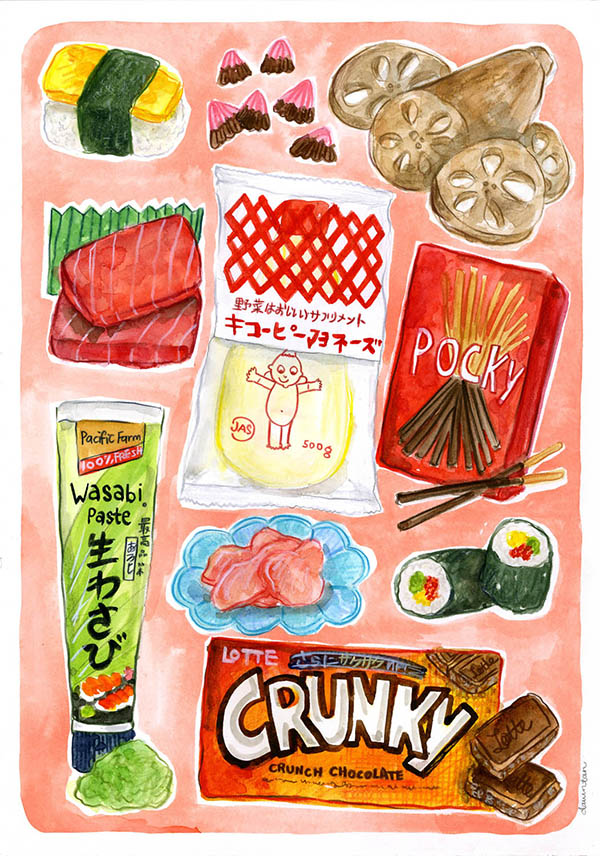
Today on Snippet’s we are talking to Dawn Tan. Melbourne based artist, soap maker and teacher who’s colourful work is inspired by travel and grocery shopping among other things..
 Tell us a bit about yourself and what your creative practice is, how and when you began:
Hello! My name is Dawn Tan and I’m an artist, soap maker and teacher! As a young child, I’ve always loved art and knew I wanted to pursue and art career. I guess being terrible at everything else apart from art, helped me discover that being creative was my thing. Hah! I discovered teaching many moons ago, while doing research for a children’s book I was creating and I ended up falling in love with it! To me, being able to teach and share my love for art – that’s simply the best so I just keep doing what I do! Our world needs more art so the more people share, the merrier!
Which five words best describe you? Funny, dreamy, kiddy, happy and hmmm.. CLUMSY! (The kids often have to catch my flying paintbrushes!)
 If you could spend a day in another artist’s studio shoes who would that artist be?
No doubt, Quentin Blake. He’s my number one art hero and I absolutely LOVE the way he paints and creates. If I could watch him on you tube all day, I could definitely use a visit to his studio!
In another life what natural talent would you wish for?
To fly! Although I must say, I’m pretty scared of heights. Actually no. Scrap that. I’d love to be able to blink my eyes and teleport. I looooove traveling but hate the flying part. I get all anxious like a headless chook. So to be able to teleport (for free!) – that’d be super awesome. This way, I can go visit whatever place on earth I’d wish to go and I can get so much more inspiration.
 Love your Locals:
City/Town/Village where you currently reside:
Sunny Yarraville in Melbourne.
Favourite spot for a bite:
Corner store, Goje for the best, healthy yoghurts!
Secret Inspirational spot:
Pompello – My local green grocer. Haha! It’s a tiny little spot but it’s such a happy place for me. I find so much of my inspiration through grocery shopping.
 You can follow what Dawn is upto: Website, Instagram, Facebook
Snippets’. Chats with Creatives. Here at Digital Fabrics we love everything print, pattern and colour and we love to know what makes designers tick. This series is all about asking some fun and different questions and learning about the inspirations and ideas behind the artist and their work. We hope to inspire others by sharing snippets of these creative stories. We gave the artists and designers featured a varied list of questions to choose from so we will learn something new from everyone involved, should be fun!
Today on Snippet’s we are talking to Dawn Tan. Melbourne based artist, soap maker and teacher who’s colourful work is inspired by travel and grocery shopping among other things..
Tell us a bit about yourself and what your creative practice is, how and when you began:
Hello! My name is Dawn Tan and I’m an artist, soap maker and teacher! As a young child, I’ve always loved art and knew I wanted to pursue and art career. I guess being terrible at everything else apart from art, helped me discover that being creative was my thing. Hah! I discovered teaching many moons ago, while doing research for a children’s book I was creating and I ended up falling in love with it! To me, being able to teach and share my love for art – that’s simply the best so I just keep doing what I do! Our world needs more art so the more people share, the merrier!
Which five words best describe you? Funny, dreamy, kiddy, happy and hmmm.. CLUMSY! (The kids often have to catch my flying paintbrushes!)
If you could spend a day in another artist’s studio shoes who would that artist be?
No doubt, Quentin Blake. He’s my number one art hero and I absolutely LOVE the way he paints and creates. If I could watch him on you tube all day, I could definitely use a visit to his studio!
In another life what natural talent would you wish for?
To fly! Although I must say, I’m pretty scared of heights. Actually no. Scrap that. I’d love to be able to blink my eyes and teleport. I looooove traveling but hate the flying part. I get all anxious like a headless chook. So to be able to teleport (for free!) – that’d be super awesome. This way, I can go visit whatever place on earth I’d wish to go and I can get so much more inspiration.
Love your Locals:
City/Town/Village where you currently reside:
Sunny Yarraville in Melbourne.
Favourite spot for a bite:
Corner store, Goje for the best, healthy yoghurts!
Secret Inspirational spot:
Pompello – My local green grocer. Haha! It’s a tiny little spot but it’s such a happy place for me. I find so much of my inspiration through grocery shopping.
You can follow what Dawn is upto: Website, Instagram, Facebook
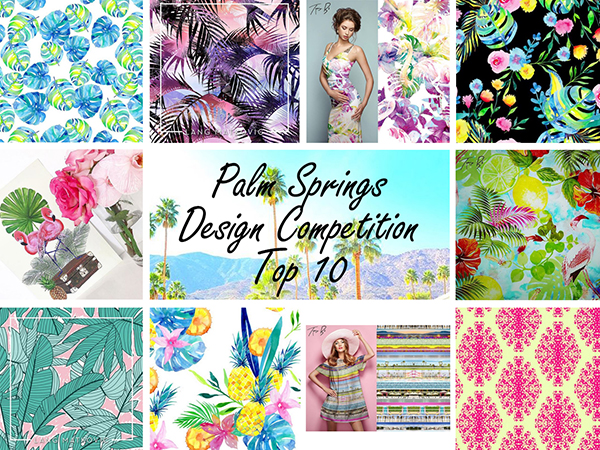
Thank you to everyone who entered our ‘Palm Springs’ design competition, we had so many great entries and loved all the different design styles and mediums used to create them. It was a difficult decision choosing the winners but we are happy to announce them today!
The top Ten were chosen by you the public :
 The team at DF have chosen the following designs as the 1st, 2nd and 3rd prize winners:
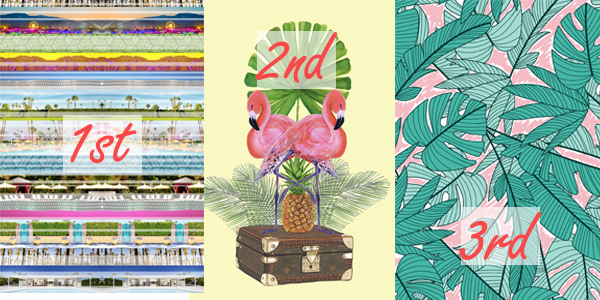
1st Prize goes to Tyago BK – This design was inspired by photographs taken of Palm Springs landscape and architecture.
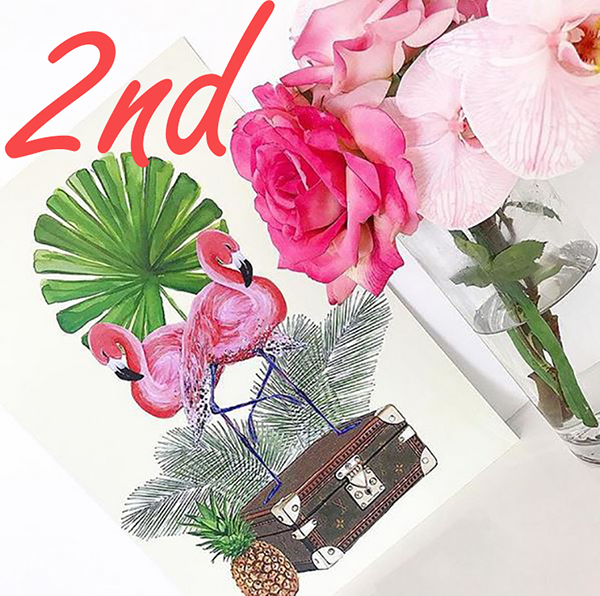
2nd Prize goes to Sandra K Stewart – This design was inspired by it’s shopping district, vintage boutiques and fashionista vibe including the Coachella festival.
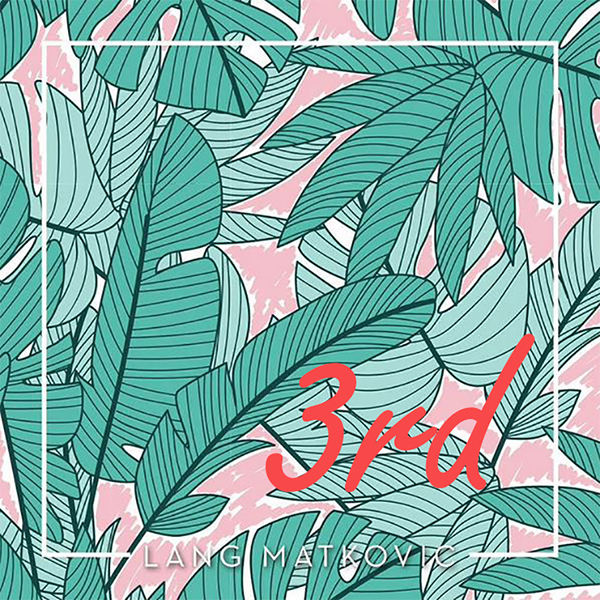
3rd Prize goes to Lang Matkovic – This design was inspired by a pastel coloured palette and the palms of palm springs.
 The prizes are as follows:
Tyago BK
1st Prize $250 worth of custom printing and a 45cm x 45cm cushion with the winning design artwork on it.
 Sandra K Stewart
2nd Prize $100 of custom printing and a 45cm x 45cm cushion with the winning design artwork on it.
 Lang Matkovic
3rd Prize $50 worth of custom printing and a 45cm x45cm cushion with the winning design artwork on it.
 Thank you to everyone who entered, we are always blown away by the talent in the designs. We shall of course do another one next year so keep your eyes peeled.
Stay creative!
DF team.
Exciting news! We have a new competition for all Textile designers out there, budding or experienced. The theme is ‘Palm Springs’. We know, fun right?
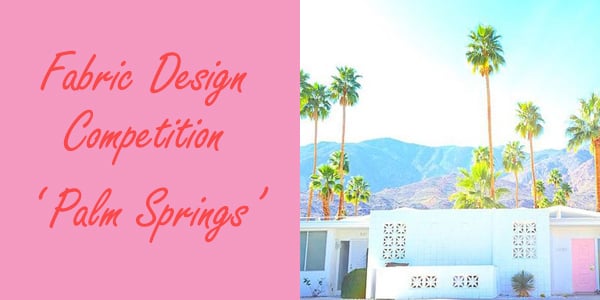
Create a fabric design for ‘interiors’ or ‘fashion’ inspired by ‘Palm Springs’ using any method you want. This could be photograph, paint, collage, sketch and could be based on colour, texture, architecture or landscape, there are no boundaries. Let your creativity GO WILD!
There will be 3 winners:
1st Prize will receive $250 worth of custom printing on a fabric from our stock plus a 45cm x 45cm cushion on waratah with their winning design, insert included.
2nd Prize will receive $100 worth of custom printing on a fabric plus a 45cm x 45cm cushion on waratah with their winning design, insert included.
3rd Prize will receive $50 worth of custom printing on a fabric plus a 45cm x 45cm cushion on waratah with their winning design, insert included.
All top ten designs will receive a strike-off of their design.
How it works:
Create it. Design it. Share it! Get your friends to share it too.
Why?
The top 10 designs will be voted for by the public, so share your designs with your friends, get them voting for you!
From the Top 10, there will also be one public voted winner, this will be the design that gets the most likes and the prize will be one 45cm x 45cm cushion with their design. Yay!
The competition will open on Saturday 21st October and close on Thursday 16th November at 9am Eastern Standard Time. All voting will close at 9am Eastern Standard Time Monday 20th November.
Top 10 will be announced on Monday 20th November on social media and will be featured on our website.
Winners will be announced on Friday 24th November.
Rules:
- Upload your design onto your Instagram account.
- Add the tag: #dfpalmsprings and tag us: Digital Fabrics @digitalfabrics so we can find your entry! If you don’t use the correct hash tag we may not see your design.
- We love to know the story behind the design and what inspired you so tell us everything!
All designs must be submitted by Thursday 16th November 9am Eastern Standard Time to be included in the competition.
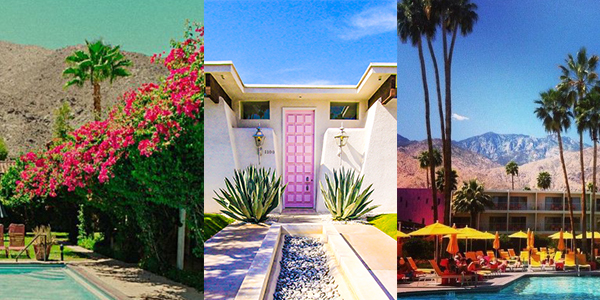
Just a little inspiration for you to enjoy:
 Terms and conditions:
This competition for Australian residents only.
Please use the correct hashtag to be included: #dfpalmsprings and tag us @digitalfabrics to ensure we can see your entry.
Only entries with the correct hashtag #dfpalmsprings will be in the running of the competition.
Unlimited entries allowed.
The team at Digital Fabrics will choose the finalists.
The winning prize can be used for one fabric type only from our stock fabric collection.
The 45cm x 45cm cushion will be printed front and back and mailed to you.
We can’t wait to see all the designs!
DF Team
Save
Save
Save
Save
Save
Save
Save
Thank you to everyone who entered our ‘Palm Springs’ design competition, we had so many great entries and loved all the different design styles and mediums used to create them. It was a difficult decision choosing the winners but we are happy to announce them today!
The top Ten were chosen by you the public :
The team at DF have chosen the following designs as the 1st, 2nd and 3rd prize winners:
1st Prize goes to Tyago BK – This design was inspired by photographs taken of Palm Springs landscape and architecture.
2nd Prize goes to Sandra K Stewart – This design was inspired by it’s shopping district, vintage boutiques and fashionista vibe including the Coachella festival.
3rd Prize goes to Lang Matkovic – This design was inspired by a pastel coloured palette and the palms of palm springs.
The prizes are as follows:
Tyago BK
1st Prize $250 worth of custom printing and a 45cm x 45cm cushion with the winning design artwork on it.
Sandra K Stewart
2nd Prize $100 of custom printing and a 45cm x 45cm cushion with the winning design artwork on it.
Lang Matkovic
3rd Prize $50 worth of custom printing and a 45cm x45cm cushion with the winning design artwork on it.
Thank you to everyone who entered, we are always blown away by the talent in the designs. We shall of course do another one next year so keep your eyes peeled.
Stay creative!
DF team.