Designing Fabric: How To Make A Repeat Pattern – Full Drop repeat in Photoshop
For this tutorial we have choose Full Drop pattern repeat. It is not an advanced technic, mostly for those who is not very proficient in Photoshop yet like to be creative and play. This fabric pattern repeat tutorial mainly suitable for photographic and abstract images.
Full Drop repeat in Photoshop
Full Drop Repeats can also be referred to as Square repeat.
Open your artwork file in Photoshop. It’s always a good idea to check the resolution quality before beginning, a minimum of 150 dpi is recommended. Crop/alter the image as desired till you are happy with an artwork that will be tiled to repeat seamlessly.

Original image – all four corners of image are relatively different and this is what will need to be fixed to create a seamless repeat.

Original image with no fixing of the seams, looks mismatched.
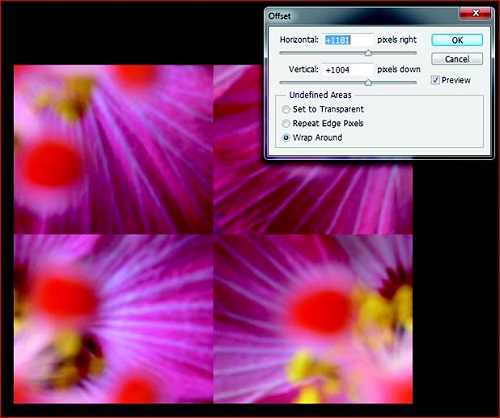
Take note of the pixel size of your image (Image – Image Size)

As well as HALF this amount. An easy way to do this is let the computer decide, halve the resolution amount (150 dpi in this case), and re-note the new pixel dimensions. Click cancel as you don’t want to actually change the resolution, just take note of it.
Now cut (OFFSET) the image in half both length and width ways. This will give the edges or seams that need to be fixed for seamless repeating. It is ideal to do this step with a flattened layer. (Filter – Other – Offset) Now put in the HALVED horizontal and vertical values determined in step 2 and make sure that Wrap Around is selected. Click OK.
It is clear to see where the image needs to be fixed to create a seamless repeat, where no harsh contrasting lines can be seen as in the above image. There are several tools to use in photoshop that you can use to do this including (but not limited to) stamp, blur, patch, clone…enjoy the play!

It is a good idea to offset the now fixed image, just to check the four points that you haven’t missed anything and nothing is looking odd.

This now forms your Repeat Tile and this is the tile/image that is required when sending artwork to a printer or uploading it for fabric printing online.
SAVE! Save file as (Artwork Name)_Repeat Tile
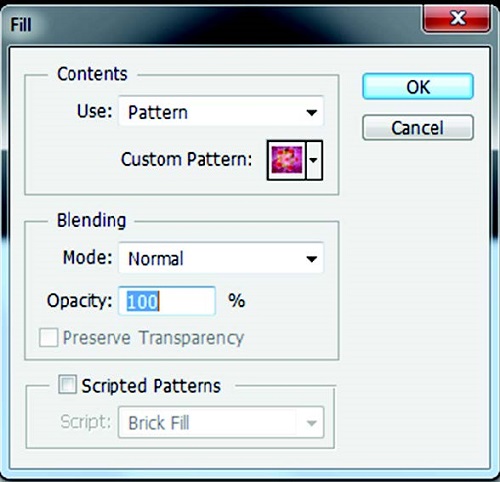
You must now check your repeat and to see it duplicated across the width and down the length of your fabric. An easy way to do so is to define your reworked artwork as a pattern. Menu>Edit>Define Pattern>Save as preferred name.
Open a new blank document with a set up reflecting something similar to a roll of fabric i.e. 145 x 100 cm depending on you repeat tile dimensions.
Menu>Edit>Fill>Select your saved pattern from the drop down box>OK
(shown below is only 50 x 50 cm)
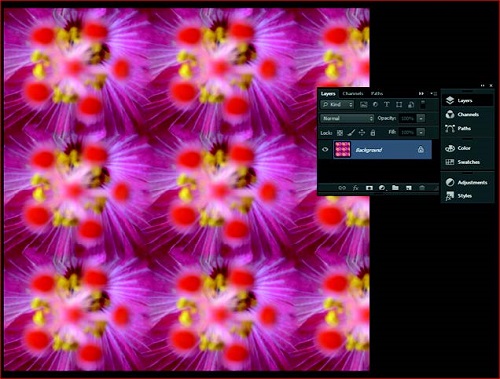
Now you can use your repeat pattern or repeat tile for digital custom fabric printing.