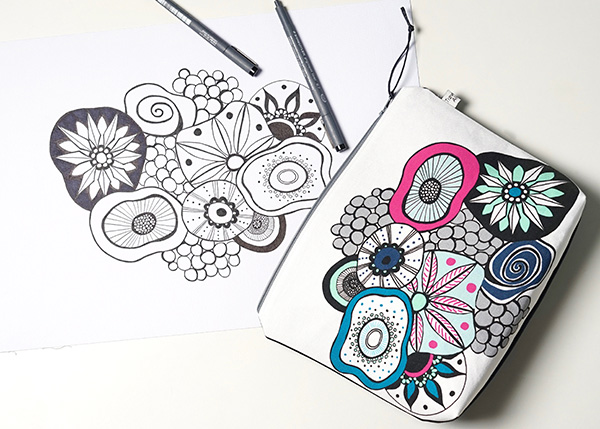
It would be safe to say that most of us are creative, we might love to doodle, paint, and create collages. Whilst these are all wonderful and inventive practices, what if you wanted to start developing these crafts into textile designs but didn’t have the digital design software skills to get your file prepared for fabric printing. What we would say is “learn it’! Learn digital textile design in small bites. Start slowly, from converting your art into a digital format and getting to know basic Photoshop tools. Everything new can be overwhelming, but if you take one step at a time and slowly build your confidence, you will get the hang of it in no time. Below are some simple steps that will help you prepare your art for digital seamless repeat printing.
DIGITIZING – CONVERTING YOUR ART INTO A DIGITAL FORMAT
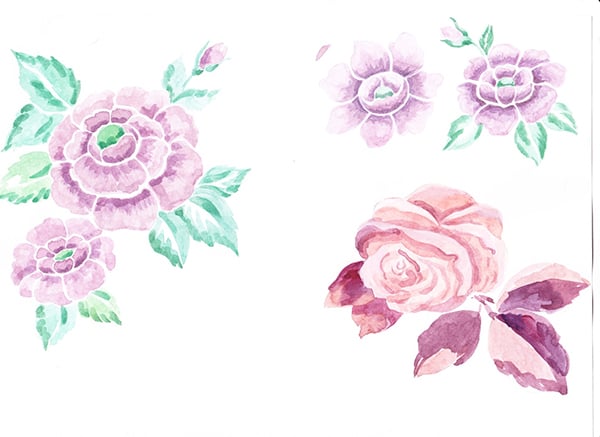
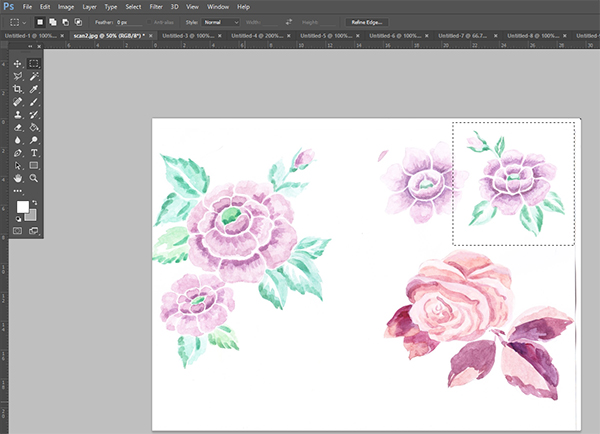
Start with an artwork painted onto a flat, one colour background that surrounds the artwork. For this tutorial we used a simple white plain background for the purpose of being easy, but any colour is fine.
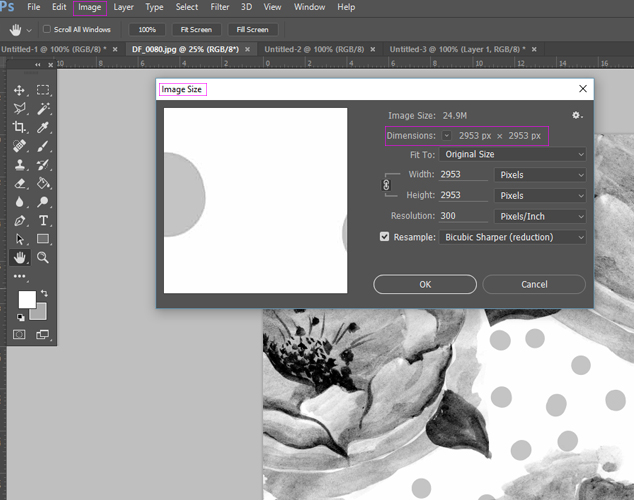
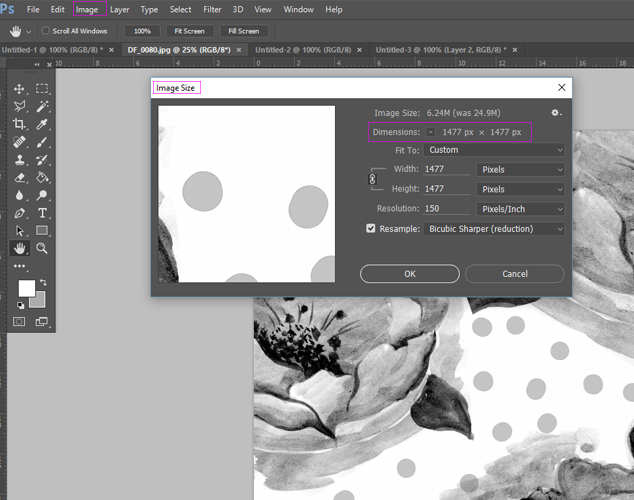
To convert your artwork into a digital format you need to scan or photograph the artwork. Scanning at a resolution of 300 dpi is preferred. However, if you don’t have a scanner, photograph your artwork laid out flat, indoors with plenty of light (natural day light if best), holding the camera directly above the artwork, making sure there are no shadows of any kind interfering with the artwork.
CLEANING – DELETING UNWANTED ELEMENTS FROM AN ARTWORK
Open your artwork in Photoshop by selecting MAIN MENU > FILE > OPEN > CHOOSE YOUR ARTWORK FILE.
Using MARQUEE TOOL select the object or image that you want to repeat.
Now let’s bring the artwork or image that you want to repeat into a new document so you can start playing with it. While MARQUEE TOOL selection is active, (this will appear as ants running around the selected area) go to MAIN MENU > EDIT > COPY to copy selected area and FILE > NEW to open new document. NOTE: Photoshop is a very smart software. The area that you have selected will now determine the file size of the new document being opened. Click OK.
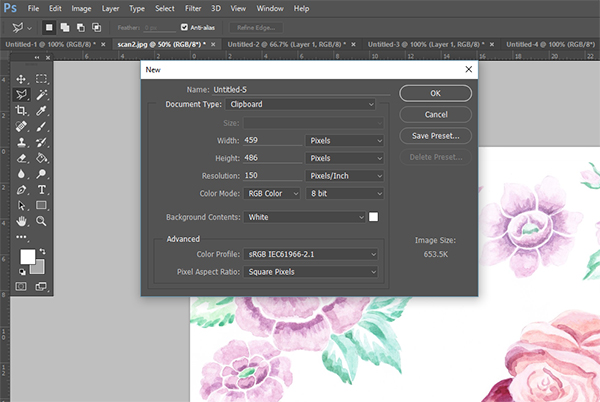
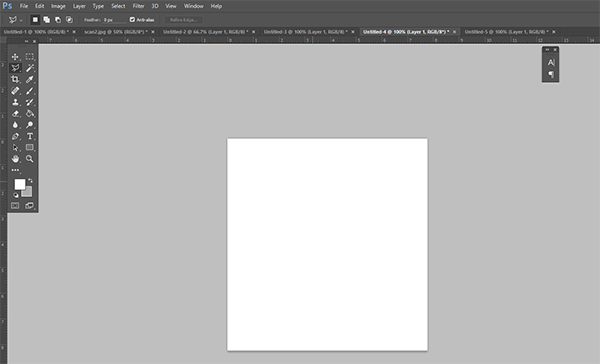
Whilst in the newly opened document select MAIN MENU > EDIT> PASTE to bring your selected artwork into the new document. It should paste by default in the middle of the new document fitting artwork well within the new document space. Nothing should be cropped out or hidden from view.
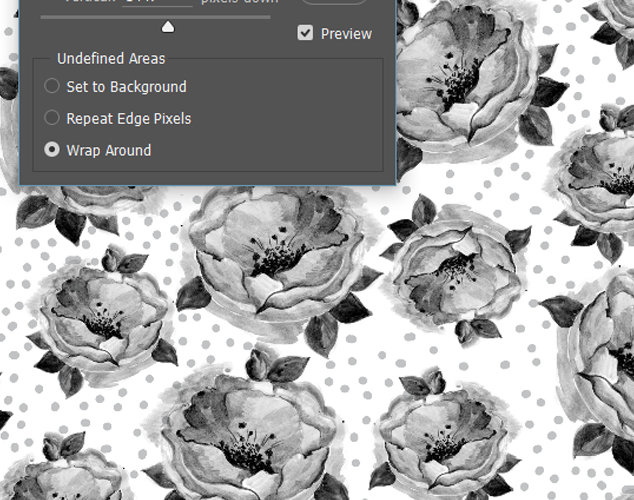
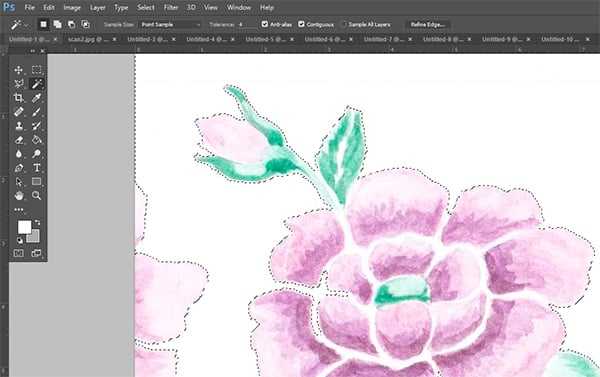
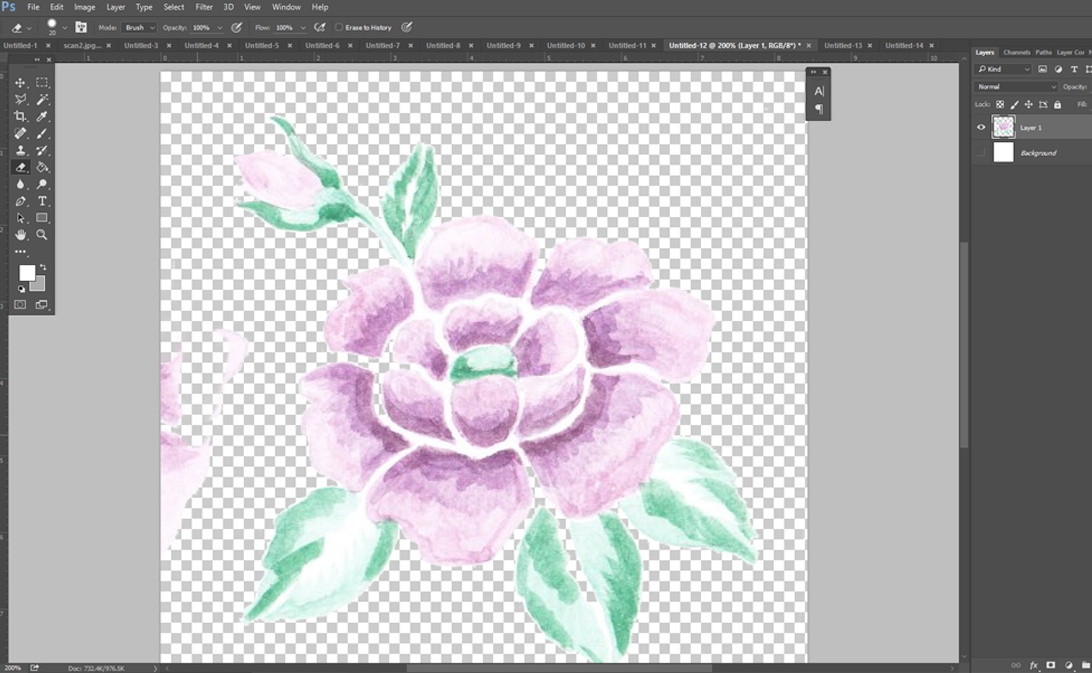
Now to clean your artwork. If your white background is slightly messy or the texture of the paper is visible, you will need to clean this up, since whatever you see on the screen will be printed onto fabric. To quickly ‘deep-etch’ or in other words ‘clean-up’, select the layer that you just brought in. Then select the MAGIC WAND TOOL. Change the tolerance to low (we selected a tolerance measure of ‘4’ but you might need to adjust this number as it is based on your artwork). Tolerance is the rate at which the same or similar colours are selected when using the MAGIC WAND TOOL. The higher the tolerance the more of that colour will be found and therefore selected within the artwork.
Make sure the CONTIGUOUS box is ticked, this will ensure that only space around your artwork is being selected, and not that which is inside or a part of the drawn objects. Now once everything is prepared for selection click on the white background to select it. You can see on the image below that only the white background area is selected. While it is selected hit the DELETE button on your keyboard. This will remove the white selected background.
As you can see there is a little bit of another flower peaking through on the left side. Lets clean this up by using the simple ERASER TOOL. You can adjust the size of the eraser as needed at the top left of the screen. You can make the background layer invisible (this will then appear as little white and grey squares as seen below) to check that you have cleaned up all of the image. Simply zoom in to check the edges of your artwork and any potential unwanted marks left behind.
ADJUSTING COLOURS
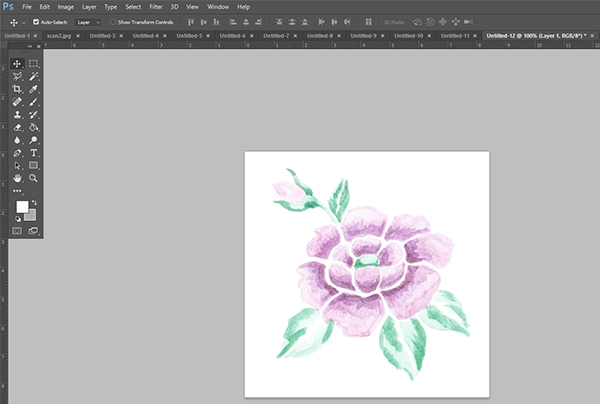
The image is now clean, but colour wise the artwork is not strong enough. To brighten and intensify the colours of the image select MAIN MENU > IMAGE > AUTO CONTRAST.
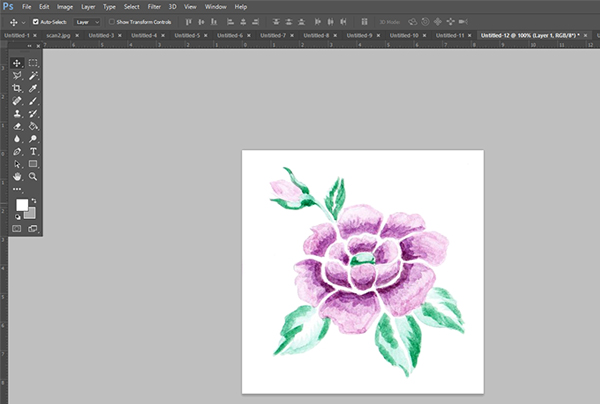
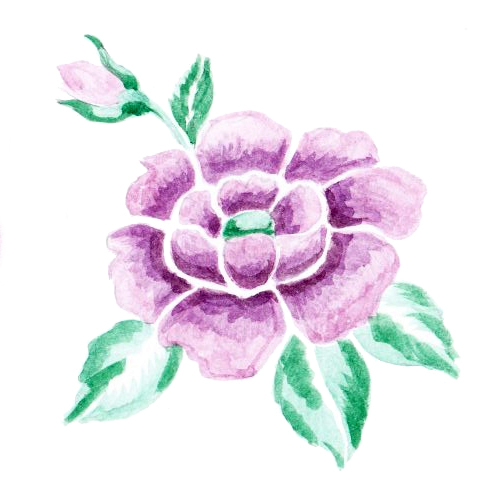
You are almost done! To flatten your image select MAIN MENU > LAYER > FLATTEN IMAGE. All layers have now merged into one. Save the image as a JPG high quality file MAIN MENU > FILE > SAVE AS > SAVE.
Now you are done and ready to upload your file to print on to a fabric of your choice!
REPEATING A PATTERN USING OUR FABRIC UPLOADER
Open the Fabric Uploader page.
Drag & Drop your image or click on the SELECT button to upload your ready to print artwork. Once your file is uploaded, you’ll be able to see it in the fabric preview window. You can scale your artwork up or down, simply by typing in and adjusting the artwork to the size you want. Keep an eye on the DPI! This is the resolution and quality of your file. If your artwork is low resolution and is scaled up, the print result can be blurry.
Next step is to choose your Repeat type. This is the fun part! Play around with the different options and see how the variations impact your artwork in the preview window. Compare how the different options distribute your artwork across the width and the length of the fabric. Pick the one that suits your design idea best!
FULL DROP REPEAT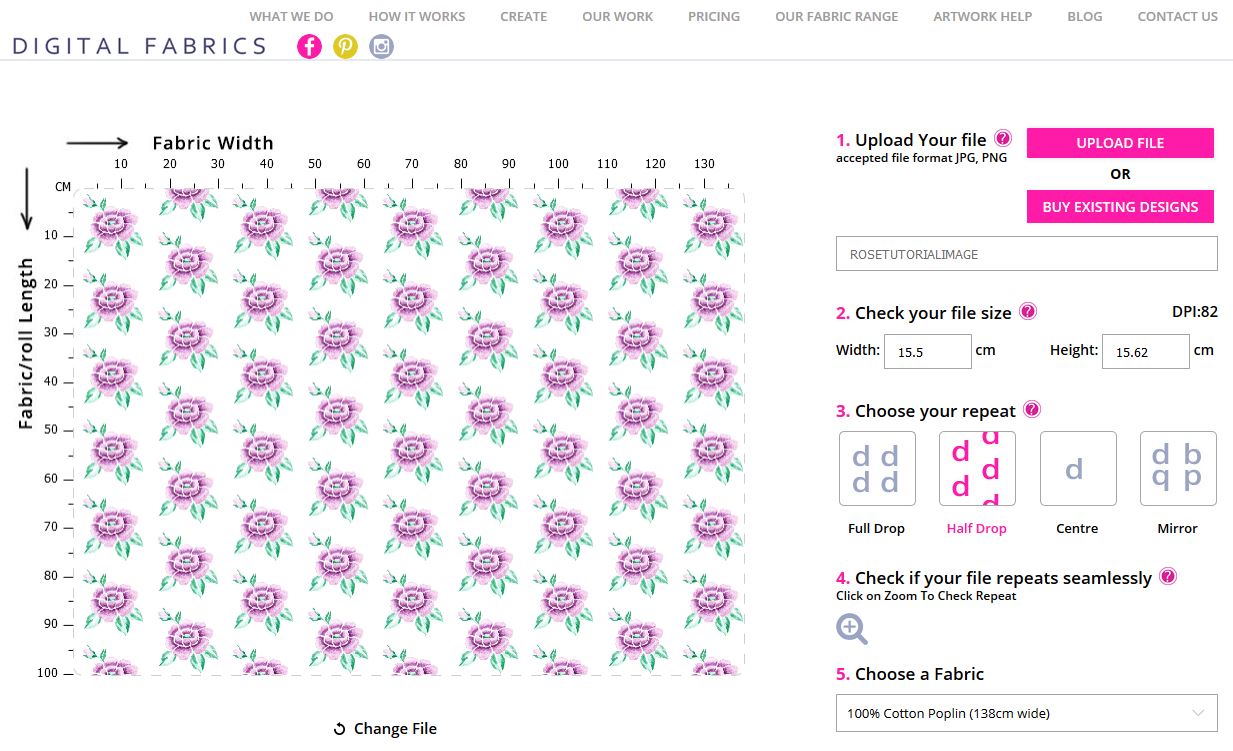
MIRROR REPEAT
Choose how many meters you wish to print simply by typing it into the quantity box and then select the fabric you want to print on. Remember that each fabric stock has a different width so be sure to check that the fabric you choose meets your needs.
P.S. This tutorial is designed to be very basic. If you are still struggling to prepare your artwork files, we recommend you attend one of the workshops on offer at our Digital Textile Design School to help you nail those Photoshop basics!