Tag Archives: print your fabric

Designing Fabric: How To Make A Repeat Pattern – Full Drop repeat in Photoshop

For this tutorial we have choose Full Drop pattern repeat. It is not an advanced technic, mostly for those who is not very proficient in Photoshop yet like to be creative and play.  This fabric pattern repeat tutorial mainly suitable for photographic and abstract images.

Full Drop repeat in Photoshop

Full Drop Repeats can also be referred to as Square repeat.

Open your artwork file in Photoshop. It’s always a good idea to check the resolution quality before beginning, a minimum of 150 dpi is recommended. Crop/alter the image as desired till you are happy with an artwork that will be tiled to repeat seamlessly.
first full drop screenshot

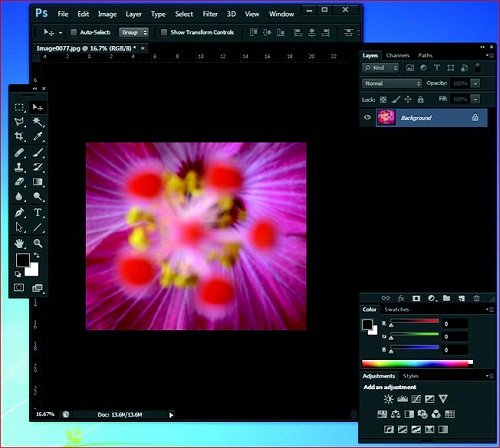
Original image – all four corners of image are relatively different and this is what will need to be fixed to create a seamless repeat.

screenshot 2

Original image with no fixing of the seams, looks mismatched.

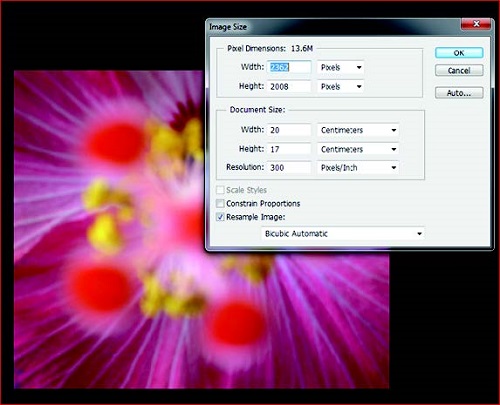
Take note of the pixel size of your image (Image – Image Size)
third full drop screenshot

As well as HALF this amount. An easy way to do this is let the computer decide, halve the resolution amount (150 dpi in this case), and re-note the new pixel dimensions. Click cancel as you don’t want to actually change the resolution, just take note of it.

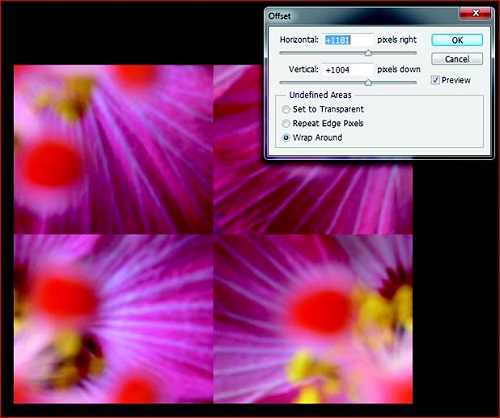
Now cut (OFFSET) the image in half both length and width ways. This will give the edges or seams that need to be fixed for seamless repeating. It is ideal to do this step with a flattened layer. (Filter – Other – Offset) Now put in the HALVED horizontal and vertical values determined in step 2 and make sure that Wrap Around is selected. Click OK.
fourth fulldrop screenshot

It is clear to see where the image needs to be fixed to create a seamless repeat, where no harsh contrasting lines can be seen as in the above image. There are several tools to use in photoshop that you can use to do this including (but not limited to) stamp, blur, patch, clone…enjoy the play!

fifth full drop screenshot

It is a good idea to offset the now fixed image, just to check the four points that you haven’t missed anything and nothing is looking odd.

sixth full drop screenshot

This now forms your Repeat Tile and this is the tile/image that is required when sending artwork to a printer or uploading it for fabric printing online.

SAVE!  Save file as (Artwork Name)_Repeat Tile
You must now check your repeat and to see it duplicated across the width and down the length of your fabric. An easy way to do so is to define your reworked artwork as a pattern. Menu>Edit>Define Pattern>Save as preferred name.
Open a new blank document with a set up reflecting something similar to a roll of fabric i.e. 145 x 100 cm depending on you repeat tile dimensions.
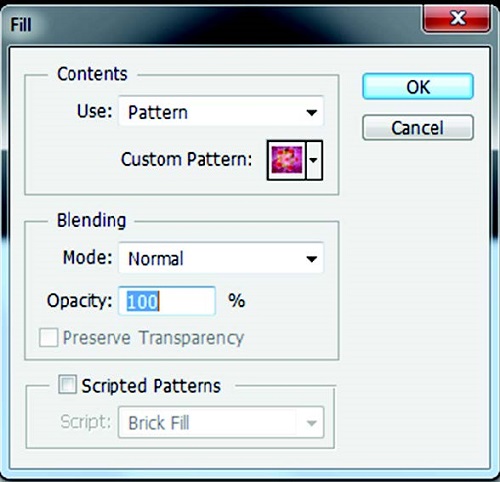
Menu>Edit>Fill>Select your saved pattern from the drop down box>OK
seventh full drop screenshot

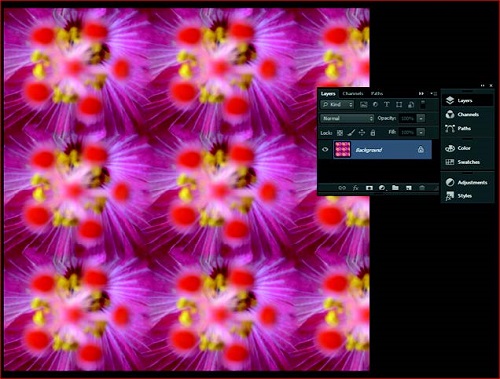
(shown below is only 50 x 50 cm)

eigth full drop screenshot

Now you can use your repeat pattern or repeat tile for digital custom fabric printing.
 

Save

Save

Designing Fabric: How To Make A Repeat Pattern – Full Drop repeat in Photoshop

For this tutorial we have choose Full Drop pattern repeat. It is not an advanced technic, mostly for those who is not very proficient in Photoshop yet like to be creative and play.  This fabric pattern repeat tutorial mainly suitable for photographic and abstract images.

Full Drop repeat in Photoshop

Full Drop Repeats can also be referred to as Square repeat.

Open your artwork file in Photoshop. It’s always a good idea to check the resolution quality before beginning, a minimum of 150 dpi is recommended. Crop/alter the image as desired till you are happy with an artwork that will be tiled to repeat seamlessly.

first full drop screenshot

Original image – all four corners of image are relatively different and this is what will need to be fixed to create a seamless repeat.

screenshot 2

Original image with no fixing of the seams, looks mismatched.

Take note of the pixel size of your image (Image – Image Size)

third full drop screenshot

As well as HALF this amount. An easy way to do this is let the computer decide, halve the resolution amount (150 dpi in this case), and re-note the new pixel dimensions. Click cancel as you don’t want to actually change the resolution, just take note of it.

Now cut (OFFSET) the image in half both length and width ways. This will give the edges or seams that need to be fixed for seamless repeating. It is ideal to do this step with a flattened layer. (Filter – Other – Offset) Now put in the HALVED horizontal and vertical values determined in step 2 and make sure that Wrap Around is selected. Click OK.

fourth fulldrop screenshot

It is clear to see where the image needs to be fixed to create a seamless repeat, where no harsh contrasting lines can be seen as in the above image. There are several tools to use in photoshop that you can use to do this including (but not limited to) stamp, blur, patch, clone…enjoy the play!

fifth full drop screenshot

It is a good idea to offset the now fixed image, just to check the four points that you haven’t missed anything and nothing is looking odd.

sixth full drop screenshot

This now forms your Repeat Tile and this is the tile/image that is required when sending artwork to a printer or uploading it for fabric printing online.

SAVE!  Save file as (Artwork Name)_Repeat Tile
You must now check your repeat and to see it duplicated across the width and down the length of your fabric. An easy way to do so is to define your reworked artwork as a pattern. Menu>Edit>Define Pattern>Save as preferred name.
Open a new blank document with a set up reflecting something similar to a roll of fabric i.e. 145 x 100 cm depending on you repeat tile dimensions.
Menu>Edit>Fill>Select your saved pattern from the drop down box>OK

seventh full drop screenshot

(shown below is only 50 x 50 cm)

eigth full drop screenshot

Now you can use your repeat pattern or repeat tile for digital custom fabric printing.
 

Save

Save

Super Easy Baby Blanket DIY

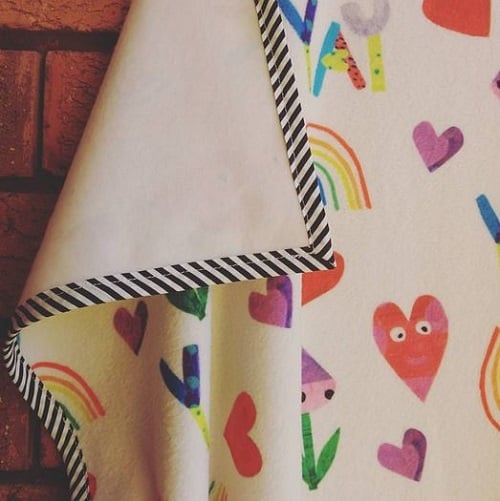
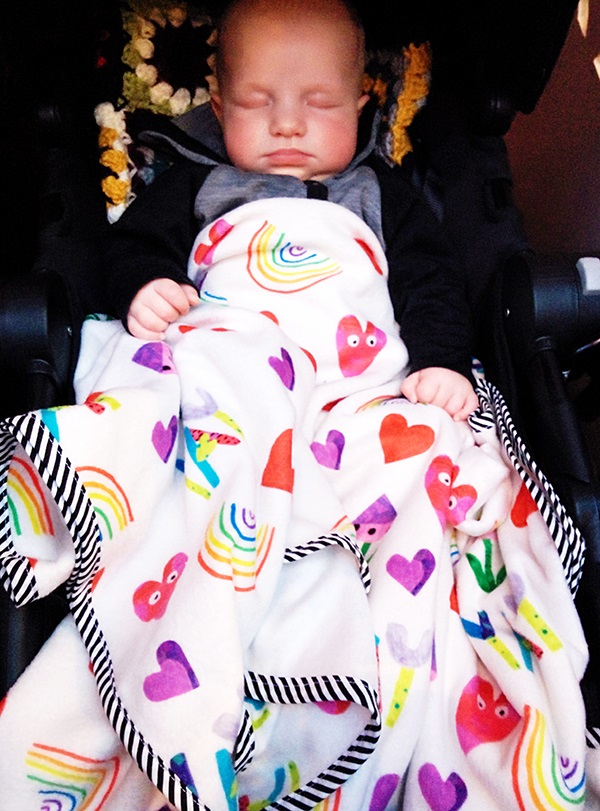
Katy Dee from Letter 11 recently printed custom fleece fabric with us to make comfy baby blanket for her little nephew and shared her creative process with us.  Get creative, make your own fleece blanket, its super easy!

You will need:

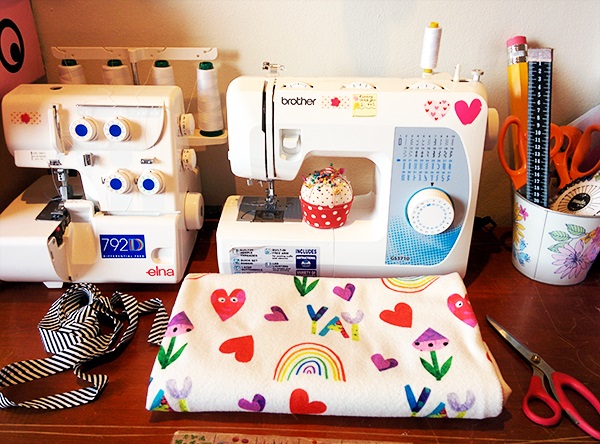
  • Custom printed fleece fabric, the beauty of this fabric is that you can make a blanket without using filling or backing fabric. One layer of fabric is enough to get comfy and snuggly. You can order your custom fabric here!
  • A sewing machine.
  • Bias Binding, you will need enough to go around the entire blanket. For this a 1.5m x 1m fleece blanket used just over 5m.
  • Dressmaking pins and scissors.

sewing space, creative space, baby blanket DIY, custom baby blanket, design your own baby blanket, custom fleece fabric, print your own fabric

  1. Cut your custom fleece fabric to the size and shape you want, in tutorial the blanket is 1.5m by 1m which is big and snuggly! A square would also be cute.
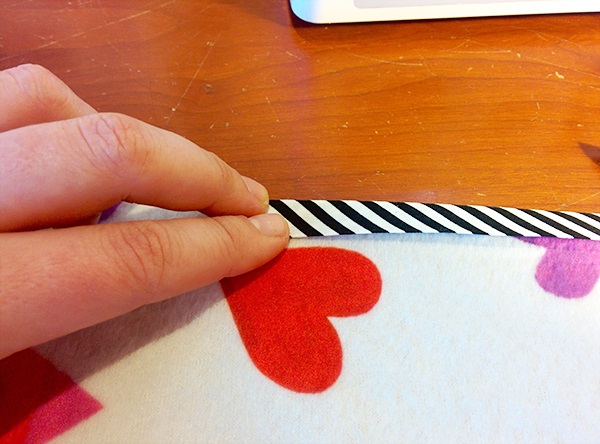
  2. Find a spot around half way down the longest length of blanket to start pinning the bias. To pin you fold it naturally in half with the flaps on the inside and wrap it around the blanket pinning all 3 layers together like a sandwich. Carry on pinning the binding all the way to the corner. baby blanket DIY, custom baby blanket, design your own baby blanket, custom fleece fabric, blanket fabric
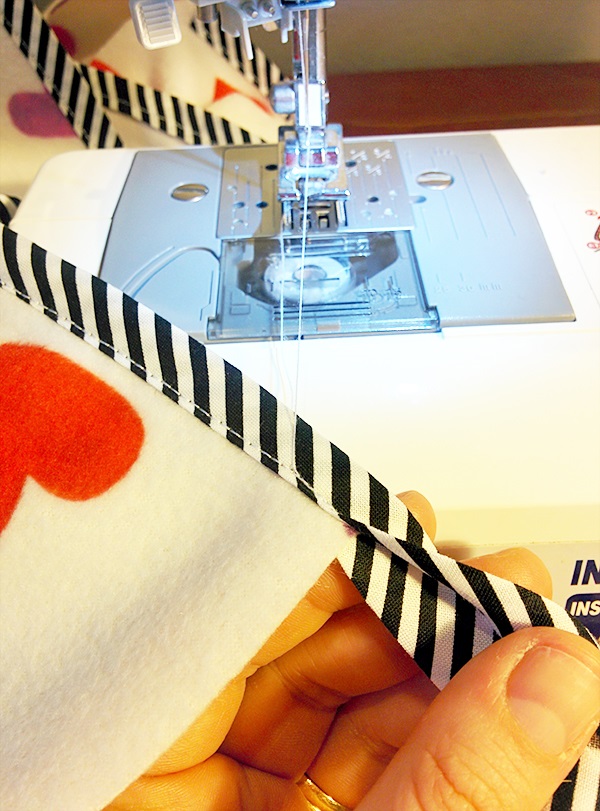
  3. Now it’s time to begin sewing…. Using running stitch and the colour thread of your choice, pop the blanket in under the machine foot and do a few back stitches first to secure the bias.  Then continue sewing on the inside edge of the binding and down towards the corner following and removing the pins as you sew….baby blanket DIY, custom baby blanket, custom fleece fabric, blanket fabric
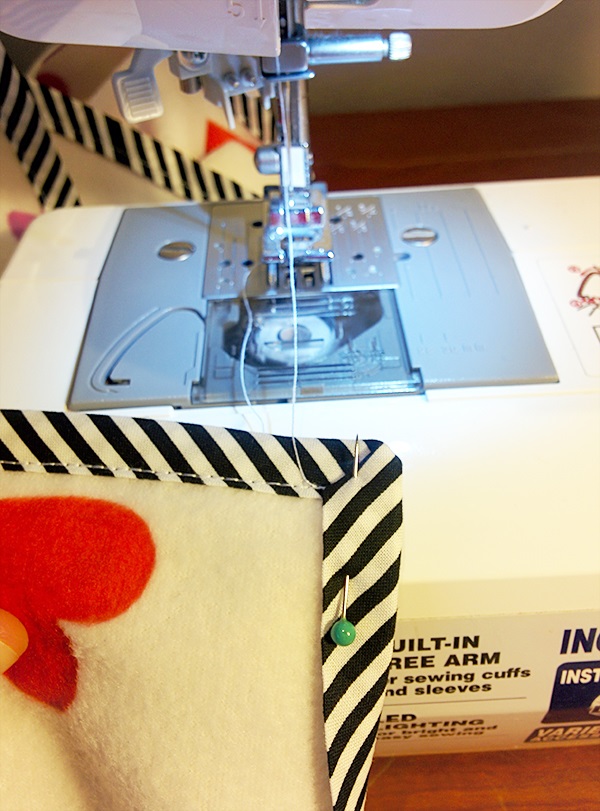
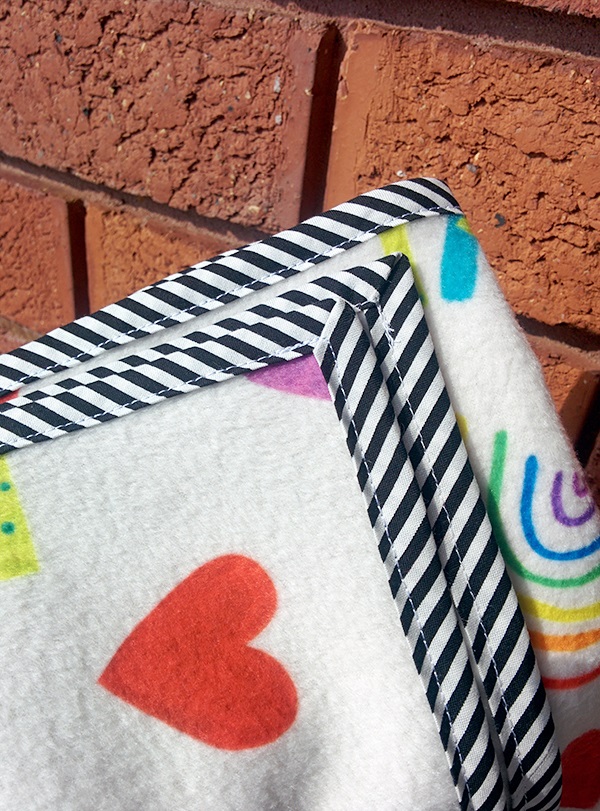
  4. To wrap the bias binding around that corner nice and neatly, fold the corners down to create a diagonal fold and pin this into place. At this point, also pin the binding along the length towards the next corner. Sew slightly into the diagonal fold, stop to rotate the blanket so you can sew another side of the blanket bias and continue to sew all around the fleece blanket. baby blanket DIY, custom baby blanket, custom fleece fabric, blanket fabric, print your own fabric
  5. When you are nearly at the point where you began sewing, do a few backstitches and remove the blanket. Cut the binding neatly so there is just a 4-5 cm length left. Fold this in on itself and pin down into place creating a neat hidden pocket. Now you can pop the blanket back in and sew that last little bit up! Don’t forget to finish with a few backstitches for safety!baby blanket DIY, custom baby blanket, custom fleece fabric, blanket fabric, custom blanketKatyDee_baby_blanket_playful_print_fabric_design_colourful_hearts_rainbow_fleece

And there you go, a super cute baby fleece blanket!

baby blanket DIY, custom baby blanket, design your own baby blanket, custom fleece fabric

Save

Save

Save

Save

Super Easy Baby Blanket DIY

Katy Dee from Letter 11 recently printed custom fleece fabric with us to make comfy baby blanket for her little nephew and shared her creative process with us.  Get creative, make your own fleece blanket, its super easy!

You will need:

  • Custom printed fleece fabric, the beauty of this fabric is that you can make a blanket without using filling or backing fabric. One layer of fabric is enough to get comfy and snuggly. You can order your custom fabric here!
  • A sewing machine.
  • Bias Binding, you will need enough to go around the entire blanket. For this a 1.5m x 1m fleece blanket used just over 5m.
  • Dressmaking pins and scissors.

sewing space, creative space, baby blanket DIY, custom baby blanket, design your own baby blanket, custom fleece fabric, print your own fabric

  1. Cut your custom fleece fabric to the size and shape you want, in tutorial the blanket is 1.5m by 1m which is big and snuggly! A square would also be cute.
  2. Find a spot around half way down the longest length of blanket to start pinning the bias. To pin you fold it naturally in half with the flaps on the inside and wrap it around the blanket pinning all 3 layers together like a sandwich. Carry on pinning the binding all the way to the corner. baby blanket DIY, custom baby blanket, design your own baby blanket, custom fleece fabric, blanket fabric
  3. Now it’s time to begin sewing…. Using running stitch and the colour thread of your choice, pop the blanket in under the machine foot and do a few back stitches first to secure the bias.  Then continue sewing on the inside edge of the binding and down towards the corner following and removing the pins as you sew….baby blanket DIY, custom baby blanket, custom fleece fabric, blanket fabric
  4. To wrap the bias binding around that corner nice and neatly, fold the corners down to create a diagonal fold and pin this into place. At this point, also pin the binding along the length towards the next corner. Sew slightly into the diagonal fold, stop to rotate the blanket so you can sew another side of the blanket bias and continue to sew all around the fleece blanket. baby blanket DIY, custom baby blanket, custom fleece fabric, blanket fabric, print your own fabric
  5. When you are nearly at the point where you began sewing, do a few backstitches and remove the blanket. Cut the binding neatly so there is just a 4-5 cm length left. Fold this in on itself and pin down into place creating a neat hidden pocket. Now you can pop the blanket back in and sew that last little bit up! Don’t forget to finish with a few backstitches for safety!baby blanket DIY, custom baby blanket, custom fleece fabric, blanket fabric, custom blanketKatyDee_baby_blanket_playful_print_fabric_design_colourful_hearts_rainbow_fleece

And there you go, a super cute baby fleece blanket!

baby blanket DIY, custom baby blanket, design your own baby blanket, custom fleece fabric

Save

Save

Save

Save

DIY with Digital Fabrics – The Sara Project

digital fabrics the sara project print your own fabric
“The fabric is so soft, and the print is bright and bold; really great quality! I love how unique my top feels in this fresh print.”
– The Sara Project

The beauty about fabrics is seeing them come to life whether it becomes a pillow cover or a unique piece of clothing. Digital Fabrics recently teamed up with Sara from The Sara Project who loves to share her passion for sewing on her blog.

digital fabrics the sara project print your own fabric
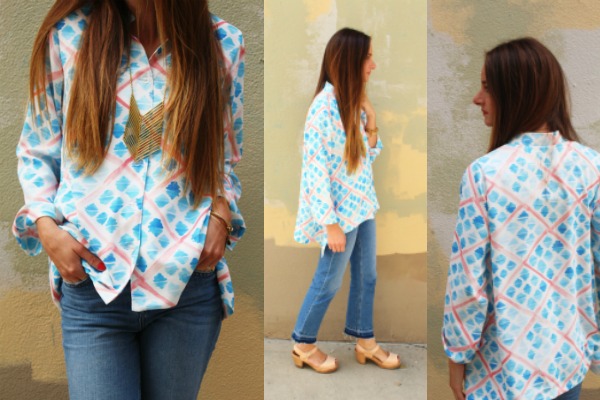
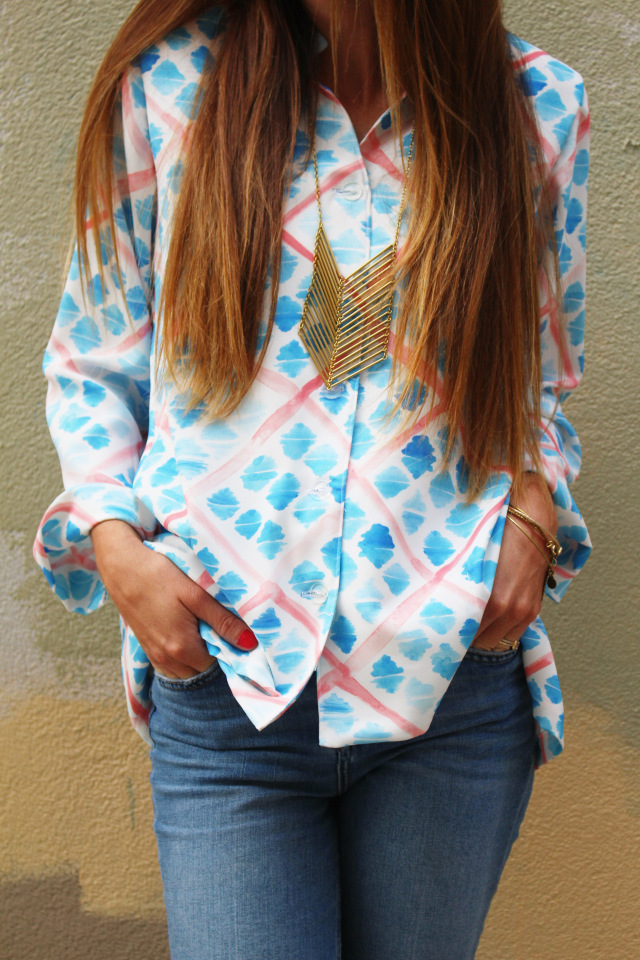
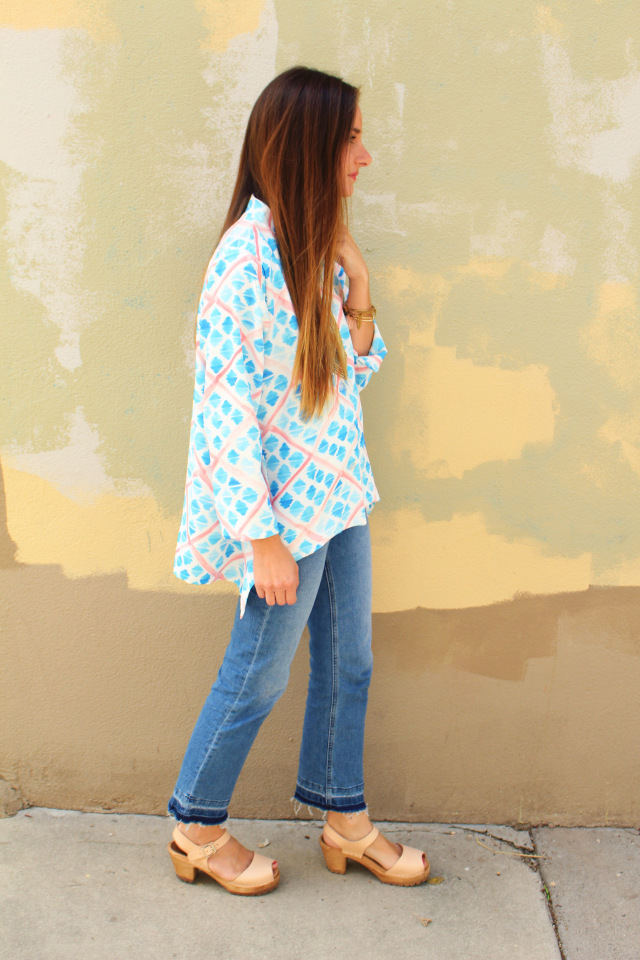
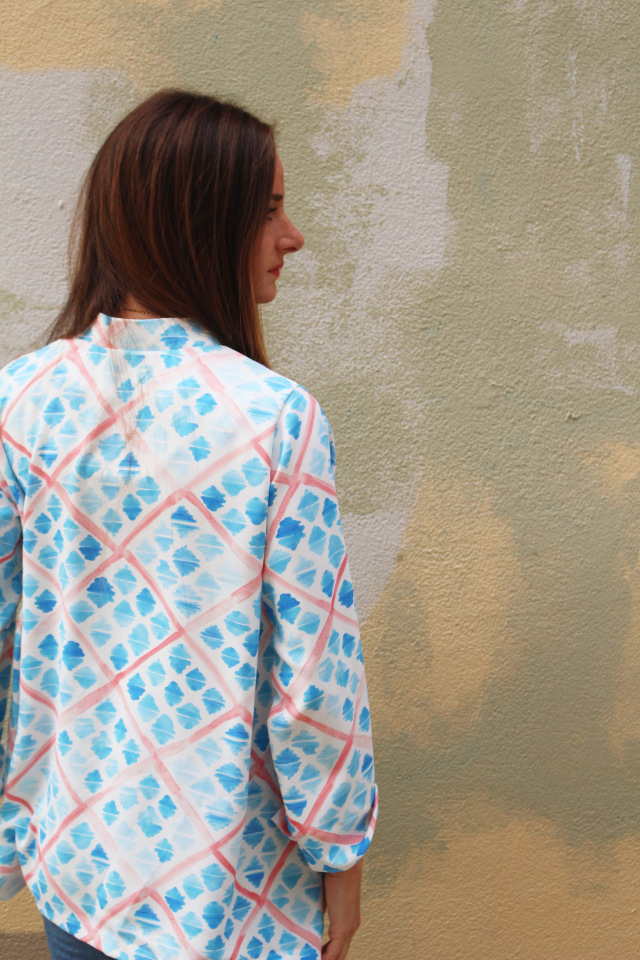
Sara used our Ethnic in Cornflower in micro fabric to create this unique top. It’s fresh, flown and this top can definitely be worn during all seasons. And we’re happy to read she was pleased with the fast shipping and quality of the Digital Fabrics she received

digital fabrics the sara project print your own fabric digital fabrics the sara project print your own fabric

DIY with Digital Fabrics – The Sara Project

digital fabrics the sara project print your own fabric
“The fabric is so soft, and the print is bright and bold; really great quality! I love how unique my top feels in this fresh print.”
– The Sara Project

The beauty about fabrics is seeing them come to life whether it becomes a pillow cover or a unique piece of clothing. Digital Fabrics recently teamed up with Sara from The Sara Project who loves to share her passion for sewing on her blog.

digital fabrics the sara project print your own fabric
Sara used our Ethnic in Cornflower in micro fabric to create this unique top. It’s fresh, flown and this top can definitely be worn during all seasons. And we’re happy to read she was pleased with the fast shipping and quality of the Digital Fabrics she received

digital fabrics the sara project print your own fabric digital fabrics the sara project print your own fabric