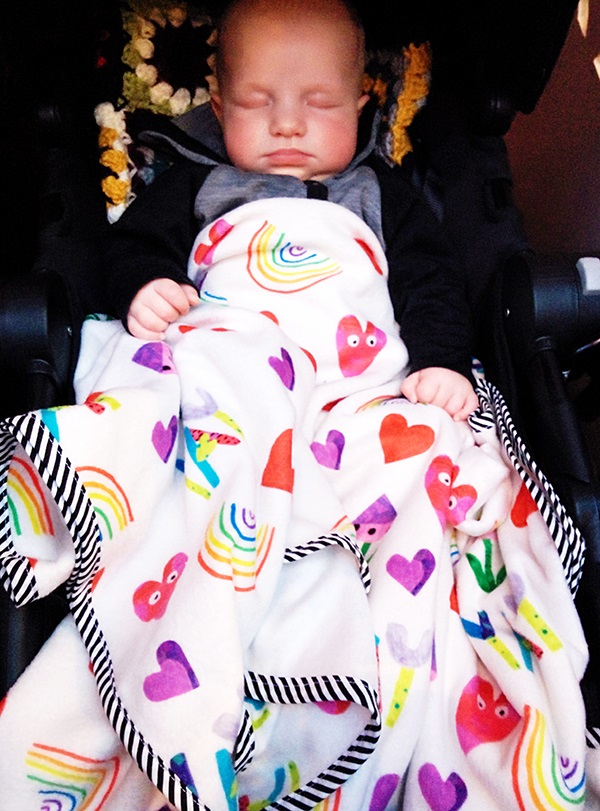
Katy Dee from Letter 11 recently printed custom fleece fabric with us to make comfy baby blanket for her little nephew and shared her creative process with us. Get creative, make your own fleece blanket, its super easy!
You will need:
- Custom printed fleece fabric, the beauty of this fabric is that you can make a blanket without using filling or backing fabric. One layer of fabric is enough to get comfy and snuggly. You can order your custom fabric here!
- A sewing machine.
- Bias Binding, you will need enough to go around the entire blanket. For this a 1.5m x 1m fleece blanket used just over 5m.
- Dressmaking pins and scissors.
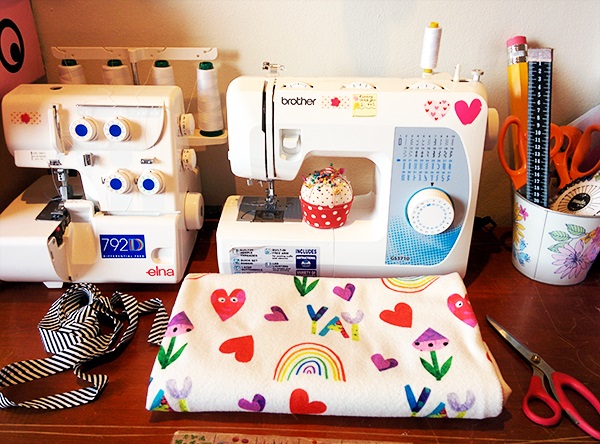
- Cut your custom fleece fabric to the size and shape you want, in tutorial the blanket is 1.5m by 1m which is big and snuggly! A square would also be cute.
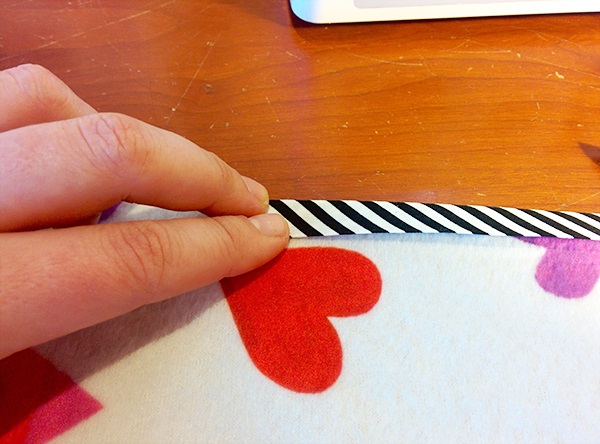
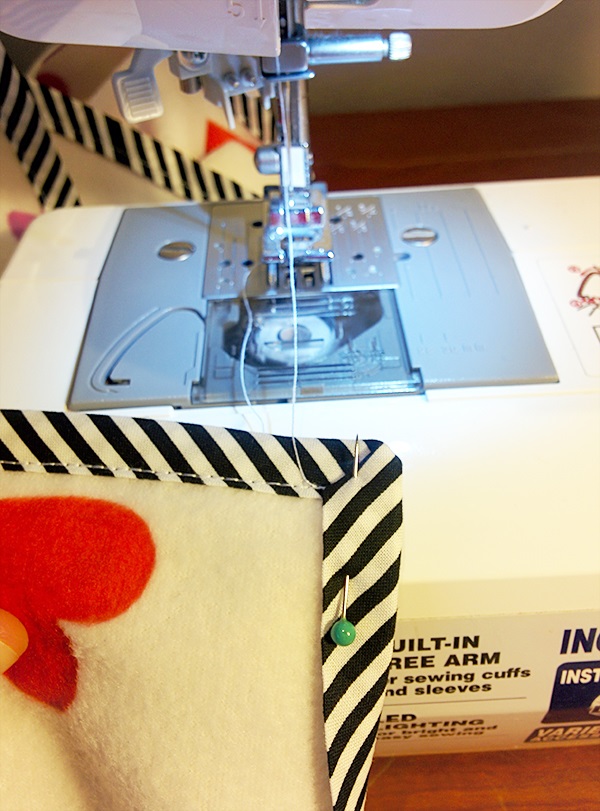
- Find a spot around half way down the longest length of blanket to start pinning the bias. To pin you fold it naturally in half with the flaps on the inside and wrap it around the blanket pinning all 3 layers together like a sandwich. Carry on pinning the binding all the way to the corner.
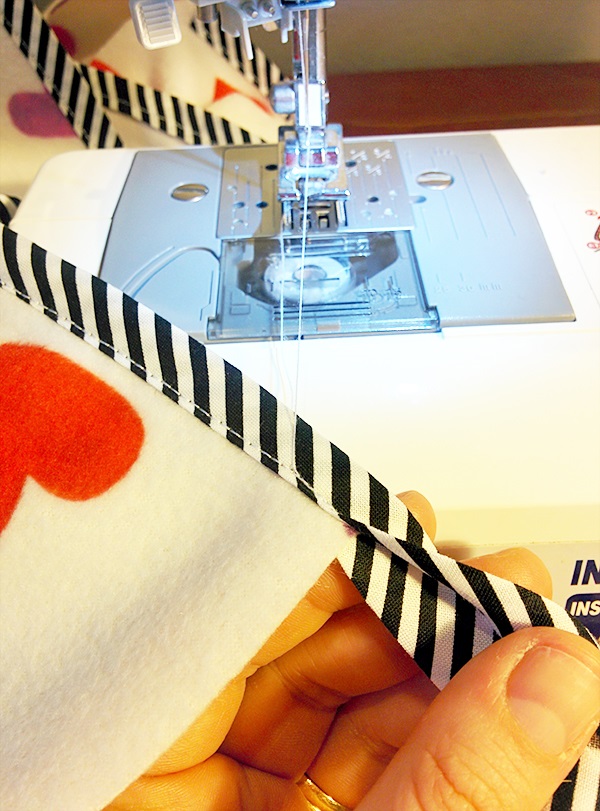
- Now it’s time to begin sewing…. Using running stitch and the colour thread of your choice, pop the blanket in under the machine foot and do a few back stitches first to secure the bias. Then continue sewing on the inside edge of the binding and down towards the corner following and removing the pins as you sew….
- To wrap the bias binding around that corner nice and neatly, fold the corners down to create a diagonal fold and pin this into place. At this point, also pin the binding along the length towards the next corner. Sew slightly into the diagonal fold, stop to rotate the blanket so you can sew another side of the blanket bias and continue to sew all around the fleece blanket.
- When you are nearly at the point where you began sewing, do a few backstitches and remove the blanket. Cut the binding neatly so there is just a 4-5 cm length left. Fold this in on itself and pin down into place creating a neat hidden pocket. Now you can pop the blanket back in and sew that last little bit up! Don’t forget to finish with a few backstitches for safety!
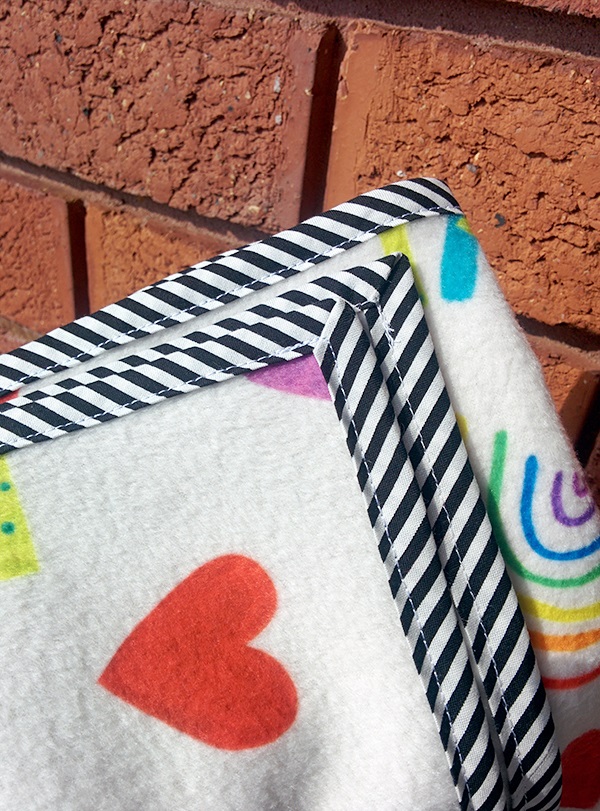
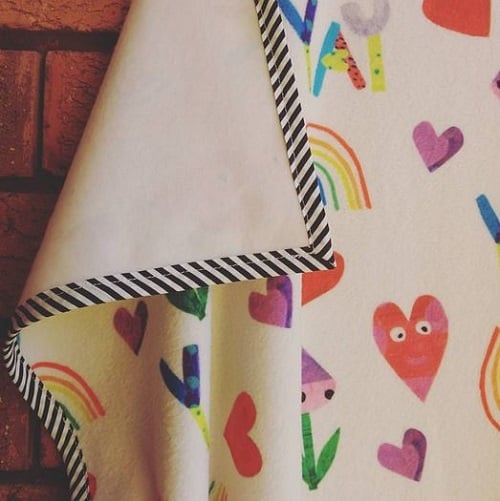
And there you go, a super cute baby fleece blanket!
Save
Save
Save
Save
Katy Dee from Letter 11 recently printed custom fleece fabric with us to make comfy baby blanket for her little nephew and shared her creative process with us. Get creative, make your own fleece blanket, its super easy!
You will need:
- Custom printed fleece fabric, the beauty of this fabric is that you can make a blanket without using filling or backing fabric. One layer of fabric is enough to get comfy and snuggly. You can order your custom fabric here!
- A sewing machine.
- Bias Binding, you will need enough to go around the entire blanket. For this a 1.5m x 1m fleece blanket used just over 5m.
- Dressmaking pins and scissors.
- Cut your custom fleece fabric to the size and shape you want, in tutorial the blanket is 1.5m by 1m which is big and snuggly! A square would also be cute.
- Find a spot around half way down the longest length of blanket to start pinning the bias. To pin you fold it naturally in half with the flaps on the inside and wrap it around the blanket pinning all 3 layers together like a sandwich. Carry on pinning the binding all the way to the corner.
- Now it’s time to begin sewing…. Using running stitch and the colour thread of your choice, pop the blanket in under the machine foot and do a few back stitches first to secure the bias. Then continue sewing on the inside edge of the binding and down towards the corner following and removing the pins as you sew….
- To wrap the bias binding around that corner nice and neatly, fold the corners down to create a diagonal fold and pin this into place. At this point, also pin the binding along the length towards the next corner. Sew slightly into the diagonal fold, stop to rotate the blanket so you can sew another side of the blanket bias and continue to sew all around the fleece blanket.
- When you are nearly at the point where you began sewing, do a few backstitches and remove the blanket. Cut the binding neatly so there is just a 4-5 cm length left. Fold this in on itself and pin down into place creating a neat hidden pocket. Now you can pop the blanket back in and sew that last little bit up! Don’t forget to finish with a few backstitches for safety!
And there you go, a super cute baby fleece blanket!
Save
Save
Save
Save

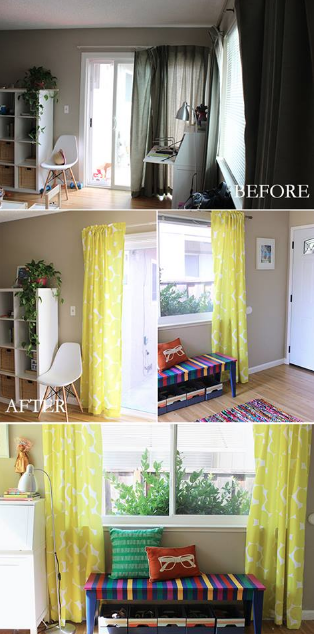
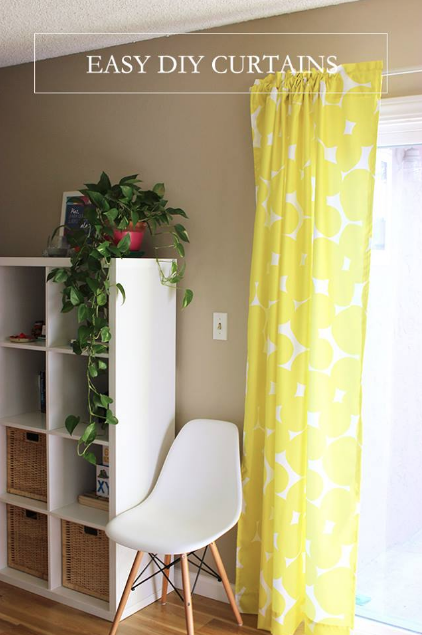
If you’re looking to give a bright make over to your home, this DIY project is for you! Curtains are a great way to add color and pattern to your home and they are so easy to make.
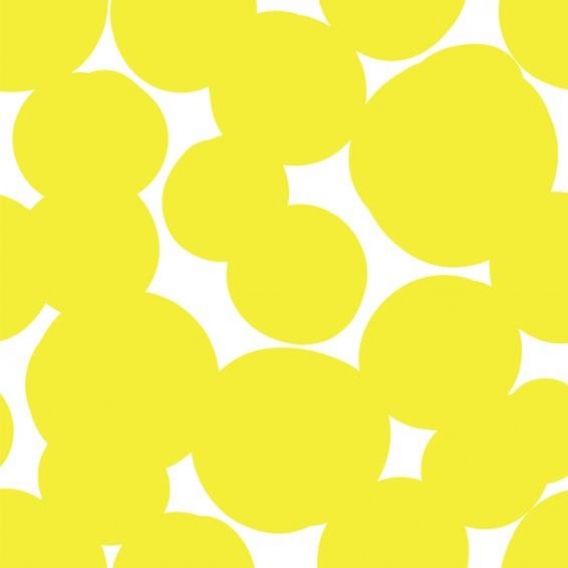
Elba from Live Colorful shows us how, with her easy DIY curtains tutorial, which she made using the Lemonade fabric she created with Digital Fabrics!
A couple months ago she moved into her new home, but if you’ve ever been through it you know how hectic a move can be. She had her eye on the ugly gray-green curtains that she wanted to change and now, thanks to the Lemonade fabric she created with Digital Fabrics, she had the perfect DIY opportunity to give this space a bright and personal touch.
Elba hasn’t been able to find prints that she loves, so inspired by that, she created the LIVE COLORFUL collection which features bright and happy prints that are perfect for many DIY home decor projects.
You can also win 2 meters of one of her designs so make sure you go check it out.
Save
If you’re looking to give a bright make over to your home, this DIY project is for you! Curtains are a great way to add color and pattern to your home and they are so easy to make.
Elba from Live Colorful shows us how, with her easy DIY curtains tutorial, which she made using the Lemonade fabric she created with Digital Fabrics!
A couple months ago she moved into her new home, but if you’ve ever been through it you know how hectic a move can be. She had her eye on the ugly gray-green curtains that she wanted to change and now, thanks to the Lemonade fabric she created with Digital Fabrics, she had the perfect DIY opportunity to give this space a bright and personal touch.
Elba hasn’t been able to find prints that she loves, so inspired by that, she created the LIVE COLORFUL collection which features bright and happy prints that are perfect for many DIY home decor projects.
You can also win 2 meters of one of her designs so make sure you go check it out.
Save
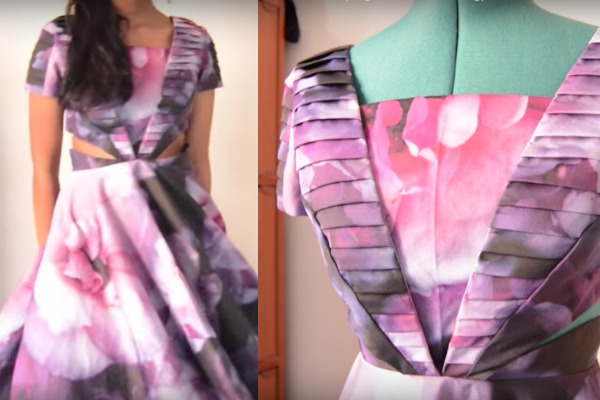
The beauty with fabrics is what you can make with them. Creative DIY talent Oaishe created a gorgeous DIY pleated bodice and circle skirt dress using the TEA ROSE cotton sateen fabric
In her tutorial she shows us how to beautiful details of how she creates the pleats in the bodice and then how you can create and attach the circle skirt to create a unique dress. For this DIY project you need about 2-3 yards/meters of fabric.
Did you know that printing fabrics with us is super easy? Create your design, Upload and pay, Receive your fabric! Our minimum order is just 1 m.
Save
Save
Save
Save
Our first workshop happened a few weekends ago at the Digital Fabrics School and it was a great day!

There were 4 students ranging in experience and knowledge and it was a fun day learning, sharing and exploring the digital process of designing a scarf from creating a collage to the digital process.
An early start on a winter’s day meant plenty of snacks and cups of tea for fuel while learning about Textile design from our expert teacher Liz Godkin. Liz has extensive industry experience including working at a fashion house in New York and freelance design across Australia and she shared tricks of the trade and useful tips for designing textile products for both personal and commercial projects.
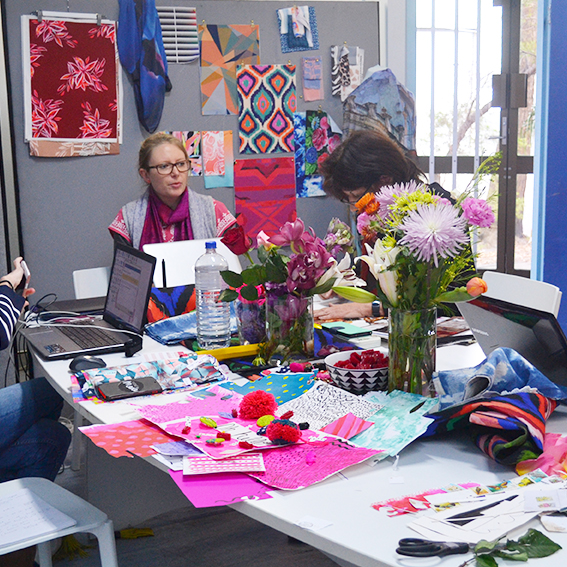
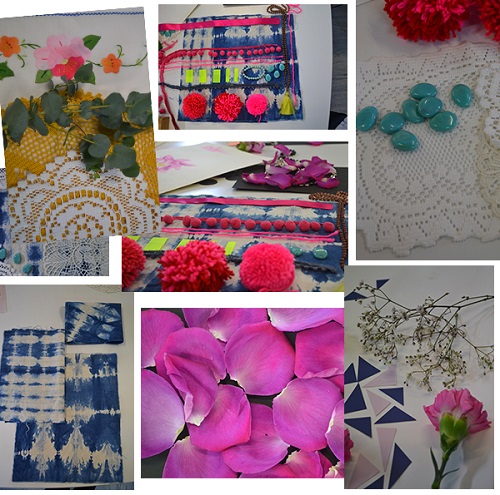
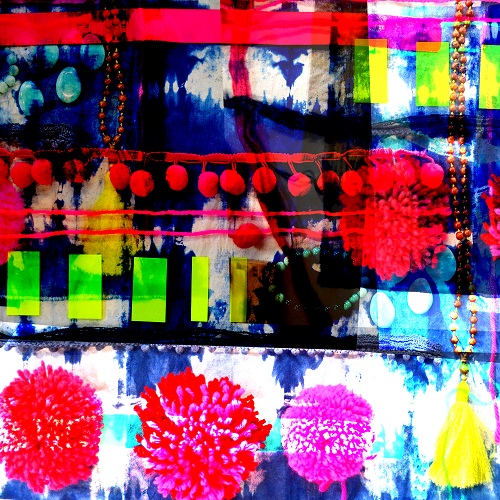
Students were getting back to basics and making flat lays which were to be the base of the scarf designs with flowers, leaves, lace, poms poms and even their own artwork. One student loved using her professional photography skills to capture the design! It’s great to work with your hands before turning it digital as it gives you a wider understanding of the process and how designs can come from anywhere.
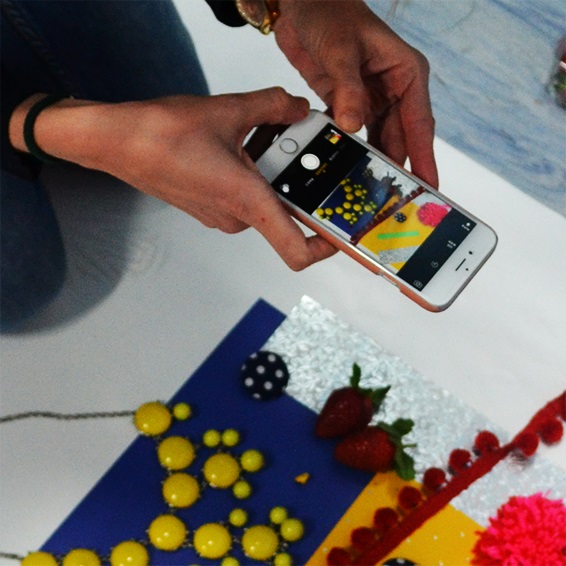
After a much needed break for some delicious sushi, more tea and it was time to take the collage into Photoshop. Few hours were spent learning how to use the manipulation tools, layers, filters and blending tools amongst many other aspects in PS. Liz was constantly offering information , shortcuts and in depth knowledge. As it was a very small class, she always had time to help students one on one which is great and definitely makes a difference.
The feedback that we received is great and are excited about the upcoming workshops and the future of the Digital Fabrics School. If you have been thinking about attending one, DO IT! You will learn some great new skills and make new friends along the way. What’s better than that?
We have lots of ideas and are thinking about lots of potential fun things to learn and make together!
See you soon for learning fun…
Digital Fabrics School!
Save
Save
Our first workshop happened a few weekends ago at the Digital Fabrics School and it was a great day!
There were 4 students ranging in experience and knowledge and it was a fun day learning, sharing and exploring the digital process of designing a scarf from creating a collage to the digital process.
An early start on a winter’s day meant plenty of snacks and cups of tea for fuel while learning about Textile design from our expert teacher Liz Godkin. Liz has extensive industry experience including working at a fashion house in New York and freelance design across Australia and she shared tricks of the trade and useful tips for designing textile products for both personal and commercial projects.
Students were getting back to basics and making flat lays which were to be the base of the scarf designs with flowers, leaves, lace, poms poms and even their own artwork. One student loved using her professional photography skills to capture the design! It’s great to work with your hands before turning it digital as it gives you a wider understanding of the process and how designs can come from anywhere.
After a much needed break for some delicious sushi, more tea and it was time to take the collage into Photoshop. Few hours were spent learning how to use the manipulation tools, layers, filters and blending tools amongst many other aspects in PS. Liz was constantly offering information , shortcuts and in depth knowledge. As it was a very small class, she always had time to help students one on one which is great and definitely makes a difference.
The feedback that we received is great and are excited about the upcoming workshops and the future of the Digital Fabrics School. If you have been thinking about attending one, DO IT! You will learn some great new skills and make new friends along the way. What’s better than that?
We have lots of ideas and are thinking about lots of potential fun things to learn and make together!
See you soon for learning fun…
Digital Fabrics School!
Save
Save
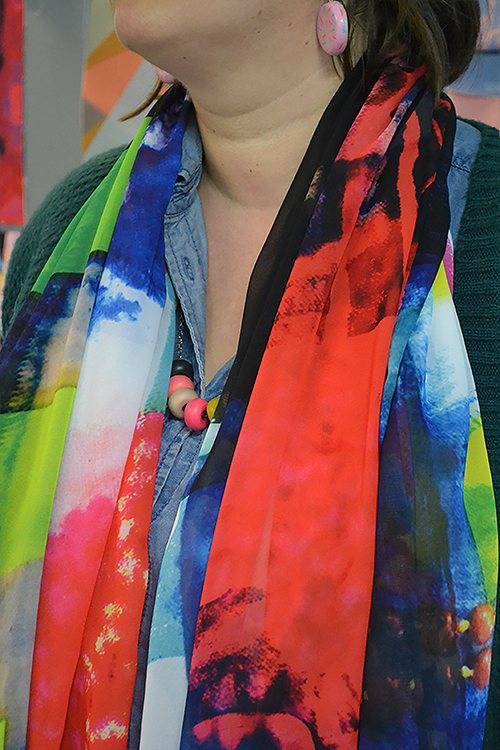
Digital Fabrics School is kicking off with DESIGN YOUR OWN SCARF WORKSHOP on July the 16th. Come and join us for fun creative day.
Full day workshop style class will provide you with knowledge of digital textile design for placement printing. You will be photographing floral inspired collage/layout and transferring your photography to a scarf! After the workshop you will receive finished large chiffon scarf printed with your created design!
On the day you will be creating and photographing collages to further manipulate them in Photoshop. This procces is fun creative and there is no wrong or write! This woark shop alose will give you the knowlage to come up with your own designs later and set them up for printing as required by fabric printing industrie. You will learn to understand scale, image size and the template, how print design can be developed, manipulate photographic digital images in different ways, design your own placement prints and change colours!
Interested? Book Design Your Own Scarf workshop now and get your early bird 10% discount. Hurry, spaces in our workshops are limited. Use EARLYBIRD promo code on checkout. Don’t wait too long this offer is limited!
[te_template name=”classes_buy_button.html” product_id=”544″]

Save
Save
Save
Save
Save
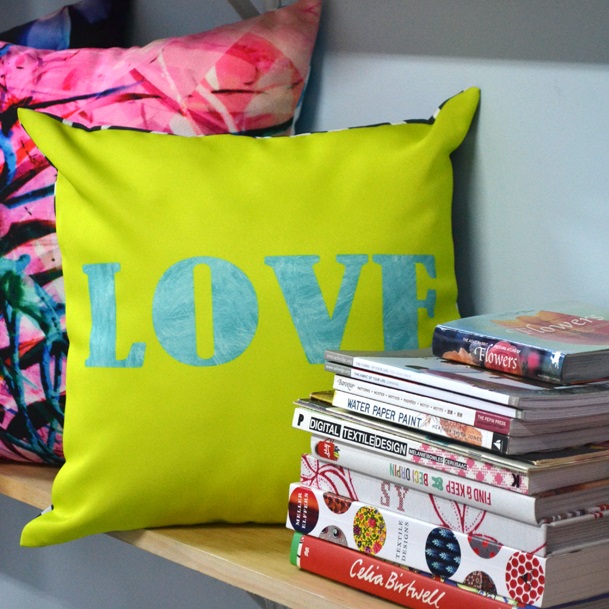
We have been working on developing a new easy system to design and print custom cushions.
Now you can Design, Create, Print beautiful cushions for your home, business or event.
With our DIY online cushion cover uploader option, its super easy! With a few clicks you can upload the design, preview the results and get your order under way. This is the quickest and most cost-effective way to turn your digital designs into a cushion!
With our online CUSHION COVER UPLOADER you can: 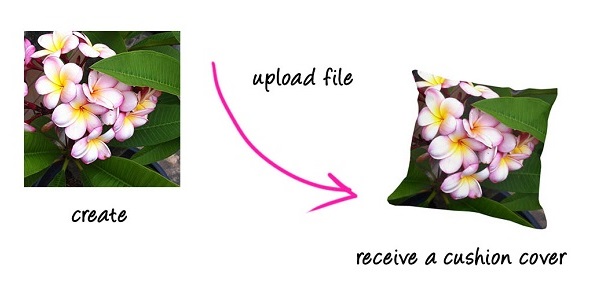
- Upload your design, front and back
- Choose a plain colour suitable for your design
- Preview your design
- Check your file size and quality
- See how your design will look on a product
- Order and pay in an instant of course
and with all of that NO SET UP or EXTRA COST!
Save
Save