We’re very pleased to announce that we can finally share the new prints that we’ve been working on. Introducing our latest designs: Hand Dyed and Green Lily! For these new prints we’ve drawn inspiration from the ‘wearable art’ trend! Whilst the term can be used broadly, when it comes to print design think heavily textured dry brush strokes, pools of inky watercolours, emotive gestures of line and colour and scratchy pencil illustrations.
 Image source
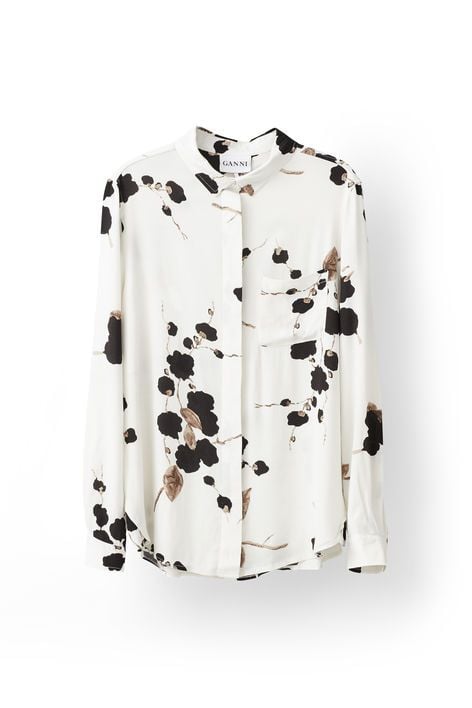
Image source
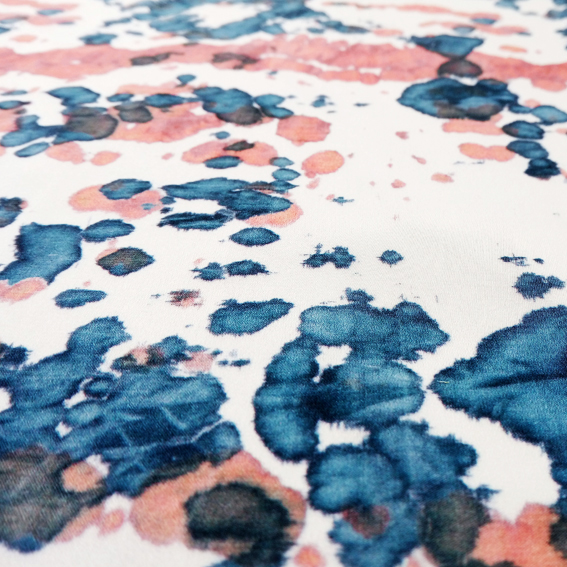
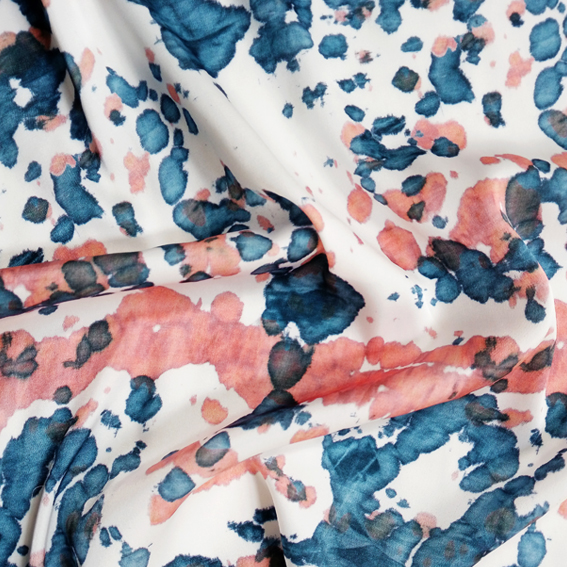
To create our first print we experimented with tie-dying techniques to create a watercolour effect. To steer away from the ultra-colourful, psychedelic designs that tie-dye is often associated with, we wanted to create a print that felt more abstract.
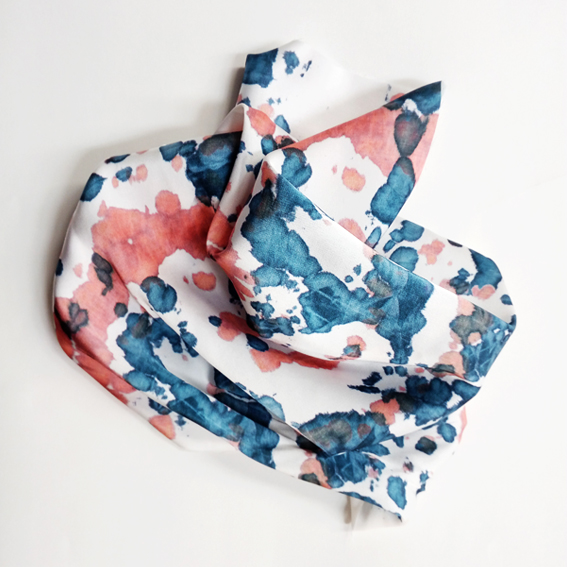
The final design chosen was one with sporadic ink blots, plenty of negative space and a softer colour palette of denim blues and muted corals. The design’s organic feel and chosen colours gives the print a contemporary feel that we think would work beautifully for both fashion and interiors.
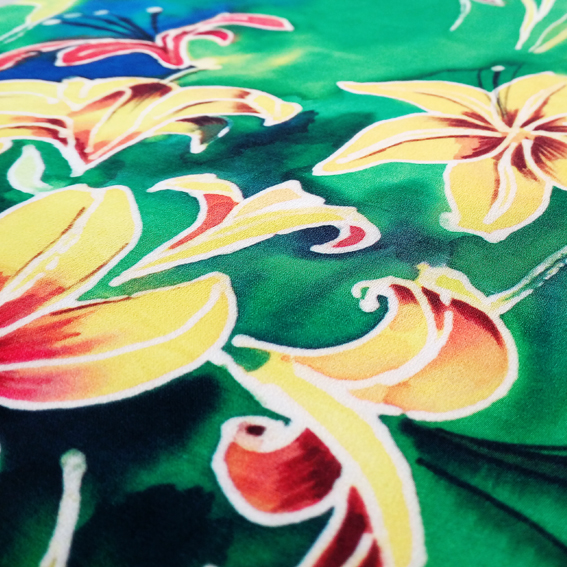
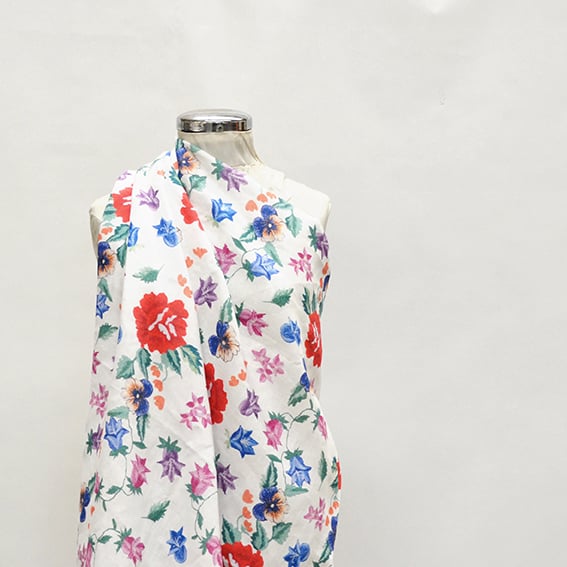
With the success of using tie-dyed fabric as a way of creating a repeat pattern we then tried painting directly onto silk using batik techniques. For this print we wanted to create floral motifs that felt looser in their form than those used in our other floral designs.
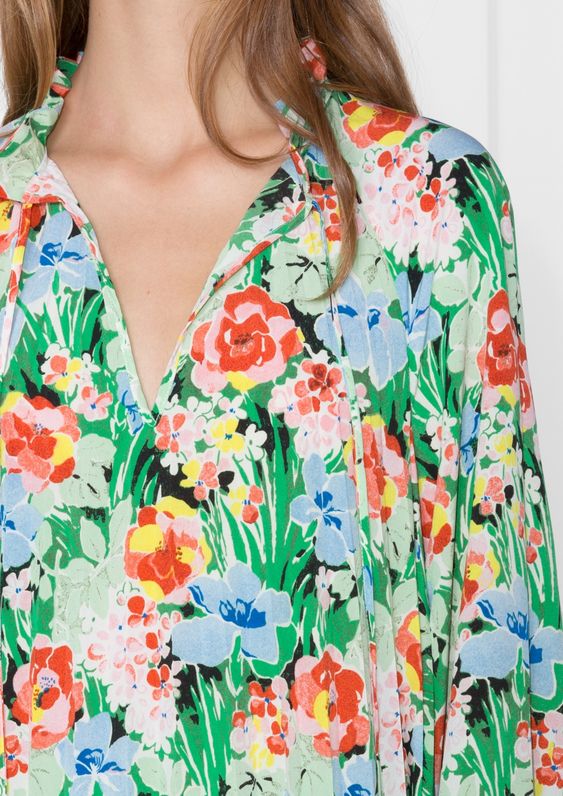
Image source
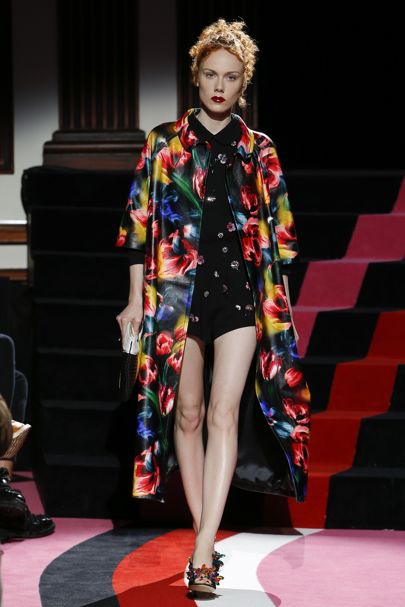 Image source
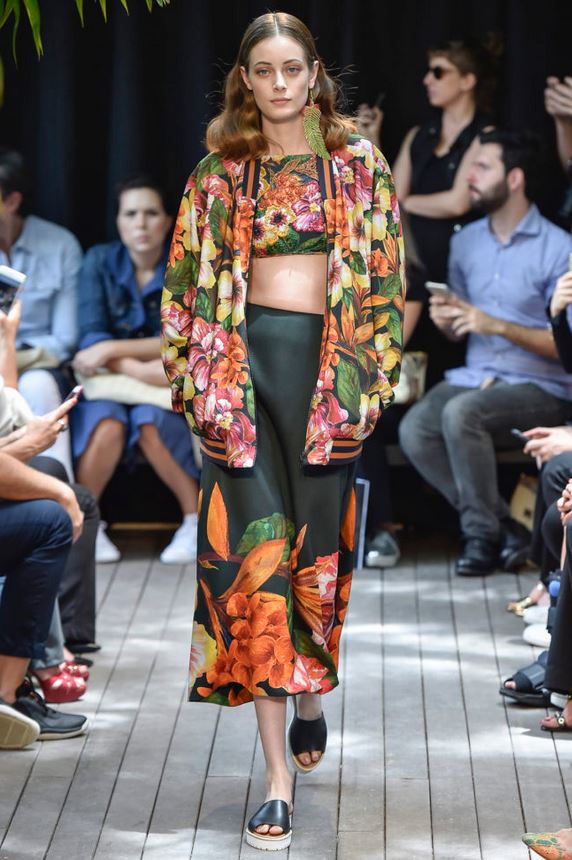 Image source
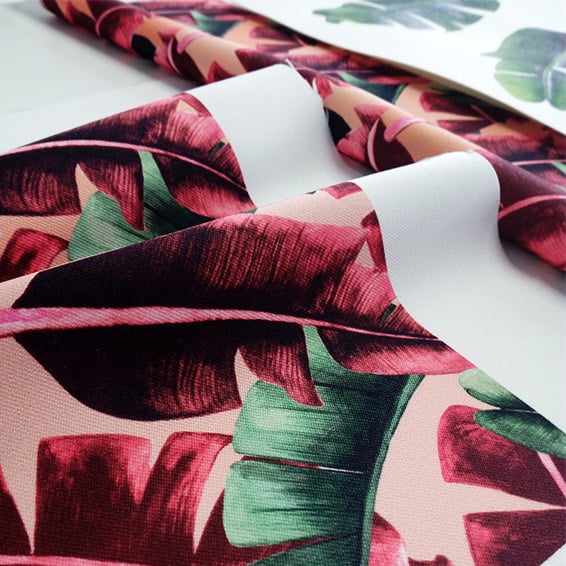
The dyes allowed not only for the creation of flowing motifs, but also an inky, spontaneous feeling background. The final design has a free-flowing, tropical quality, and is desperate to be made into gorgeous wardrobe staples such as dresses, trousers and head scarves.
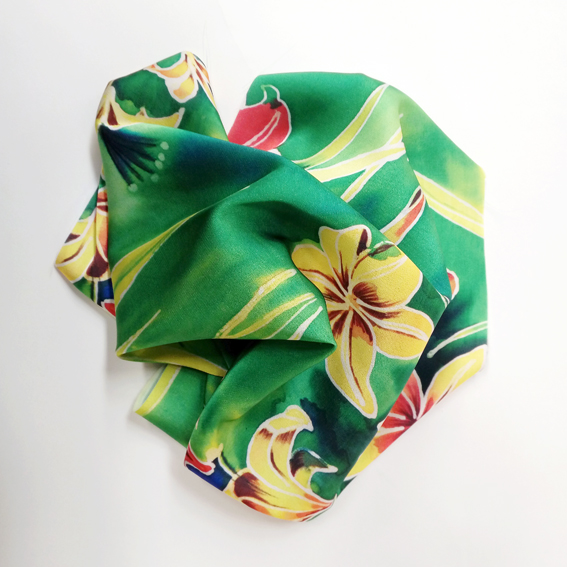
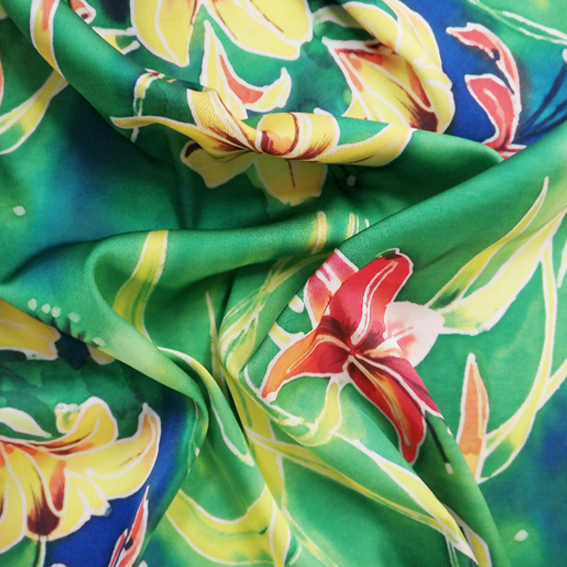 Both designs were resolved as repeat patterns by scanning the original dyed fabric, and then manipulating the artwork digitally. These photographs show the repeats designs digitally printed onto our silk-like fabric Dilly, which beautifully maintains the hand-painted quality of the original artworks.
Whether you like prints that are crisp and minimal, or big, bold and colourful, the wearable art trend is certainly one to try! These prints are now available for purchase in our Design Library.
We’re very pleased to announce that we can finally share the new prints that we’ve been working on. Introducing our latest designs: Hand Dyed and Green Lily! For these new prints we’ve drawn inspiration from the ‘wearable art’ trend! Whilst the term can be used broadly, when it comes to print design think heavily textured dry brush strokes, pools of inky watercolours, emotive gestures of line and colour and scratchy pencil illustrations.
Image source
Image source
To create our first print we experimented with tie-dying techniques to create a watercolour effect. To steer away from the ultra-colourful, psychedelic designs that tie-dye is often associated with, we wanted to create a print that felt more abstract.
The final design chosen was one with sporadic ink blots, plenty of negative space and a softer colour palette of denim blues and muted corals. The design’s organic feel and chosen colours gives the print a contemporary feel that we think would work beautifully for both fashion and interiors.
With the success of using tie-dyed fabric as a way of creating a repeat pattern we then tried painting directly onto silk using batik techniques. For this print we wanted to create floral motifs that felt looser in their form than those used in our other floral designs.
Image source
Image source
Image source
The dyes allowed not only for the creation of flowing motifs, but also an inky, spontaneous feeling background. The final design has a free-flowing, tropical quality, and is desperate to be made into gorgeous wardrobe staples such as dresses, trousers and head scarves.
Both designs were resolved as repeat patterns by scanning the original dyed fabric, and then manipulating the artwork digitally. These photographs show the repeats designs digitally printed onto our silk-like fabric Dilly, which beautifully maintains the hand-painted quality of the original artworks.
Whether you like prints that are crisp and minimal, or big, bold and colourful, the wearable art trend is certainly one to try! These prints are now available for purchase in our Design Library.
Have you been dreaming up projects or designs that would be just perfect for a super soft linen? Now you can bring those ideas to life as we have a very exciting new fabric to introduce to our Natural Fabrics selection – the new Linen Deluxe!
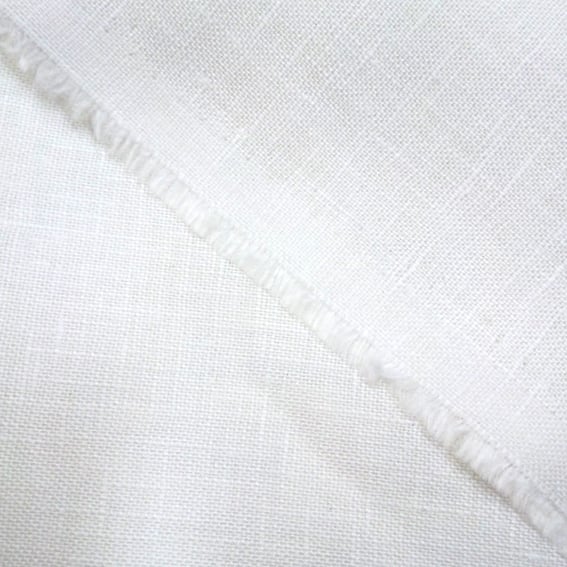
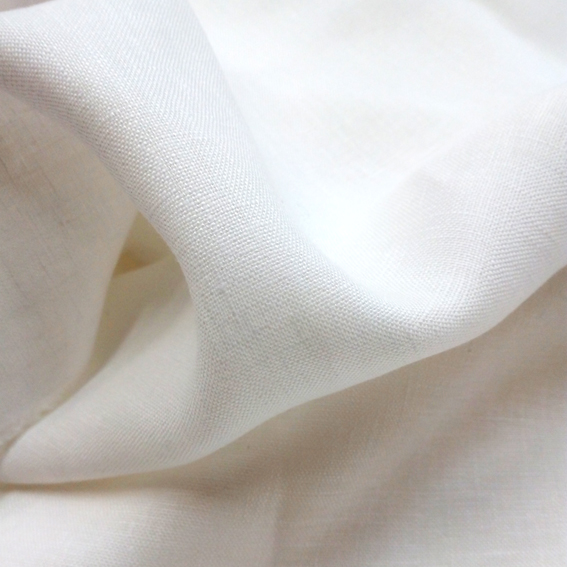
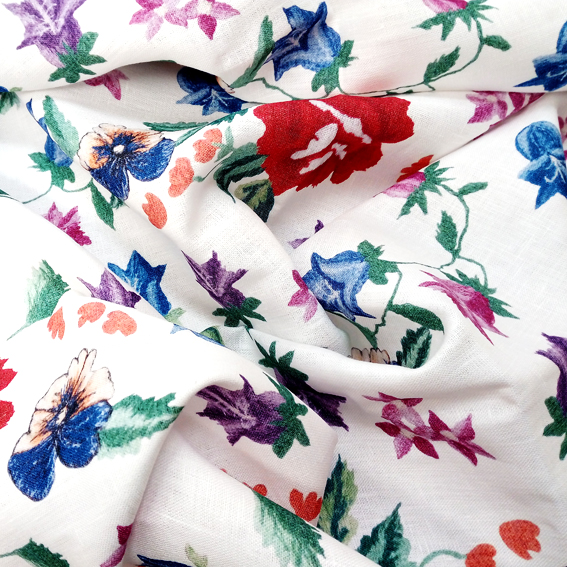
Not to be confused with our very popular Cotton Linen fabric, the Linen Deluxe is a mid-weight 220GSM fabric that is 100% linen. It has a bright white base making it perfect for optimum colour reproduction when printing. We just can’t get enough of how our test print designs look on the fabric’s surface.
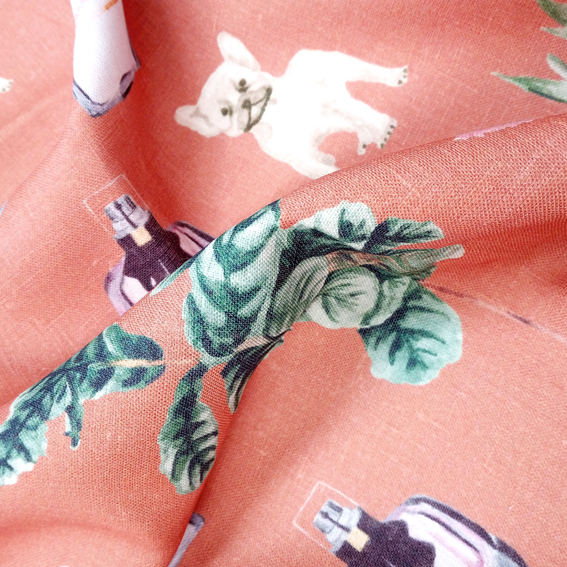
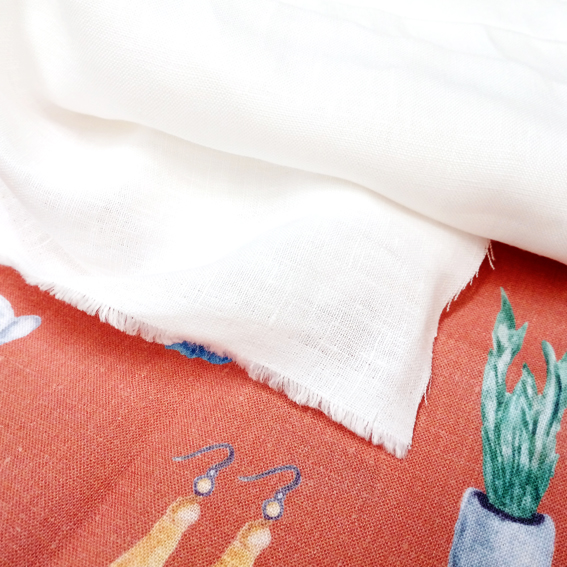
The texture and drape of the Linen Deluxe perfectly embodies simplicity and elegance, whilst its softness makes it ideal for both furnishings and apparel. We think it would be ideal for shirts, blouses, pants, cushion covers, curtains, tablecloths and napkins.
Sample swatches of the Linen Deluxe are available now using our Sample Pack Order Form. We can’t wait to see what you print on this gorgeous addition to the Digital Fabrics family.
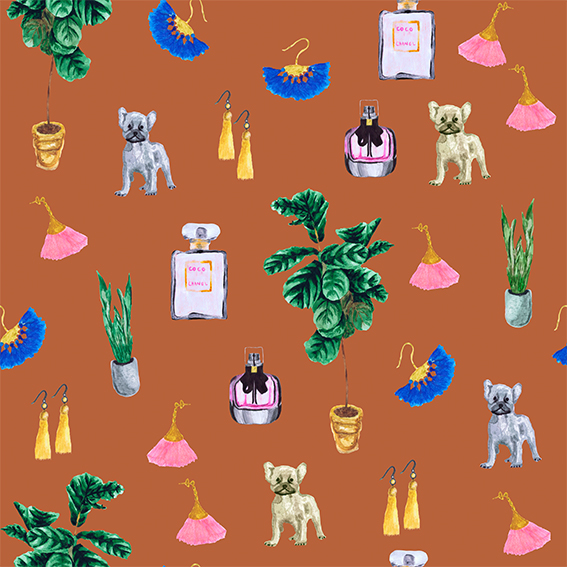
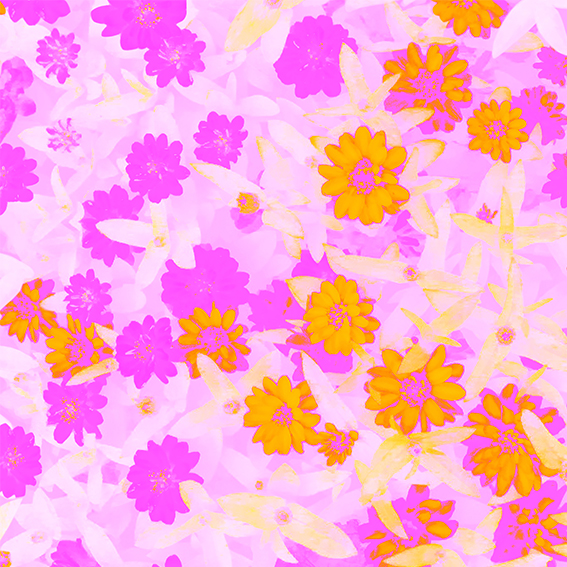
We’re launching a new range of prints at Digital Fabrics! It’s been a little while since we brought you our last set of designs and this time we took a different approach to bringing you new prints. Rather than focus on one cohesive collection, we’ve had three artists create three different prints for you just in time for Mother’s Day!
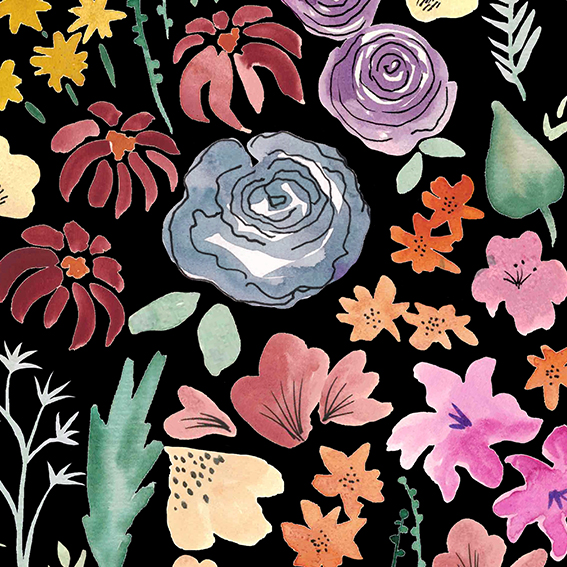
The collection of prints range from flirty to psychedelic to sophisticated, and feature both hand-painted illustration and digital manipulation. With three very different styles represented, we’re sure there’s something for everyone.
 If you’re needing fresh ideas on what to spoil mum with this Mother’s Day, we’ve got you covered and have put together a few DIY ideas that we just know you’ll both love. A custom made gift speaks volumes, and is guaranteed to be a winner with mum this year!
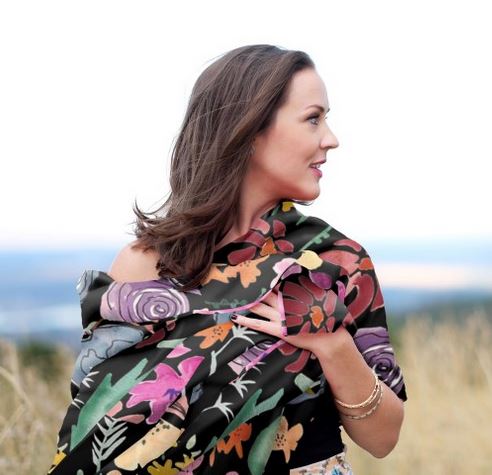
 Got accessories in mind for a mum who always looks fabulous? How about making a gorgeous and versatile scarf? For something bold or bright you might want to use either our Roxy or Dilly fabrics. If you were thinking of something a little more sheer we would recommend our super soft Chiffon.
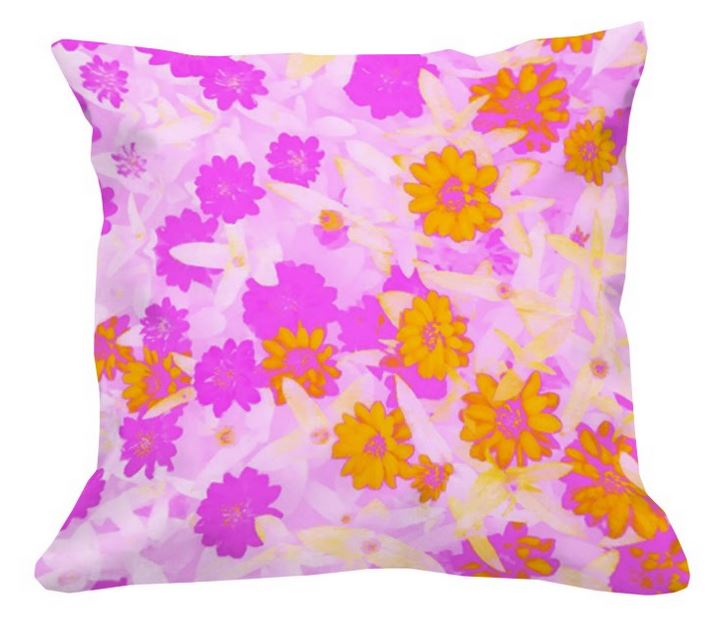
 If you think home-wares might be better suited, how about a tablecloth? Our Cotton Linen is an absolute dream for a decadent feeling table setting and our Waratah and Panama fabrics are excellent polyester options for durability. You could also make napkins to match! And we can’t forget the ever perfect gift of a stunning, custom-made cushion! It could be the perfect opportunity to try out our new Organic Cotton Canvas that we’re very excited to introduce! Of course our Cotton Linen, Waratah and Panama fabrics are also perfect for cushion covers too.
 So whatever your, or your mum’s style, there’ something here to get you started on any handmade Mother’s Day gifts you might have been thinking about. Let us know how we can help you realise your next DIY textile project!
These prints are now available for purchase in our Design Library!
Exciting news from us at Digital Fabrics, we have launched a new textile collection! This time we dove head first into a private collection of vintage European textiles and found just the inspiration we needed! The Boho-Chic trend is one that pops up time and time again, and it’s for good reason. We just can’t get enough of bohemian patchwork, colours and textures, and have designed a range of prints heavily inspired by collected embroidery treasures.
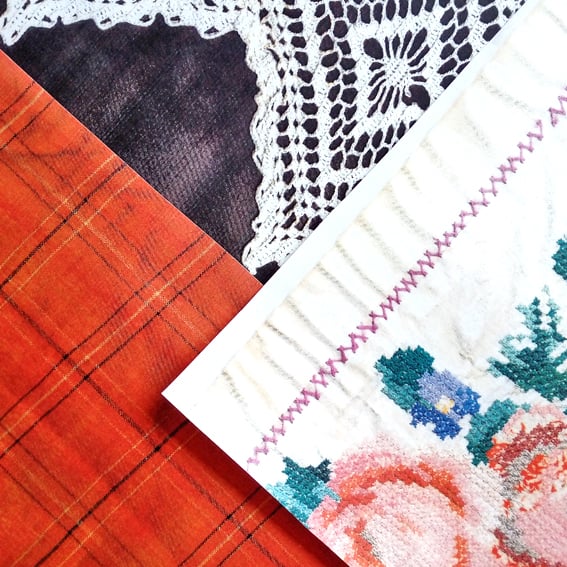
Whilst the boho design aesthetic is undoubtedly fabulous, the statement style can be a little overwhelming for some. We wanted to create timeless re-imaginings that pared-back the heavily embellished designs typical of bohemian textiles, resulting in versatile and accessible designs.
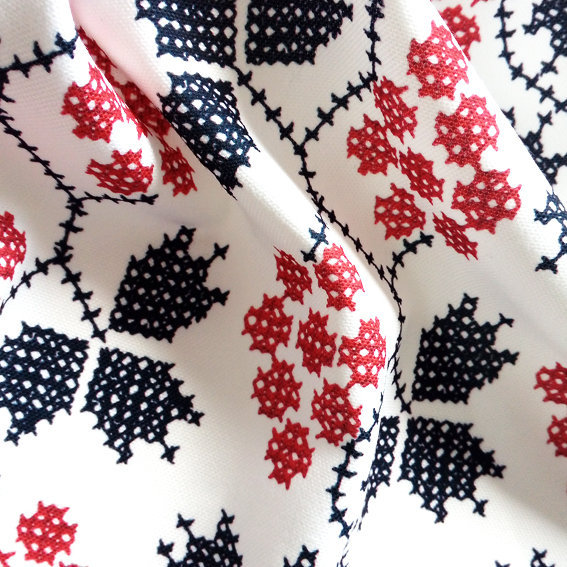
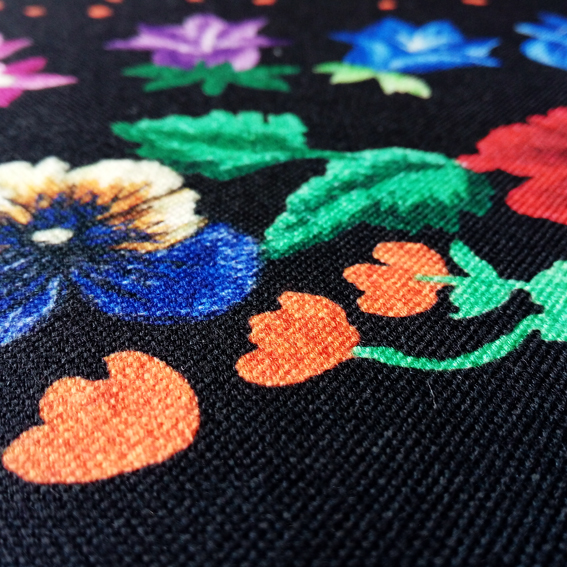
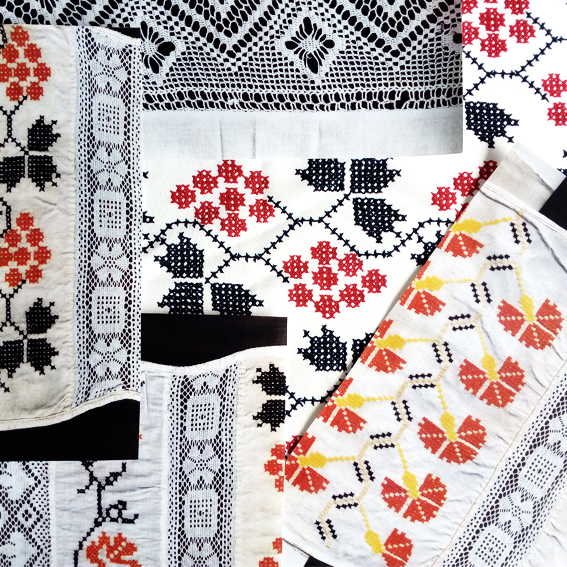
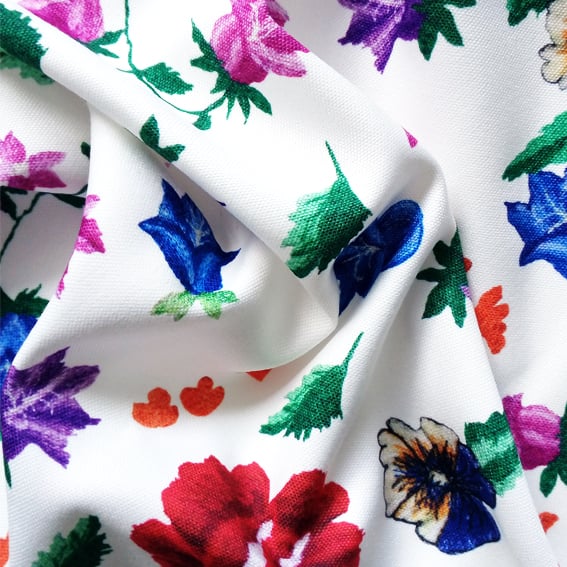 Elements of vintage textiles were scanned, redrawn and redesigned to create the Babushka collection. Finding the balance between streamlined design and textured details was key in maintaining the essence of folk embroidered pieces whilst still giving them a more contemporary feel, and negative space became as important a feature to focus on as the motifs and designs themselves.
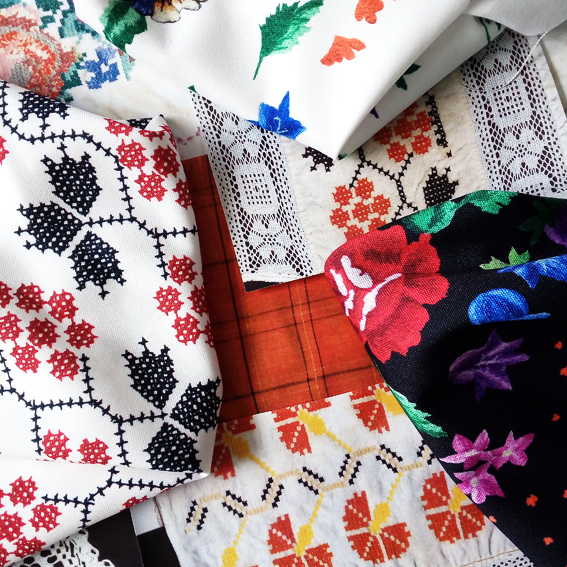
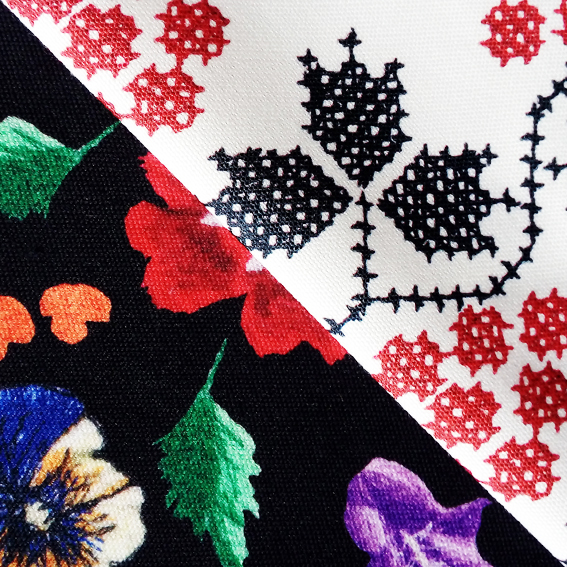 The collection features both flirty, feminine motifs and minimal, geometric design elements, whilst using bold contrasting colours to maintain a crisp aesthetic throughout the range. The range revamps vintage embroidered textiles, resulting in elegant, graphic designs that can be used for so much more than the blouses and table-wear that we so often associate with the bohemian style. We cannot wait to see what you create with these prints!
The Babushka Collection is available for purchase in our Design Library!
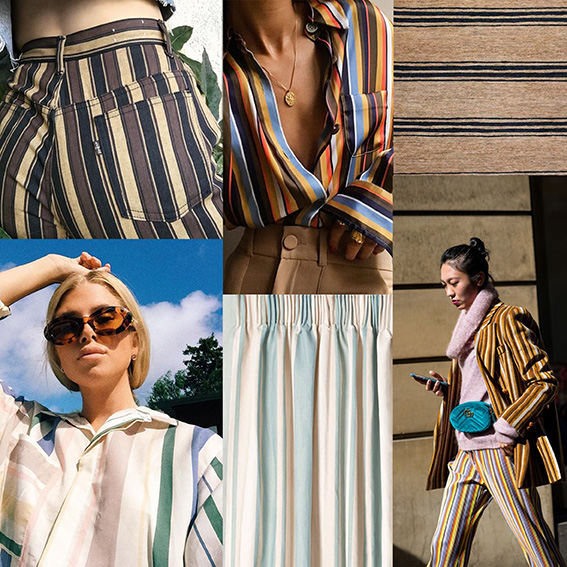
Stripes are an absolutely timeless design staple! But with them always being in style it’s easy to sometimes forget just how fabulous and versatile they are. Here at Digital Fabrics we wanted to shine the spotlight on stripes again, and have created a gorgeous range of prints that re-imagines classic stripe designs – introducing our Stripped Back Collection.
 Our most recently designed textile collections drew focus to luscious textures and the organic nature of hand drawn motifs. What better way to keep things interesting than to launch a series of designs that celebrates crisp lines, formal shapes and a timeless aesthetic. It was crucial to adopt interesting considerations of both colour and form since we were working in the continuous design space of ‘stripes’. Not only did the designs need to feel fresh, it was also essential to create a diverse collection to avoid designing prints that were too similar to each other.
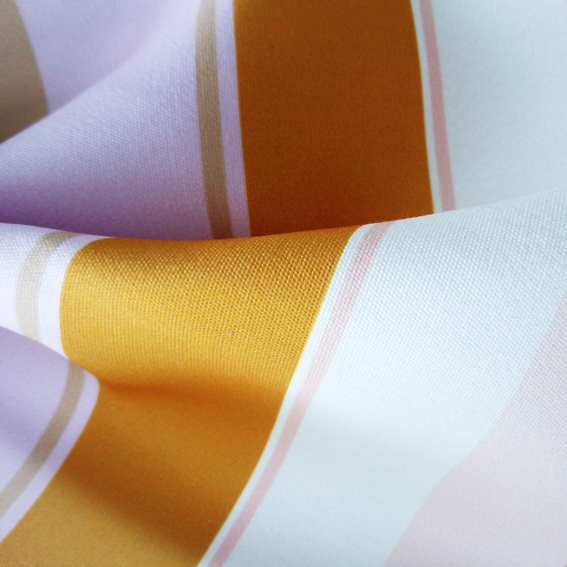
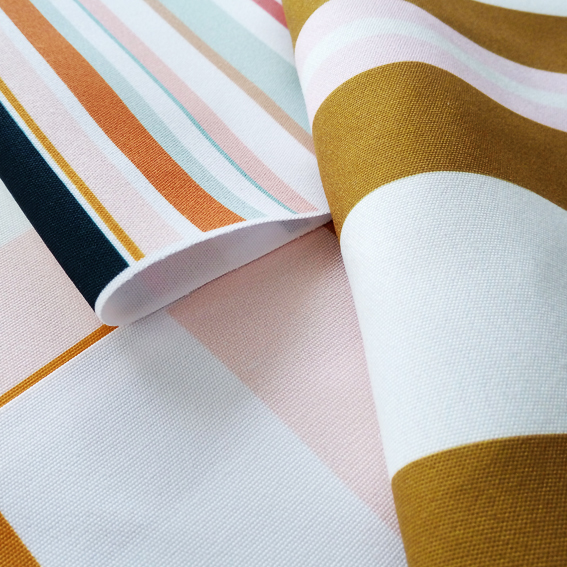
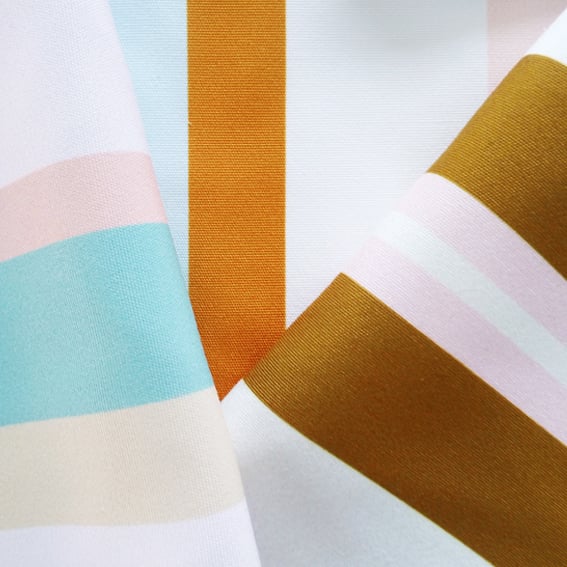
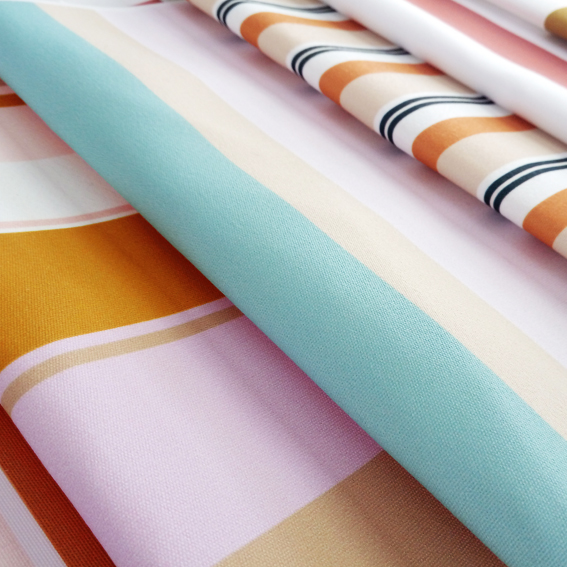
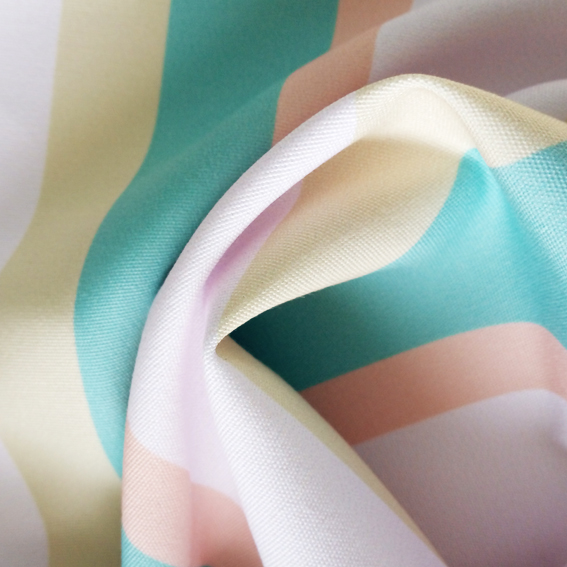 Variation in band width was key in generating a distinct range of textiles. This allowed us to develop wide, colour-blocked styles as well as contemporary revivals of the pinstripe. Colour was also a major element when it came to designing striking stripe prints. The collection re-imagines neutrals, using soft blush pinks in the same way that you would typically use brown and cream colours. The range pairs these neutrals with dreamy sorbet inspired hues, bold mustards and deep navy accents.
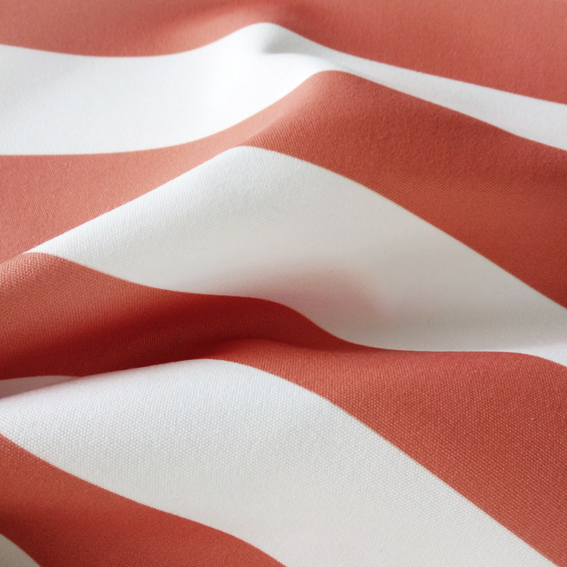
 The collection features prints which are both minimal and edgy, with some designs undeniably inspired by the rich history of stripe patterns in print design. These designs would be fabulous in both the home and the wardrobe, and we can’t wait to see what you do with them!
The Stripped Back Collection is available for purchase in our Design Library!
We are right in the middle of a gorgeous Sydney Summer, and for most of us have gone back to work after a (hopefully) relaxing festive break. What better way to feel like we’re still on holidays than with the launch of a new range of summery prints- our Tropicana range. Time to take a very grown up trip to the tropics!
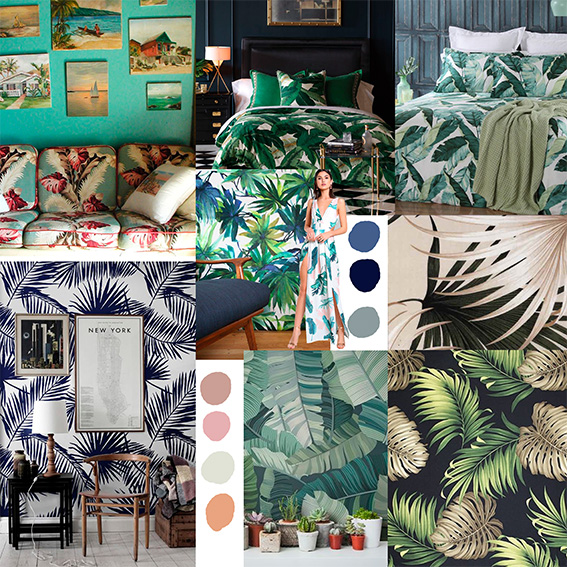
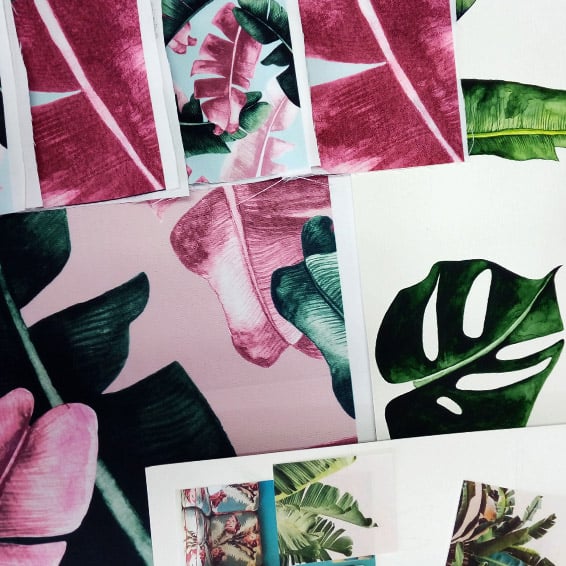
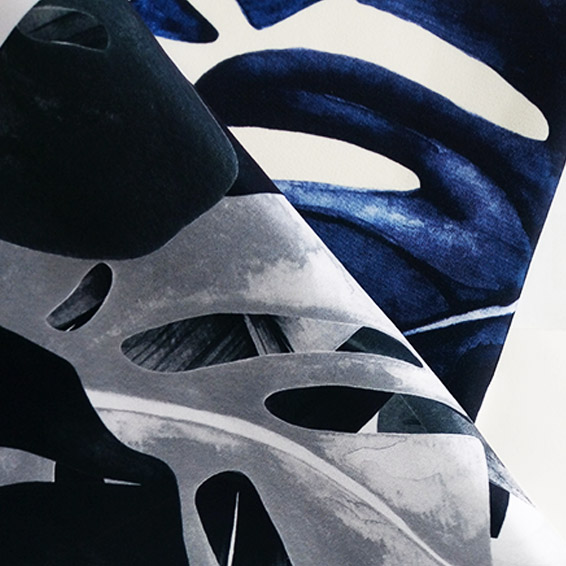
All of the designs began by taking inspiration from tropical flora and carefully hand painting a series of detailed Banana Palms and Monstera leaves. At Digital Fabrics we love all things textural, and by using one of our favourite mediums, watercolours, we were able to create really luscious leaf motifs to start creating textile designs from.
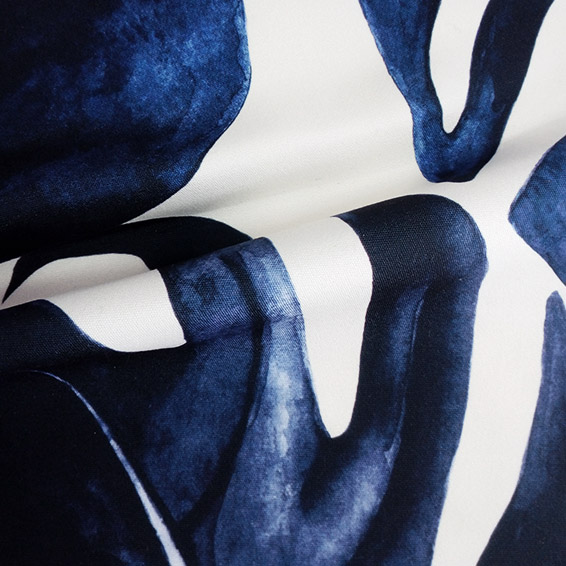
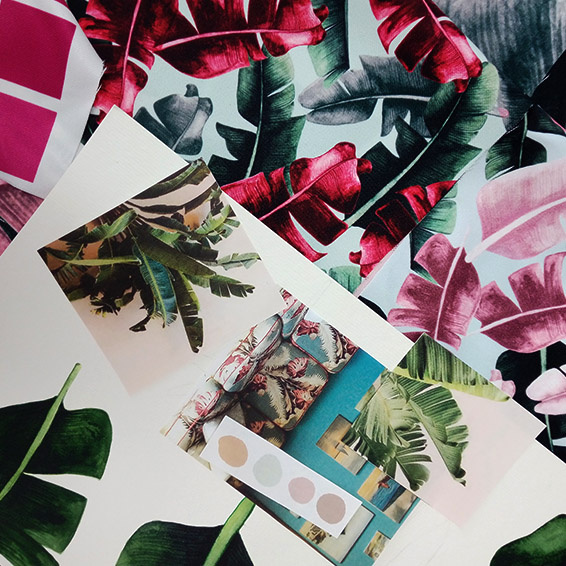
We wanted to rework classic tropical designs to create elegant and accessible prints. To achieve this we determined each design as a large scale print to celebrate the gorgeous watercolour aesthetic. We then primarily used a colour palette of contrasting neutrals with muted colours such as blush pink and sage to ensure the designs as timeless.
We see these designs being suitable for both interiors and fashion and just looking at these new prints has us dreaming about fabulous statement curtains or retro swimsuit designs. We’d love to hear about the kind of project you envision these designs for!
The Tropicana Collection is available for purchase in our Design Library!
We have a New Jersey fabric in stock replacing the old base. This is an exciting opportunity for those textile and fashion designers who are looking for a t-shirt like fabric to construct a garment, this fabric is suitable for women’s, mens and kids wear.
Jersey is a mid-weight 200 gsm fabric, not too heavy or light, with two way stretch jersey knit. It has nice drape, soft with a nice cotton-like hand.
The Fabric prints beautifully, with great colour representation and superb colour fastness.
Our fabulous New Jersey fabric is perfect for any t-shirt type’s garments and casual wear such as t-shirts, dresses, loose fit tops, singlets, cool weather scarves and baby clothes. This fabric also very well suited for home textiles: blankets, pillow cases or throw cushions.
NOTE: this fabric doesn’t have spandex and has only limited stretch capacity, this fabric will not be suitable for very tight garments such as leggings.
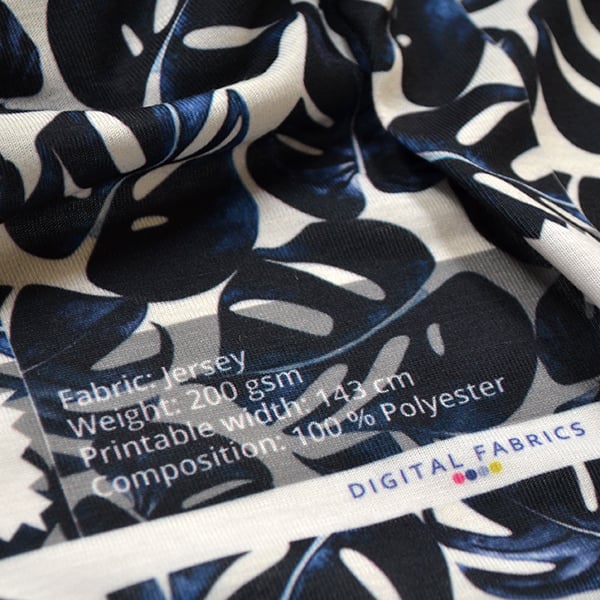
Midnight Jungle design printed on Jersey
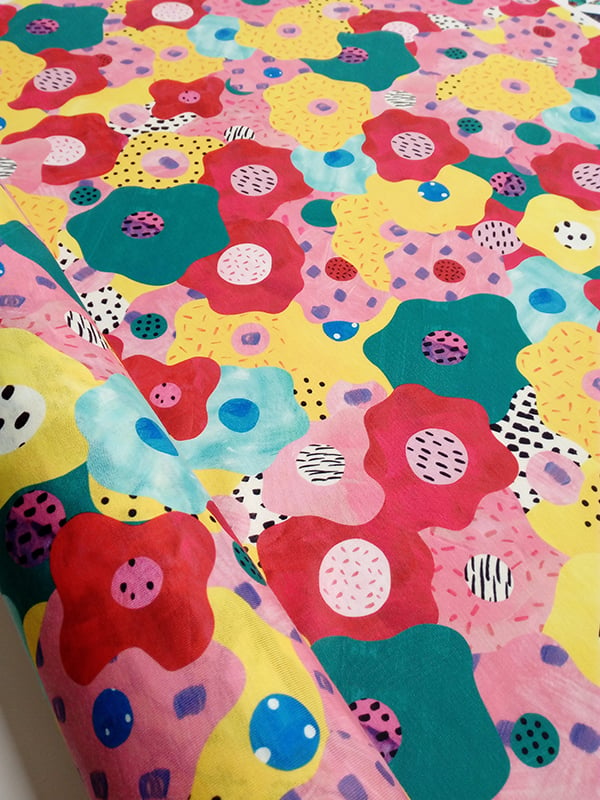
Bright and Happy Florals fabric design by Katy Dee printed on Jersey
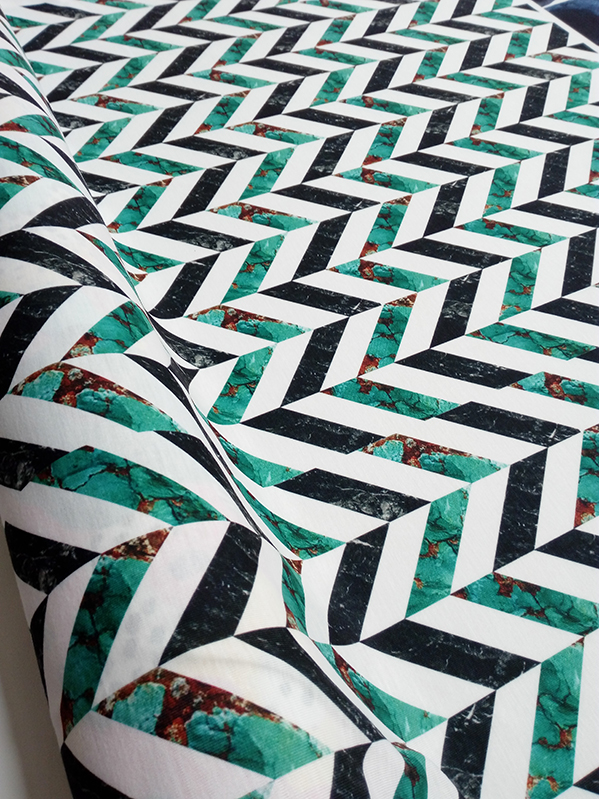
Marble Shevron fabric design printed on Jersey fabric

Wattle design by Crystal Kluger printed on Jersey fabric
We have a New Jersey fabric in stock replacing the old base. This is an exciting opportunity for those textile and fashion designers who are looking for a t-shirt like fabric to construct a garment, this fabric is suitable for women’s, mens and kids wear.
Jersey is a mid-weight 200 gsm fabric, not too heavy or light, with two way stretch jersey knit. It has nice drape, soft with a nice cotton-like hand.
The Fabric prints beautifully, with great colour representation and superb colour fastness.
Our fabulous New Jersey fabric is perfect for any t-shirt type’s garments and casual wear such as t-shirts, dresses, loose fit tops, singlets, cool weather scarves and baby clothes. This fabric also very well suited for home textiles: blankets, pillow cases or throw cushions.
NOTE: this fabric doesn’t have spandex and has only limited stretch capacity, this fabric will not be suitable for very tight garments such as leggings.
Midnight Jungle design printed on Jersey
Bright and Happy Florals fabric design by Katy Dee printed on Jersey
Marble Shevron fabric design printed on Jersey fabric
Wattle design by Crystal Kluger printed on Jersey fabric
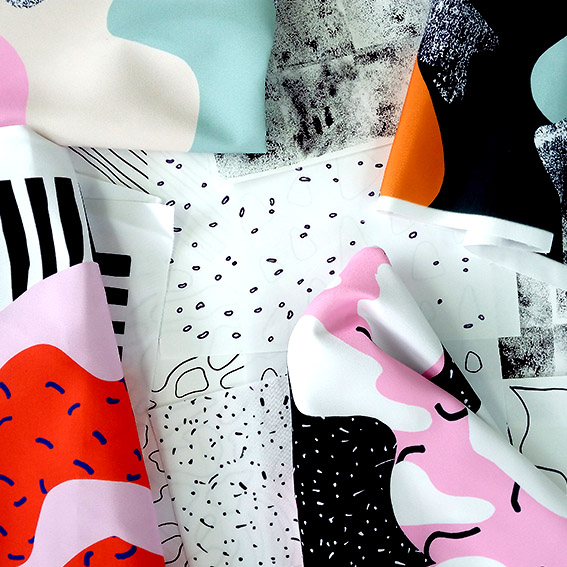
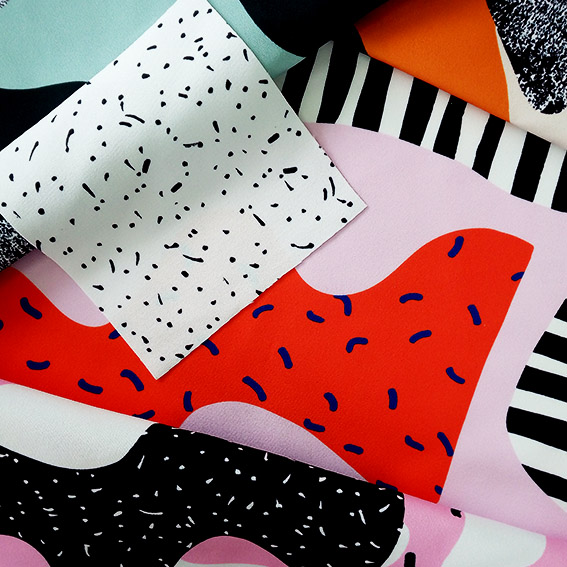
Here at Digital Fabrics we have a very exciting textile collection to launch just before the end of the year, with a really fun range of fabric prints to get you through Summer. The designs are inspired by dynamic and quirky Memphis design surface patterns and uses contrasting colours, shapes and textures to create playful designs that can be used together or on their own.
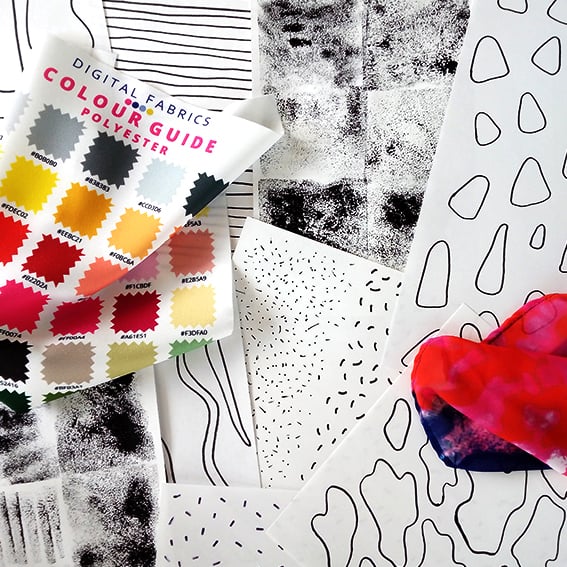
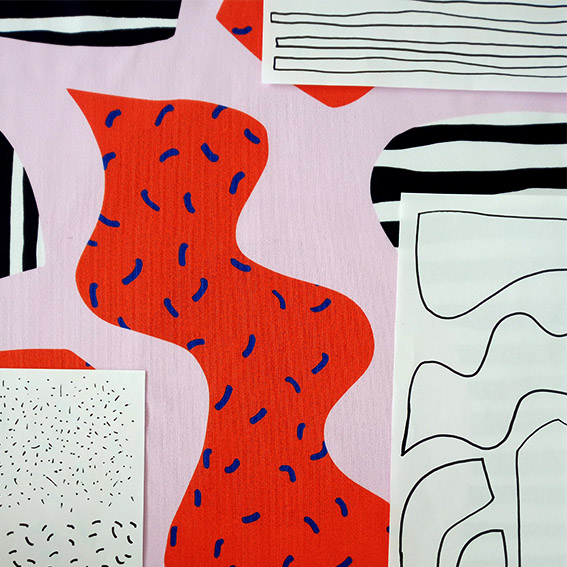
All of the print designs started out on paper! By using different mark making processes with a variety of materials such as markers, paints, pens and sponges, graphic shapes and surfaces began to emerge. These were then dissected and collaged together to create interesting designs with lots of energy.

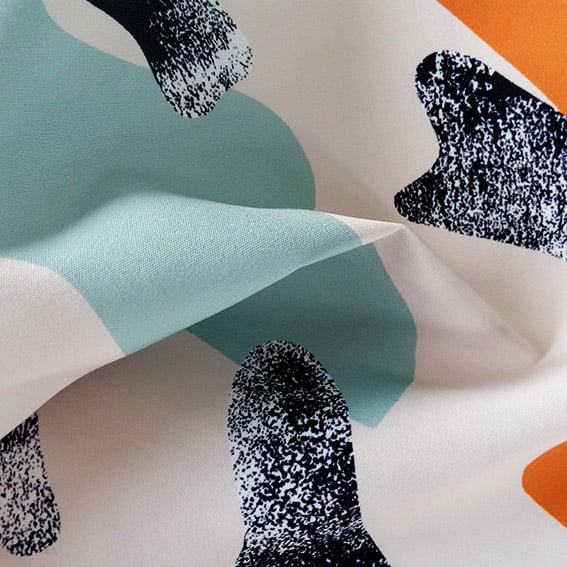
Colour is such a key component of this collection and it was really important to get them right. We combined very on trend pastel shades, with timeless neutrals, and whites to contrast with bold blacks and splashes of electric warm colours.
The Memphis Summer Collection is perfect to get those creative juices flowing over the next few months! Whether it’s making something in time for an event over the festive season or it’s because you’ve finally some free time to work on a DIY project, Digital Fabrics can help out with your fabric printing needs. We see these designs working for both interiors and fashion, with statement cushions and fabulous Summer dresses being the first things that come to mind!
The Memphis Summer Collection is available for purchase in our Design Library!